Pin It

Thursday, November 30, 2023

Christmas Classics, Christmas Card, Stampin' Up!

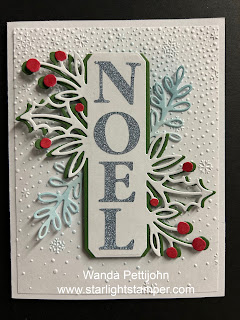
Hello and welcome to my blog. Today I have a sweet and simple Christmas card to share with you. Please read on to see how I made today's card.

The base of my card is a folded half-sheet of Basic White card stock. It opens on the right and the fold is on the left.

I cut a 4" x 5-1/4" piece of Basic White card stock and textured it using the "Snowflake Sky" embossing folder. I took my Blending Brush and Balmy Blue ink and scrubbed on some ink to give the background a bit of color to the texture. Then I glued it to the card base.

Next I die cut a Basic White piece with the rectangle and holly leaves on it from the "Christmas Classics" bundle. I also cut a Garden Green piece too using that same die.

A scrap piece of Basic White was used for the loopy leaves. I had taken my Blending Brush and Balmy Blue ink and scrubbed on some color. I wanted the Balmy Blue color in the card but not as dark as the card stock is. So using the Blending Brush added the blue but softly.

The letters were cut using my Cricut because I did not buy the "Joy of Noel" set. I just couldn't afford it all. I really wanted to make this card and that's why I used my Cricut to cut the letters. I had gotten some blue sparkle vinyl from The Dollar Tree and set it up on my machine. The font I used was GaralonB. You can get almost any font you want from dafont.com.  A fun great place to find fun fonts!! After making them I set then in place on the Basic White strip.  also on that strip I had colored the berries in using my dark Real Red Blends Pen.

I took the Garden Green strip and cut it in half the long way. I glued each half to the back of the Basic White piece, offsetting it a bit so it could be seen on the sides.

To assemble the card I added Dimensionals to the back of the Noel piece. I set it in place. 

I added a little bit of glue to the ends of the loopy leaves piece and tucked them under the Noel piece. And that was it.

This was a fun card to make and I think it probably would have been easier had I bought the "Noel of Joy" set but like I said, I just couldn't afford all the stuff I wanted.

Thank you SO very much for taking your time to stop in and see today's Christmas card,
Wanda

Wednesday, November 29, 2023

Christmas Classics, Sending Cheer, Christmas Card, Stampin' Up!

Hello and welcome to my blog. Today I'm going to share with you a Christmas card I found on Pinterest. I made a few little changes to it. You can see the original card here. Please read on to see how I made today's card.

The base of the card is a folded half-sheet of Basic White card stock. It opens on the right and the fold is on the left.

I cut a 4" x 5-1/4" piece of Real Red card stock for the layer. I die cut the berries from the "Christmas Classics" bundle from the center of this piece.

I had stamped the holly leaves from the "Christmas Classics" bundle but found the other leaves in the "Sending Cheer" bundle matched the original card and I liked them better. So I stamped them using Garden Green ink on a scrap piece of Basic White card stock. I cut them out using matching the die in the bundle. 

Next I cut a piece of Basic White card stock that measured 3-7/8" x 5-1/8". When I cut this on my paper cutter I cut it on the right side of the mark on my cutter. This allowed the piece to be just a hair larger than the numbers stated above. Then just a little bit more of the Real Red could show. I textured this piece using the "Snowflake Sky" embossing folder. I glued it to the Real Red piece.

The Designer Series Paper (DSP) is from the "Joy of Christmas" 12" x 12" package and was cut at 1-1/2" x 4".  I glued it to the bottom of the embossed piece. 

I had some Real Red ribbon (retired) and I tied it around the piece and tied a bow. I then glued this to the front of the card base.

The words are from the "Christmas Classics" bundle. I stamped them on a piece of Basic White card stock using Real Red ink. And I die cut them using the third largest stitched circle in the "Stylish Shapes" set. Dimensionals were added to the back and the piece was set in place on the front of the card. 

Next the holly leaves were glued in place and then the berries. I added two Real Red pearls that I had colored using my dark Real Red Blends pen and the card was done.

I like how it turned out even though I did not have all the materials used in the original card. This is a perfect layout to use up some of those scraps we just can't seem to toss in the recycling bin!

Thank you SO very much for taking your time to stop in and see today's Christmas card,
Wanda
Tuesday, November 28, 2023

Joy of Christmas, Sending Cheer, Christmas Card, Stampin' Up!

Hello and welcome to my blog. Today I have a fun card to share with you. Please read on to see how I made today's card.

The base of my card is a folded half-sheet of Garden Green card stock. After cutting it measured 4-1/4" x 11".  I cut a 4" x 5-1/4" piece of Basic White card stock and taped it to the inside.

I cut the Basic White layer at 4-5/8" x 3-1/2". The Real Red piece was cut at 4-1/8" x 3". And the Designer Series Paper (DSP) was cut at 4" x 2-7/8".

I placed a little bit of tape on the back of the DSP and affixed it to the Real Red piece. You want to put that tape where the circle will be cut out. I used the "Stylish Shapes" dies for this. I used the 3rd and the 4th dies for this step. Using the 4th die first and die cut the DSP and Real Red at the same time. Make sure the piece is lined up as you would when you do the final layering. Once die cut then take the DSP piece and line up the larger circle die around the opening, trying to make it as even as possible all the way around.  I use Post-it tape because I don't want the piece to slip. It's happened before so now I must tape it.

Once die cut I taped the two pieces together. I turned it over and added Dimensionals around the circle. I took a 2-1/2" x 2-1/2" Basic White piece of card stock and affixed it to the area around the circle. More Dimensionals are added around the rest of the back of the piece and a bit of snail tape to the 2-1/2" x 2-1/2" Basic White piece and that was set in place on top of the 4-1/5" x 3-1/2" Basic White piece. Then that piece was taped to the front of the card.

The words are from the "Sending Cheer" set and were stamped using Real Red ink on a scrap piece of Basic White card stock. The were punched out using the "Double Oval" punch. Using the same punch I also punched out a Garden Green scalloped oval. I taped the ovals together. Dimensionals were added to the back and set in place on the front of the card.  

Now you can add your image to the center.  Or if you'd rather stamp an image then you will need to do it before you affix it to the back of the circle.  I had been cleaning up some things in my workroom and I ran across a 4 pack of these cute little gingerbread men. So I thought they'd fit well in the opening and make a cute card. Plus I got to use them up because I made 4 cards! YAY!

This was a fun card to make and I was thrilled that I could use up some stuff sitting around in my workroom.

Thank you SO very much for taking your time to stop in and see today's Christmas card,
Wanda

Monday, November 27, 2023

Joy of Christmas, Christmas Classics, Christmas Card, Stampin' Up!

Hello and welcome to my blog. Today I have a quick Christmas card to share with you. I found it on Pinterest and thought I'd give it a try. Mostly because I had all the stuff to make it and I thought it was pretty. An added bonus is, it's quick and easy to make. You can see the original card here.  Please read on to see how I made it. 

The base of my card is a folded half-sheet of Basic White card stock. It opens on the right and the fold is on the left.

Next I cut a 4" x 5-1/4" piece of Garden Green card stock.  I took the largest stitched circle in the "Stylish Shapes" set and die cut it from the center of the Garden Green layer.

The Designer Series Paper (DSP) is from the "Joy of Christmas" 12" x 12" package. I cut it at 3-7/8" x 5-1/8".  I taped it to the Garden Green layer.  Then that was taped to the card base.

I stamped the "Merry Christmas" from the "Christmas Classics" set using Real Red ink. I die cut it using the second largest stitched circle from the "Stylish Shapes" set. After cutting I took the pine needles image and stamped on the upper part and lower part using Garden Green ink. I stamped once and then without adding more ink I moved the stamp at a different angle and stamped again. Then I taped the two circles together. Dimensionals were added to the back of the circle piece and it was centered on the front of the card. 

For a final touch I colored three small crystal rhinestones using the dark Real Red Blends pen. They were set in place on the front of the card and the card was done.

This was such a super quick and easy card to make. I thought it was a perfect use for that busy DSP.

Thank you SO much for taking your time to stop by and see today's Christmas card,
Wanda

Sunday, November 26, 2023

Throughout the Year, Joy of Christmas, Christmas Card, Stampin' Up!

Hello and welcome to my blog. Today I have a quick and easy card to share with you. And it has one of my favorite things to do, layering!  I love making cards with layers. These are simple so you can whip up a few of these in no time. Please read on to see how I made today's card.

The base of the card is a folded half-sheet of Basic White card sock. I cut a 4" x 5-1/4" piece of Real Red card stock for the layer.  And then a 3-3/4" x 5" piece of Basic White card stock was cut for the top layer. I textured that layer using the "Distressed Tile" embossing folder.  I glued the embossed piece to the Real Red piece and then I taped those to the front of the card.

Next I cut the Designer Series Paper (DSP) from the "Joy of Christmas" 12" x 12" package. You will need to strips and they measure 1-1/2" x 3-3/4". The Real Red layers behind them measure 1-3/4" x 4". I taped the DSP strips to the Real Red strips. I glued the left one in place, lining up the left side and the top so they looked like they were the same distance from the top and side.  The other strip was added using Dimensionals. I lined it up so it was the same distance on the bottom and right side.

The words are from the "Throughout the Year" set and were stamped on a piece of Basic White card stock that measured 1" x 3-3/4". I used Real Red ink and stamped the words in the center of the strip. I trimmed the sides close to the words. Then I cut a 1-1/4" x 4" piece of Real Red card stock and taped the word strip to it. Then I trimmed the sides. Dimensionals were added to the left side and a little bit of glue was added to the right side and the word piece was set in place.  

I used my "Bough" punch and punched out a Garden Green sprig. I added a little glue to the bottom of the stem and slipped it under the word piece and the card was done.

Even with all of those layers it went quickly. This is a perfect card to use up your scraps.

Thank you SO much for taking your time to stop in and see today's Christmas card,
Wanda

Saturday, November 25, 2023

Classical Christmas, Sending Cheer, Christmas Card, Stampin' Up!

Hello and welcome to my blog. Today I have a Christmas card I found on Pinterest to share with you. The original inspired me to find what I had that was current and create a card. You can see the original card here.  Please read on to see how I made today's card. 

The base of the card is a folded half-sheet of Basic White card stock. It opens on the right and the fold is on the left.

I cut a 4" x 5-1/4" piece of Basic White for the bottom layer. Then a 3-3/4" x 5" piece of Designer Series Paper (DSP) from the "Joy of Christmas" 12" x 12" package was cut. I taped this to the Basic White piece and then I taped that to the card base.

Next I cut the raised Basic White layer. It measures 2-3/4" x 4".  You are going to want to cut two of these. I textured one using the "Distressed Tile" embossing folder. I glued that to the second piece. After texturing it, it was just too flimsy. I wanted my piece to lay flat so this was the best way to achieve that.

A stitched rectangle was die cut using the second largest "Nested Essentials" rectangle die on a scrap piece of Basic White card stock. I stamped the words from the "Sending Cheer" set using Poppy Parade ink. I glued this piece to the center of the textured rectangle. It will be more narrow on the sides than it is on the top and bottom. 

The holly leaves are from the "Christmas Classics" bundle and were cut from a piece of Basic White card stock. You need two of these.  Save the veins in the middle. Those I colored using my dark Shaded Spruce Blends pen. 

Then I stamped the holly leaves image using black Memento ink. I colored them in with both light and dark Blends pens. I die cut it out using the matching die. I also die cut the berries using the die from the same bundle on a scrap piece of Poppy Parade card stock. 

I snipped the stems on the Basic White holly leaves and the stamped holly leaves. I used a small amount of glue and affixed the Basic White holly leaves first. Then the colored Shaded Spruce veins. And then the stamped holly leaves.  The berries were added with a little glue too. 

Dimensionals were added to the back of the rectangle piece and it was set in place on the center of the card.

I tied a (retired) ribbon bow and glued it in place on the upper left corner. And the card was done. 

I'm pleased with the way the card turned out. It's got the same layout as the original card but all of the elements are different and it worked!

Thank you SO very much for taking your time to stop in and see today's Christmas card,
Wanda

Friday, November 24, 2023

Christmas Classics, Heartfelt Hexagon, Joy of Christmas, Christmas Card, Stampin' Up!

Hello and welcome to my blog. Today I found a sweet card on Pinterest that I thought I'd see if I could make. You can see the original card here. I did click on the link but I only got some basic info on the card but no measurements. Please read on to see how I made today's card.

The base of the card is a folded half-sheet of Basic White card stock. After cutting the piece measured 4-1/4" x 11" and is folded at 5-1/2".  It opens on the bottom and the fold is on the top.

I cut a 3-3/4" x 5-1/8" piece of Shaded Spruce card stock.

Then I cut a 3-5/8" x 5" piece of Real Red card stock. On top of that the Designer Series Paper (DSP) from the "Joy of Christmas" 12" x 12" package will be attached. I cut a 1-1/2" x 3-1/2" piece of the Shaded Spruce checked DSP and taped it to the bottom of the Real Red piece, leaving a tiny border around the sides and bottom. 

Next I cut the holly DSP from the same package. It measures 1-1/8" x 3-1/4".  You will need three of these. I taped them to the Real Red piece. I tape the two outside pieces and then the center piece. Leave a thin border around the pieces. 

A Real Red ribbon (retired) was wrapped around the piece and the ends were taped to the back. I tied a bow and set it aside until the words were done.

I stamped the border for the words using the image from the "Heartfelt Hexagon" set. Shaded Spruce ink was used for that. The words are from the "Christmas Classics" set and were stamped using Real Red ink. I punched out the piece using the matching Hexagon punch.  Dimensionals were added to the back and the piece was set in place on the front of the card.

The bow was glued in place. A tiny red pearl was added to the word piece and the card was done.

This was a quick card to make. And now having the measurements I can make more using other DSP. This is a perfect layout to use up some of those scraps of DSP. You can change the length of the strips to match your scrap. Ya gotta love that!

Thank you SO very much for taking your time to stop in and see today's Christmas card,
Wanda

Thursday, November 23, 2023

Autumn Leaves, Thanksgiving Card, Stampin' Up!

Hello and welcome to my blog. Today is Thanksgiving and I'd like to with you all a wonderful day.  In the midst of getting things ready for the day I took a little time out to whip up a quick card. Last of the fall leaves and pumpkins and onto the Christmas themed ones. Please read on to see how I made today's card.

The base of my card is a folded half-sheet of Basic White card stock. It opens on the bottom and the fold is on the top.

I cut a 4" x 5-1/4" piece of Basic White card stock and textured it using the "Distressed Tile" embossing folder. Dimensionals were added to the back and the piece was set in place on the card base. I found it was a bit flimsy. I'm thinking that maybe next time I'd glue a couple pieces together and then texture it or glue a smooth one to the textured one and then add that to the front. I'm just now liking how it has dips in it. But it's too late to do anything about this card now without ruining it.

Next I stamped the words from the "Autumn Leaves" bundle using Mossy Meadow ink. I die cut them with the die from the same bundle.  

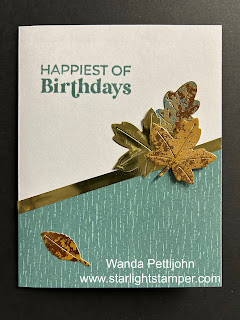
The leaves are from the same bundle and were die cut from the pretty "Oxidized Copper" 12" x 12" package and one gold foil paper leaf. I glued the leaves in place and then added the word piece using Dimensionals.  And the card was done.

This was a quick card to put together and it's got a soft fallish look to it. Now back to cleaning up after the holiday mess!

Thank you SO very much for taking your time to stop in and see today's Thanksgiving card,
Wanda

Wednesday, November 22, 2023

Sparkling Snowflakes, Winter Meadow, Christmas Card, Stampin' Up!

Hello and welcome to my blog. Today I have a chilly wintry Christmas card to share with  you. Please read on to see how I made today's card.

The base of my card is a folded half-sheet of Basic White card sock. After cutting the piece measured 4-1/4" x 11".  I scored it at 5-1/2" and folded it in half.  I like to score my cards to make sure I get a nice straight line.

Starting from the base of the card and going up, the pieces measure as follows: Gray Granite 4-3/4" x 3-5/8". The Designer Series Paper (DSP) from the "Wintry Meadow" 12" x 12" package goes on top of that and measures 4-5/8" x 3-1/2". Misty Moonlight card stock measures 3" x 4-1/8". And the top piece of DSP measures 2-7/8" x 4". You will also need a 2" x 2" piece of Basic White card stock.

Now that your papers are all cut let's put the card together. Tape the DSP to the Gray Granite piece. The DSP is the backside of the piece that is on the top. It's kind of sad to use it instead of the pretty trees but it had to be done! With those two pieces taped together I then taped that to the front of the card base.

I took the two smaller rectangle pieces and with a tiny amount of tape I added it to where the circle will be punched. I uses a 1-1/4" round punch for this. I lined up the DSP on top of the card stock as I would do creating a layer but I didn't want them both stuck together yet.  After getting them lined up I put the piece in the punch as far as it would go.  The top part of the circle is about 1" from the edge of the DSP.  It's not crucial to where the circle is, you just don't want it centered in the middle of the piece. It's centered left and right and it may actually be the same distance on the upper part too, that is just by chance.  Next I took the DSP and punched a 1-3/8" circle from it. I had to use a piece of scrap copier paper behind it or it would tear inside the punch.  You will just be punching out a ring. Line it up to get it as equal around as possible.  Once you punch out the ring you are ready to tape the two pieces together.

The snowflake in the center was made next, I used the "Snowflake Sky" embossing folder. I picked out the largest snowflake I could see on the folder.  Once embossed I inked up a q-tip in Misty Moonlight ink and lightly tapped it on the snowflake. I had used my finger but got ink on the falling snow dots and I didn't like that look so I redid it using the q-tip.  I centered the piece over the circle and set it in place using Dimensionals. 

Dimensionals were added to the back of the rectangle layers and a little glue on the embossed piece and it was set in place on the front of the card.

The words are from the "Sparkling Snowflakes" set and were stamped using Misty Moonlight ink. I punched them out using the "Double Oval" punch.  I set it in place using Dimensionals and the card was done.  

This was a fun card to make and I do like how it turned out.

Thank you SO very much for taking your time to stop in and see today's Christmas card,
Wanda

Tuesday, November 21, 2023

Heartfelt Hexagons, Winter Meadow, Sympathy Card, Stampin' Up!

Hello and welcome to my blog. Today I have a sympathy card to share with you. It's very quick and easy to make. Please read on to see how I made today's card.

The base of the card is a folded half-sheet of Basic White card stock. It opens on the right and the fold is on the left.

I cut a 4" x 5-1/4" piece of Basic Gray for the layer. On top of that is a piece of Designer Series Paper (DSP) cut at 3-7/8" x 5-1/8" and it was taped to the Basic Gray piece. Then that was taped to the front of the card.  

Then I stamped the words.  This was a brave way for me to make this card because if I messed up on the words it was all ruined. I should have stamped the words on the DSP piece first and then put the card together.  

I kept the card simple because I felt that a sympathy card didn't need a lot of bling. Plus this DSP just carries the feel of the words.

This card took less than 10 minutes to make and that included putting the stamp set and ink away when I was done!

Thank you SO very much for taking your time to stop in and see today's card,
Wanda

Monday, November 20, 2023

Sending Cheer, Matchbook Candy Holder, Teacher Gift, Weekend Projects, Stampin' Up!

Hello and welcome to my blog. Today I have a fun stocking stuffer for you to make. You can add these to your Christmas stockings or give them out to your mail carrier, co-workers, friends, etc.  They are easy to make and are fun to give. I believe this layout is called a "Matchbook Holder" Please read on to see how I made today's project.

You can make these for any candy you have. I chose the M & M's because my granddaughters like them. All you need to do to change the holder is to measure.  I will provide measurements for this M & M package. 

My M & M package measures 2-3/4" x 4".  Add 1/8" to 1/4" to the 2-3/4" end to equal 2-7/8" or 3".  Now you take the 4" and multiply it by two, one for the front and one for the back.  I also add a little for the top, I don't like the piece to just bulge. This part will vary depending on how thick your candy is. There now that you know the basics of the piece I will give you the measurement for the M & M project pictured here.

The card stock for this was cut at 9-1/2" x 2-7/8".  I scored it as follows: 3/4", 1-1/2". 5-1/2", 5-3/4". I like to have the front piece thicker, that's why I have two 3/4" scores there. Now go score your piece and come back!

Fold all score lined inward. I stapled the front piece down. I stamped it about 1/8" from the fold. And I stapled it backwards, meaning that the bumps from the staple are on the front. Doing it this way makes the back smooth and the bumps will be covered by your Designer Series Paper (DSP).

Next you will want to decorate the front.  The (DSP) is from the "Joy of Christmas" 12" x 12" package. I cut the top piece at 3-3/4" x 2-7/8" and a 2-1/8" x 2-7/8" piece for the lower part. Score this piece at 3/4" and 7/8" I glued both pieces in place. The bottom piece is larger than needed but that was planned. Glue it from the bottom edge and then roll it over the fold towards the inside. I prefer to use glue because the piece bends a bit and I know glue isn't going to release. Tape will work, it's up to you which you prefer to use.

Once I got the DSP on I stamped the Gingerbread man from the "Sending Cheer" bundle. I used Pecan Pie ink to stamp him. The hearts were stamped using Real Red and the face was stamped using black Memento ink. Then I die cut him using the matching die. I cut off the loop on the top, it's used for making him into an ornament or tag and it's not needed here. Dimensionals were added to the back and it was set in place on the front of the holder. 

The words are from the same set and were stamped using Real Red ink on a scrap piece of Basic White card stock. I used the "Double Oval" punch on them. I added a little glue to the bottom of the oval and attached it to the upper edge of the bottom section. 

I tucked the upper part to the inside and the piece was done, all closed up and ready to give! 

Wasn't it fun? It's pretty quick and easy too. Even easier if you have some DSP that has characters on it that you can just die cut and affix! I just kept mine simple but you can add some bling too. 

Thank you SO very much for taking your time to stop in and see today's Stocking Stuffer/gift,
Wanda


Sunday, November 19, 2023

Sending Cheers, Joy of Christmas, Christmas Card, Stampin' Up!

Hello and welcome to my blog. I did not post a card yesterday. It's been a very long time since I have not posted a card. I make one every day and yesterday I took the day off because I had a long day at my local craft fair. It was busy and the shoppers were out and about. But when I got home I was exhausted so I decided I would take a day off. It's been a couple of years since I've missed a day. I was due. But today I went down to my messy workroom and worked on a card to share with you. I found the card on Pinterest and made a few changes to it due to supplies. You can see the original card here. Please read on to see how I made today's card.

The base of the card is folded half-sheet of Basic White card stock. It opens on the right and the fold is on the left. 

I cut a 4" x 5-1/4" piece of Granny Apple Green card stock.

The next layer is a piece of Designer Series Paper (DSP) is from the "Joy of Christmas" 12" x 12" package. It's cut at 3-3/4" x 5". 

Then a Basic White piece of card stock was die cut using the die from the "Deckled Rectangles" set. I used my Blending Brush and brushed the edges using Granny Apple Green ink.

And the top Granny Apple Green from the "Deckled Rectangles" die set was cut from the large Granny Apple Green layer. I centered it before cutting. No one will ever know there's a piece missing in the center.

The stocking is from the "Sending Cheers" bundle. I stamped it using Real red ink. The top part of the stocking was die cut using some glitter paper.  I glued the glitter paper to the top of the stocking.

Next was the words. They are from the "Sending Cheer" set using Real Red ink. I punched them out using the oval from the "Double Oval" punch. 

And I tied a checkered ribbon into a bow. Now we are ready to assemble.

I taped the DSP to the Granny Apple Green piece. Then I taped that to the front of the card.

The two deckled rectangle layers were taped together and then taped to front of the card.

Dimensionals were added to the stocking and the word piece and they were set in place.

The bow was glued on and the card was done.

This was a very simple card to make with lots of layers. I LOVE lots of layers on a card, it gives the card a lot of dimension.  

Thank you SO very much for taking your time to stop in and see today's Christmas card,
Wanda

Friday, November 17, 2023

Christmas Classics, Throughout the Year, Christmas Card, Stampin' Up!

Hello and welcome to my blog. Today have a quick and easy Christmas card to share with you. I think I'm still stuck in the "quick and easy" mode. Quick and easy is good. Especially this time of the year. With Thanksgiving just around the corner and then Christmas and all of the things that go along with that. Like cards, decorating, baking, shopping, cleaning. UGH! I'm tired already and I haven't even started!  Well, lets skip that for now and talk about today's card.

The base of my card is a folded half-sheet of Basic White card stock. I cut a 4" x 5-1/4" piece of Basic White for the top of the card. I textured it using the "Snowflake Sky" embossing folder. I glued it to the card base. 

The holly image is from the "Christmas Classics" bundle using black Memento ink. I colored in the leaves using both light and dark Shaded Spruce Blends pens. Then I die cut them with the matching die from the same bundle. 

The berries are from the same set and were stamped using Poppy Parade ink. I die cut them too.

Then I took a piece of white Baker's Twine and colored it with my dark Poppy Parade Blends pen. I let it dry for a bit before handling it. It's best to do that or your fingers will be all red. 

I took some gold cord from the "Simply Elegant" trim package and wound it around a glue bottle three times. I used a glue dot on to hold the ends together. The holly piece was stuck to the glue dot too and set aside. The bow was tied and a little bit of glue was added to the front of the card and it was set in place. Then the holly piece was set in place on top of that. I added a couple of small Dimensionals to the holly and that part was done.

The words are from the "Throughout the Year" set and were stamped using Shaded Spruce ink. I fussy cut around them and added them to the front of the card using Dimensionals.  And the card was done.

This was SO quick to make and I would recommend coloring the twine first to get it plenty of time to dry.

Thank you SO much for taking your time to stop in and see today's Christmas card,
Wanda


Thursday, November 16, 2023

Textured Floral, Wanted to Say, Get Well Card, Stampin' Up!

Hello and welcome to my blog. Today I needed a get well card so I grabbed some Designer Series Paper (DSP) that was sitting on my worktable. Please read on to see how I made today's card.

The base of my card is a folded half-sheet of Basic White card stock. It opens on the right and the fold is on the left.

The DSP is from the "Countryside Inn" 12" x 12" package. I cut it to measure 5-1/4" x 4". It was taped to the front of the card base.

The words part was done next. I used the "Wanted to Say" die set for the words. I die cut the word piece using Night of Navy card stock. I had used double-sided sticky sheets behind it before cutting. Then I used a piece of Basic White card stock with the sticky sheet behind it too before cutting it. After the two pieces were cut I added the words to the word outline piece. I measured the piece so I could figure out what size card stock to cut for the layers. I was originally going to lay the words on the top of the card but the DSP was too busy and they got lost, that's why the layers are needed.

I cut a piece of Balmy Blue card stock at 3-1/4" x 2". And the Basic White layer was cut at 3-1.2" x 2-1/4".  I taped the two layers together and then added the words to the top. Dimensionals were added to the back and the piece was set in place on the front of the card.

I had die cut a Basic White cluster of leaves from the "Textured Floral" bundle. I tucked it under the layered piece with a little bit of glue on the end. A bit of it hung over the bottom of the rectangle layers so I had to snip it off because I didn't like it sticking out. And that was it, the card was done.

I'm not overly thrilled with it. I have found this DSP difficult to work with but I did manage to get a card made with it.

Thank you SO very much for taking your time to stop in and see today's get well card,
Wanda

Wednesday, November 15, 2023

Textured Floral, Birthday Card, Stampin' Up!

Hello and welcome to my blog. Today I have a birthday card to share with you.  It's a very easy layout and quick to put together too. Please read on to see how today's card was made.

The base of my card is a folded half-sheet of Garden Green card stock. I cut 1-3/4" off the bottom of the front of the card. That left a 2-1/2" flap on the upper part.

A 4" x 5-1/4" piece of Basic White was cut and taped to the inside of the card.

The Designer Series Paper (DSP) is from the "Fresh as a Daisy" 12" x 12" package and was taped on the front of the card.

The words are from the "Textured Floral" set and were stamped using Garden Green ink. I die cut them using the second smallest stitched rectangle in the "Nested Essentials" die set. I also die cut a Garden Green one from the same set, it was the third smallest. I taped the two pieces together.

I often struggle with getting the piece straight on a front like this. SO what I did here was I added Dimensionals to the upper part of the word piece. Without removing the covering on the Dimensionals I set the piece on the front of the card to see where it would look the best. Then I added Dimensionals to the front of the card along the edge. I removed the backing from the Dimensionals and set the piece in place. I was able to eye it to get it straight and it went on nicely! No Dimensionals showing on the back or making the card stick together.  Ya gotta love that, right? LOL

This was a fun and quick card to make.  I may use this layout for a get well card I need to make. I hope I can find some large get well wording.

Thank you SO very much for taking your time to stop in and see today's birthday card,
Wanda

Tuesday, November 14, 2023

Christmas Classics, Joy of Christmas, Christmas Card, Stampin' Up!

Hello and welcome to my blog. Today I have a card to share with you that I found in Pinterest. You can see the original card here. There was no link to any measurements so I winged it. Please read on to see how I made this card. 

The base of the card is a folded half-sheet of Basic White card stock. It opens on the right and the fold is on the left. 

I cut a 3-7/8" x 5-1/8" piece of Basic White card stock for the larger layer. 

The Designer Series Paper (DSP) is from the "Joy of Christmas" 12" x 12" package. I cut it at 2-3/4" x 2-3/4" and the Garden Green layer behind it was cut at 3" x 3".  I taped the two layers together. A ribbon was wrapped around the front and taped to the back. I slid another piece of ribbon (still on the spool) under the piece I just taped and tied a bow. I also tied a gold cord bow and glued it under the ribbon bow. I had used some retired Real Red ribbon I had in my stash. Then I glued the piece in place on the front of the large Basic White layer. I lined it up with the top and two sides.

The words are from the "Christmas Classics" bundle and were stamped using Real Red ink. I die cut them with the matching die. Dimensionals were added to the back and it was set in place under the words.

For a final touch I used some gold pearls from the "Blooming Pearls" package and the card was done.

This was a very quick and easy card to make. It's a nice layout if you have scraps to use up.

Thank you SO much for taking your time to stop in and see today's Christmas card,
Wanda


Monday, November 13, 2023

Christmas Classics, Joy of Christmas, Christmas Card, Stampin' Up!

Hello and welcome to my blog. Today I have a Christmas card to share with you that I found on Split Coast Stampers. I hadn't been there in a while and I thought I'd check it out. I ran across this beauty and just had to make it. You can see the original card here. Please read on to see how the card was made.

The base of the card is a folded half-sheet of Basic White card stock. The front was cut off at 1-3/4".  Save that piece to stamp your words. The words are from the "Christmas Classics" bundle. They were stamped using Versa Mark and heat set with gold embossing powder. It's not one of my favorite things to do. I don't know why I don't like to heat emboss because it's so pretty. Maybe it's the idea of getting out all the stuff to do it.  Like it's not a lot of stuff, some embossing powder, Versa Mark, and the heat tool. I just don't know. But I do know that I've always been pleased with what I was making using it.  Once the words were done I die cut them with the die in the "Christmas Classics" bundle. 

Next I die cut the larger piece that the words go on using Basic White card stock.

There is a pine branch in the set and I stamped it using Shaded Spruce ink on Basic White card stock. I needed three of them. Once stamped I die cut them and set them aside. 

The holly leaves were die cut using Shaded Spruce card stock, I needed two of them.

And then the open leaves were die cut using gold foil paper.

A 5-1/4" x 2-1/4" piece of Basic White card stock was cut and then textured using the "Snowflake Sky" embossing folder. I glued that to the top flap of the card. I didn't have the music folder so I used what I had. 

On the inside at the bottom I taped a piece of Designer Series Paper (DSP) from the "Joy of Christmas" 12" x 12" package, it measured 5-1./4" x 1-1/2". I didn't have the gingham that was on the original package so I used what I had. 

I glued all of the pieces in place on the front of the card, adding the word piece last. A few colored rhinestones were added to the front of the card. I had colored them with my dark Shaded Spruce Blends pen. And that was it, the card was done. 

I thought it turned out just fine. I like the snowy background. It still has a wintry Christmas feel to it.

Thank you SO very much for taking your time to stop in and see today's Christmas card,
Wanda

Sunday, November 12, 2023

Sending Cheer, Joy of Christmas, Christmas Card, Stampin' Up!

Hello and welcome to my blog. Today I have a fun Christmas card to share with you. Please read on to see how I made it.

The base of my card is a folded half-sheet of Basic White card stock. It opens on the right and the fold is on the left.

I cut a 4" x 5-1/4" piece of Basic White card stock for the front of the card. I die cut the piece using the "Split Card" die set. I thought it looked pretty plain on the right so I was going to just texture that side with the "Snowflake Sky" embossing folder. I set it in the folder so only that side would be textured. After doing that I liked it but I had embossed some of the grid lines so I put it partially back in the folder and textured the rest of the piece. So my advice to you is to put the whole piece in the folder and slowly emboss it so you don't break any of the grid lines. I glued this piece to the Designer Series Paper (DSP) from the "Joy of Christmas" 12" x 12" package. I cut that piece a little shy of 4" x 5-1/4" so it would

Next I stamped the gingerbread man from the "Sending Cheer" bundle using Pecan Pie ink. I stamped the hearts with Real Red ink and the face with back Memento ink. I set him in place on the lower part of the card.

The words are from the same "Sending Cheer" set and were stamped using Real Red ink on a scrap piece of Basic White card stock. I punched them out using the "Double Oval" punch. I also used that punch on a scrap piece of Garden Green card stock for the scalloped layer behind the words. I taped the two ovals together. 

I thought the upper right looked a bit blah so I used some holy leaves from a die in the "Christmas Classics" bundle. I snipped it from the rectangle piece. I glued the two leaves to the front of the card. I took some pearls and colored them using my dark Cherry Cobbler Blends pen and set them in place with the leaves.  And the card was done.

This was a fun and quick card to make. I think some other DSP would be better for this layout but I was using what I had.

Thank you SO very much for taking your time to stop in and see today's Christmas card,
Wanda

Saturday, November 11, 2023

Christmas Classics, Christmas Card, Stampin' Up!

Hello and welcome to my blog. Today I have a quick Christmas card to share with you. I found it on Pinterest and I made a few changes. You can see the original card here.  Please read on to see how the card was made.

The base of the card is a folded half-sheet of Basic White card stock. It opens on the right and the fold is on the left.

I die cut the holly word piece using the die from the "Christmas Classics" bundle and Garden Green card stock.

The words were stamped using Real Red ink on a piece of Basic White card stock. It was die cut using the rectangle die in the bundle. I taped them to the Garden Green piece. Dimensionals were added to the back and the piece was set aside.

Next the pine needles were stamped. I had used Shaded Spruce ink and Garden Green ink. They both look like the same color to me until you look at it very close-up.  I stamped the taller ones using Shaded Spruce and then moved the stamp a bit to make it look like they are shorter. And Garden Green was used for that. 

I set the word piece in place. The original card had used some enamel type embellishments for the berries. I didn't buy those to I just took some pearls and colored them using my dark Cherry Cobblers Blends pen. I set them in place on the card and the card was done.

This was such a quick and simple card to make. It was fun and easy too!

Thank you SO much for taking your time to stop in and see today's Christmas card,
Wanda

Friday, November 10, 2023

Autumn Leaves, Throughout The Year, Them Bones, Birthday Card, Stampin' Up!

Hello and welcome to my blog. Today I am going to share a birthday card with you. Please read on to see how I made today's card. I actually made two of them because hubby has twin sisters. He comes from a family of twins. His mom had twins and one of those twins had twins. And his mom's sister had twins.  All identical too so when I joined the family it was a bit confusing. But I wasn't alone in the confusion, I have identical triplets on my side so hubby got a little taste of what I was going through! LOL 

So onto today's card. The base of my card is a folded half-sheet of Basic White card stock. I cut it in half on the short side so after cutting it measures 4-1/4" x 11".  I scored it at 2-1/4" and 5-1/2".  Fold the card in half and then fold the front flap inward. 

Then I took a circle punch and punched a little knitch in the middle so it will be easier to pull out the gift card or money.  Once punched I glued the sides.

Now to decorate the front. I cut a piece of Designer Series Paper (DSP) from the "Them Bones" 12" x 12" Halloween package. It was nice to be able to use some more paper from that package. It's got a couple of fall colors I can use for more cards with the "Layering Leaves" bundle. 

The words are from the "Throughout the Year" set and were stamped on a 2-3/8" x 2-3/8" piece of Basic White card stock. I stamped the words on the upper part of the square so I could add something there. At the time I stamped the words I had no idea what I was going to do. I was thinking flowers but I wasn't ready to look yet.  A 2-5/8" x 2-5/8" piece of Pumpkin Pie card stock was cut for the layer. I taped the two squares together. I set that piece in place on the front of the card using Dimensionals on the left side. Be careful not to put them all over the piece or you will stick your card together.  And yes, I have done that one or two times in the past. It's frustrating, especially when you knew not to do it. UGH!

So after giving that open area some thought I decided to go with leaves. I die cut them from the "Autumn Leaves" bundle using Cajun Craze and Pumpkin Pie card stock. The smaller leaf was set in place using a Dimensional and the other leaf was just glued in place.

I added a little bling to it using some retired copper rhinestones. I have quite a few of them left so you may see them on some upcoming cards. My card was done!

This was a fun and quick card to make and a great way to give a gift card. 

Thank you SO very much for taking your time to stop in and see today's birthday card,
Wanda 

Thursday, November 09, 2023

Christmas Classics, Christmas Card, Stampin' Up!

Hello and welcome to my blog. Today I have another quick and easy card to share with you. Please read on to see how I made today's card.

The base of the card is a folded half-sheet of Basic White card stock. It opens on the right and the fold is on the left.

I cut a 4" x 5-1/4" piece of Basic White card stock and textured it using the "Distressed Tile" embossing folder. A 2" x 4" piece of Designer Series Paper (DSP) from the "Joy of Christmas" 12" x 12" package and I glued it to the left side of the textured card stock. Then that piece as glued to the card base.

Next I die cut the Basic White rectangle with leaves from the "Christmas Classics" bundle. I also die cut a holly leaf and two of the loopy type leaves using Garden Green card stock.  I also used the same loopy dies to cut two of the gold "More Dazzle" specialty paper. You have to be careful of the size dies you use with the paper because it's got tiny gold fold dots on it and the smaller you go the less of those dots stay on. I lost a few making these.

And lastly the words, they were stamped using the the "Christmas Classics" set with Pecan Pie ink. I die cut them using the die in the bundle.

Now to assemble the rest of the work. I added the words using Dimensionals.  Then I set that piece in place on top of the card but I didn't glue it down. I set it so I could see where to add the leaves.

The leaves were added using glue and then the piece with the words on it was added using glue and the card was done.

A little bling would be pretty but I didn't want to add any to mine.

This was a very fun card to make. It was easy to make and quick to put together. And I'm happy with the way it turned out.

Thank you SO very much for taking your time to stop in and see today's Christmas card,
Wanda

Wednesday, November 08, 2023

Christmas Classics, Winter Meadow, Christmas Card, Stampin' Up!

Hello and welcome to my blog. Today I have a quick and easy Christmas card to share with you. Please read on to see how I made it.

The base of my card is a folded half-sheet of Basic White card stock.

I cut a 4" x 5-1/4" piece of Lost lagoon card stock that was textured using the "Snowflake Sky" embossing folder. I glued it to the front of the card.

Next I cut a piece of Designer Series Paper (DSP) from the "Winter Meadow" 12" x 12" package. It was cut at 4-1/4" x 3-1/8".  I taped it to a piece of Pretty Peacock card stock that was cut at 4-1/2" x 3-1/4". I took some white (retired) ribbon and wrapped it around the piece about 1-3/8" up from the bottom of the piece. I taped the ends on the back. I had to wrap ribbon around it twice because mine was pretty see through.  Dimensionals were added to the back of it and it was centered on the front of the card.

The words are from the "Christmas Classics" were stamped using Lost Lagoon on a scrap piece of Basic White card stock. I die cut it using the matching die in the bundle.  I set the word piece in place using Dimensionals.

I added a couple of the leafy branches using Lost Lagoon card stock. The dies are in the same "Christmas Classics" bundle. 

I took some pearls and colored them using my dark Pretty Peacock Blends Pen. I set them in place on the front of the card and the card was done.

This was a fun and quick card to make and the DSP has such a peaceful look to it.

Thank you SO very much for taking your time to stop in and see today's Christmas card,
Wanda

Tuesday, November 07, 2023

Autumn Leaves, Days to Remember, Pick of the Patch, Masculine Fall Birthday Card, Stampin' Up!

Hello and welcome to my blog. Today I took the other pieces of the "One Sheet Wonder" pumpkin paper that I made a few weeks back.  I has used the "Pick of the Patch" set to make the full sheet. It took a while to do because I had to stamp off and then spritz the image and then stamp on the card stock. I stuck with it and got the whole sheet filled. Then I used my Blending Brush to scrub on some more color around the whole sheet. Yesterday I cut a quarter sheet from the full sheet and used part of it. Today I'm using the other part that measures 2-1/2" x 4". Please read on to see how I made today's card.

The base of the card is a folded sheet of Basic White card stock. I taped the "One Sheet Wonder" piece to it on the left. 

On the right I glued a piece of Garden Green card stock that measured 1-1/2" and was textured using the "Painted Texture" embossing folder. 

A 1/4" piece of Pumpkin Pie card stock was cut for the strip between the two affixed pieces. I glued that strip in place.

The leaves are from the "Autumn Leaves" bundle and were die cut using the "Oxidized Copper" Designer Series Paper (DSP) and gold foil paper. I glued the two gold ones down and the copper one was set in place using Dimensionals.  I had colored a long piece of white piece of Baker's Twine using my dark Pumpkin Pie Blends pen. I tied a bow and glued it on top of the copper leaf.

The words are from the "Days to Remember" set and were stamped on a scrap piece of Basic White card stock using Garden Green ink. I punched them out using the "Double Oval" punch.  I punched out a Pumpkin Pie scalloped oval piece using the same punch. I taped the ovals together and set them in place using Dimensionals.

I had some retired rhinestones I added to give the card a little bling.  I didn't want to add too much bling since it's supposed to be a masculine card but it goes either way.  And that was it.

I like how it looked but I like yesterday's card better.

Thank you SO very much for taking your time to stop in and see today's masculine birthday card,
Wanda

Monday, November 06, 2023

Autumn Leaves, Pick of the Patch, Days to Remember, Oxidized Copper, Masculine Birthday Card, Stampin' Up!

Hello and welcome to my blog. Today I have a masculine birthday card to share with you. I had a piece of card stock left over from making a "One Sheet Wonder" a few weeks ago. You can see that card and info by clicking here. Please read on to see how I made today's card.

The base of my card is a folded half-sheet of Basic White card stock. It opens on the right and the fold is on the left. 

I took a piece of the background paper that I had stamped a few weeks ago. I thought it took a long time to make that "One Sheet Wonder" because every image had to be stamped off and then misted before it was stamped on the card stock. But I stuck with it and filled a full sheet. I made a card with it but forgot about it until I ran across it today. My plan is to use it up! The pumpkins are from the "Pick of the Patch" set. I cut that piece at 1-1/2" x 5-1/4"".  

Next I cut a piece of Garden Green to measure 2-1/2" x 1/4" and I textured it using the "Painted Texture" embossing folder I glued that piece to the left of the card. Then I glued the "One Sheet Wonder" piece in place on the right.

I cut a 5-1/4" x 1/4" piece of pumpkin Pie card stock and glued it where the other two papers met.

The leaves were die cut using the dies from the "Autumn Leaves" set, "Oxidized Copper" Designer Series Paper" (DSP), and gold foil paper. I set the larger leaf in place using Dimensionals. The gold leaf was taped on top of that.

I took a piece of white Baker's Twine and colored it with my dark Pumpkin Pie Blends Pen. I tied a bow. I tied this bow before the ink was completely dry and my fingers were very orange. By the time I removed all the ink from my fingers with alcohol whites the piece was dry. I glued the bow in place on the bottom of the leaves.

The words are from the "Days to Remember" set using Garden Green ink on a scrap piece of Basic White card stock. I punched them out using the "Double Oval" punch. The layer behind it is a scalloped piece punched from the same punch using Pumpkin Pie card stock. I taped the two ovals together. Dimensionals were added to the back and it was set in place on the lower part of the card. 

I had some retired rhinestones from the "Champagne Rhinestone" package and I added them to the front of the card. I thought it could use some bling and I didn't buy anything current because I have plenty of retired to use up.

This was a fun card to make and it's got a nice masculine touch to it.  I may have to play with the rest of the piece I cut off tomorrow and see if I can come up with something better.

Thank you SO much for taking your time to stop in and see today's masculine birthday card,
Wanda 

Sunday, November 05, 2023

Christmas Classics, Joy of Christmas, Gift Card Holder Card, Stampin' Up!

Hello and welcome to my blog. Today I have a quick gift holder card to share with you. These are very easy to make and can be used for any occasion too.  Just swap out the Designer Series Paper (DSP) and you're set for the occasion you need. Please read on to see how I made today's card.

The base of the card is a folded half-sheet of Poppy Parade card stock. It was cut in half on the short side and after cutting it measured 4-1./4" x 11". Then it was folded in half. On the front half it was scored at 2-1/4".  Set your piece on your scoring board and score at 2-1/4" and then at 5-1/2". Fold the card in half like you normally would do. Then take the front scored piece and fold it inward onto itself.  I took a 1/4" circle punch and punched partial circle to make it easier to get the gift card out.

Next the pocket was glued on each end and set aside to set up. 

While the glue is drying I cut a 3" x 4" piece of DSP from the "Joy of Christmas" 12" x 12" package. I taped it on the front of the card. Did you ever have an issue taping the DSP on? I had the piece set one way and it didn't quite look right so I turned it 180 degrees and it looked worse, so I turned it back.  It's all in what your eye sees, right?

The words are from "Christmas Classics" set and were stamped using Garden Green ink on a 2-3/8" x 2-3/8" piece of Basic White card stock. They were layered on a 2-5/8" x 2-5/8" piece of Poppy Parade card stock. I originally had used Poppy Parade ink and Garden Green card stock and it looked awful so I went with the Garden Green ink and Poppy Parade card stock. I taped the two layers together and set them in place on the front of the card using Dimensionals. Be careful not to get the Dimensionals on the inside part of the card. To avoid that I line up the piece where it needs to be, then I hold it in place and using a pencil I make light marks on the back of the word piece.  This way you avoid the inside piece.

It's a bit plain looking but it's still nice. It's a quick and easy card to make.

Thank you SO very much for taking your time to stop in and see today's gift card holder card,
Wanda

Saturday, November 04, 2023

Autumn Leaves, Throughout the Year, Masculine Birthday Card, Stampin' Up!

Hello and welcome to my blog. Today I have another quick card to share with you.  It was so quick that I made two at the same once and was done in no time at all. Please read on to see how I made today's card.

The base of my card is a folded half-sheet of Basic White card stock. It opens on the right and the fold is on the left.

The Designer Series Paper (DPS) is from the "Inked Botanicals" 12" x 12" package. I had cut a 5-1/2" x 4-1/4" piece because my plan was to cover the whole front but I changed gears mid card. I ended up cutting the piece at an angle. I measured 1-1/2" up from the bottom on the left and 3" up on the right and I cut it. I took the left over piece and matched it up and trimmed it a bit to the same size as the first one. I taped it in place on the lower part of the card.

Next I cut a 1/4" strip of gold foil paper about 4-3/4" long and glued it across the front of the card covering the edge of the DSP. 

The words were stamped next. They are from the "Throughout the Year" set and were stamped using Lost Lagoon ink.

I used the "Autumn Leaves" bundle to die cut the leaves. I used the "Oxidized Copper" DSP and gold foil paper for them. I glued them all in place except for the top maple leaf, I used Dimensionals to set in place.  And that was it. Super easy and super quick.

Thank you SO very much for taking your time to stop in and see today's masculine birthday card,
Wanda

Friday, November 03, 2023

Christmas Classics, Shining Brightly, Christmas Card, Stampin' Up!

Hello and welcome to my blog. Today I have a quick Christmas card to share with you. One more day to go in my quest to have a week of quick cards. It's not to say that I won't have more but they probably won't be in 7 consecutive days like these have been. I love quick cards, especially when they don't look like you just threw them together. Please read on to see how I made today's card.

The base of the card is a folded half-sheet of Basic White card stock. I cut a 4" x 5-1/4" piece of Basic white card stock for the front. If you want to make an even quicker card you could eliminate that piece.

Next I cut a piece of Designer Series Paper (DSP) from the "Shining Brightly" 12" x 12" package. My piece was cut at 5-1/4" x 4". Then I cut that piece diagonally. I cut it at 1-1/2" at the bottom and 4" at the top. I set it up on my paper cutter and cut the angle. I taped that piece to the left of the 4" x 5-1/4" Basic White piece.

Then I stamped the words from the "Christmas Classics" set using Poppy Parade ink. 

A 1/4" piece of Night of Navy card stock was cut from a quarter sheet of card stock. It overlapped the top and bottom (as planned). I trimmed each end and it looked even. The piece was then taped to the front of the card base.

I colored some pearls using my Cherry Cobbler Blends pen and set them in place on the front of the card.

This was a very quick and easy card to make. It's got some fun colors to it and doesn't really look like it went together fast.  Oh and the other end of the DSP can be used on another card. With this design it doesn't matter the orientation so it could go on the left side again and have the words up a little higher on the card. It won't go to waste.

Thank you SO very much for taking your time to stop in and see today's Christmas card,
Wanda

Thursday, November 02, 2023

Autumn Leaves, Darling Details, Masculine Birthday Card, Stampin' Up!

Hello and welcome to my blog. Today I have another quick card to share with you. I am one who loves layers and I am trying to make quick cards to share with you that are not very involved. On today's card I only layered one of the elements. It's SO hard for me to keep it this simple. I do like the look but I really wanted to cut the Designer Series Paper (DSP) smaller and layer it.  But this way is SO much quicker and that was the point of this weeks theme. Please read on to see how I made this card.

The base of my card is a folded half-sheet of Basic White card stock. It opens on the right and the fold is on the left.

I cut a 4" x 5-1/4" piece of Basic White card stock and textured it using the "Distressed Tile" embossing folder. 

Next I took a piece of DSP from the "Earthen Elegance" 12" x 12" package and cut it to measure 5-1/4" x 2". I glued it to the left side of the textured piece. Then I glued that piece to the front of the card.

The leaf is from the "Autumn Leaves" bundle and were stamped using Crushed Curry ink. I die cut it using the matching die in the bundle. It was set in place on the card using Dimensionals.

The words are from the "Darling Details" set and were stamped using Pecan Pie ink. I punched them out using the "Double Oval" punch. I also punched out the scalloped piece from the same punch using Pecan Pie card stock. I taped the two ovals together. Dimensionals were added to the back and the piece was set in place on the front of the card.  And that was it, the card was done.

It's simple yet has a nice rich look to it because of the DSP. It's great for a masculine birthday card,

Thank you SO very much for taking your time to stop in and see today's masculine birthday card,
Wanda

Wednesday, November 01, 2023

Sending Cheer, Christmas Card, Stampin' Up!

Hello and welcome to my blog. I can't believe it's November already. I will have some fall and Thanksgiving cards but for now I'm going to jump into a few Christmas cards. With Halloween out of the way I have more time for the other cards. Please read on to see how I made today's card.

The base of the card is a folded half-sheet of Basic White card stock. It opens on the right and the fold is on the left.

I took a 4" x 5-1/4" piece of Designer Series Paper (DSP) from the "Shining Bright" 12" x 12" package. I taped to the front of the card base.

Next I cut a 2-3/4" x 3-3/4" piece of Poppy Parade card stock and textured it using the "Snowflake Sky" embossing folder. I glued it to a 3" x 4" piece of Basic White card stock. Dimensionals were added to the back and the piece as set in place on the center of the card. Centered enough by eyeing it.

Two gingerbread boys were stamped using the image from the "Sending Cheer" set and Pecan Pie ink.  The heart "buttons" were stamped using Poppy Parade ink and the face was stamped using black Memento ink. I die cut them with the matching die. 

The words are from the same set and were stamped using Poppy Parade ink. I punched them using the "Double Oval" punch. I glued the piece in place on the lower left of the card and the card was done.

This was a fun card to make and I am pleased with the way it turned out. I LOVE gingerbread boys and this set is so cute. I think it was the gingerbread boy image that made me want to order this set.

Thank you SO very much for taking your time to stop in and see today's Christmas card,
Wanda