Pin It

Tuesday, October 31, 2023

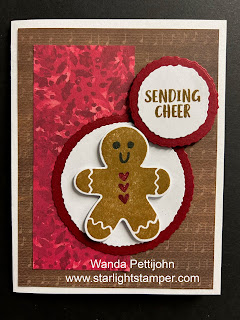
Sending Cheer, Joy of Christmas, Christmas Card, Stampin' Up!

Hello and welcome to my blog. Today I have a quick Christmas card for you to make. I'm trying to keep things simple this week. I do love layering but sometimes in making simple cards layers need to be omitted. But here I added a couple and left some pieces without. Please read on to see how I made today's card.

The base of the card is a folded half-sheet of Basic White card stock. It opens on the right and the fold is on the left.

I cut a 4" x 5-1/4" piece of Designer Series Paper (DSP) from the "Joy of Christmas" 12" x 12" package. I taped it to the front of the card. 

Next I cut a 2" x 4-1/2" piece of DSP from the same package. I taped that to the left side of the card.

The gingerbread boy was stamped next on a piece of Basic White card stock using Pecan Pie ink. The hearts were stamped using Cherry Cobbler ink and the face was stamped using black Memento ink. The piece was then cut out with a die from the "Sending Cheer" bundle. 

I used the circles from the "Deckled Circles" die set for the gingerbread boy and the words. For the Gingerbread boy I used the 5th smallest one on Basic White card stock. And for the Cherry Cobbler layer, I used the 6th smallest one.

The words were stamped on a scrap piece of Basic White card stock using Pecan Pie ink and were die cut using the 2nd smallest die in the "Deckled Circles" die set and the Cherry Cobbler layer was die cut using the 3rd smallest die. I cut that circle from the center of the large Cherry Cobbler circle. I taped all the circles together.

I taped the largest circles on the front of the card, a little below center. I added the Gingerbread boy using Dimensionals. And then the words were added using Dimensionals and the card was done. 

This is a very quick and easy card to make. I LOVE gingerbread boys and I hope to make some more cards soon using this set.

Thank you SO very much for taking your time to stop in and see today's Christmas card,
Wanda

Monday, October 30, 2023

Throughout The Year, Autumn Leaves, Oxidized Copper, Masculine Birthday Card, Stampin' Up!

Hello and welcome to my blog. Today I have a very quick and easy masculine birthday card.  Or a fall birthday card, I needed it for a masculine birthday. Please read on to see how the card was made.

The base of my card is a folded half-sheet of Very Vanilla card stock. It opens on the bottom and the fold is on the top.

I cut a 2" x 5-1/4" piece of Very Vanilla card stock and textured it using the "Distressed Tile" embossing folder. I glued it to the left side of the card. As you may have read in other posts, I prefer to glue my embossed pieces because there's not a lot of flat surfaces for the tape to stick and I've found that it comes off easily, but with the glue it's not going anywhere.

The words are from the "Throughout the Year" set and were stamped on a scrap piece of Very Vanilla card stock using Pecan Pie ink. I die cut them using the second largest die from the "Nested Essentials" die set. I used the largest die to cut the Pecan Pie layer behind it. I taped the two layers together and I glued them to the front of the card. Centering them as much as possible by eyeing it.

Next I die cut two leaves using the "Oxidized Copper" Designer Series Paper (DSP) and the "Autumn Leaves" bundle. One of the maple leaves was cut using gold foil card stock. The leaves were set in place using Dimensionals and the card was done

Now don't you just love quick and easy cards?  This was very fun to make and I love how quick it went together.

Thank you SO very much for taking your time to stop in and see today's masculine birthday card,
Wanda

Sunday, October 29, 2023

Christmas Classics, Sparkling Snowflakes, Winter Meadow, Christmas Card, Stampin' Up!

Hello and welcome to my blog. Today I have a quick Christmas card to share with you. I'm so into quick cards lately, especially Christmas cards when you need to make a lot of them in a short amount of time. Please read on to see how I made today's card.

The base of my card is a folded half-sheet of Basic White card stock. It opens on the right and the fold is on the left.

I cut a 2-3/8" x 5-1/4" piece of Designer Series Paper (DSP) from the "Winter Meadow" 12" x 12" package and I taped it to the left of the card front. The DSP measures about 1/4" from the bottom, fold, and top.

Next I die cut the leaves from the "Christmas Classics" set. I also cut a set of berries. I colored all of them using my Wink of Stella pen.

Then I stamped the words from the "Sparkling Snowflakes" set using Misty Moonlight ink. I punched them using the "Double Oval" punch. My scrap piece of Basic White was large enough that it cut the scalloped oval at the same time. Dimensionals were added to the back of the word piece and it was set in place on top of the scalloped oval. 

I set the three leaves in place and laid the oval over them. I held the leaves in place with my left hand, lifted the stems and then added some tape to that area so the leaves would stick. 

The oval was glued down. I wasn't sure how well the tape would hold the leaves so I used glue on the oval. 

Lastly the berries were set in place using tiny Dimensionals.  And the card was done. 

I'm SO pleased with the way this card turned out. I love the wintery look it has. And most of all, it didn't take long to make!

Thank you SO very much for taking your time to stop in and see today's Christmas Card,
Wanda

Saturday, October 28, 2023

Autumn Leaves, Throughout The Year, Masculine Birthday Card, Stampin' Up!

Hello and welcome to my blog. Today I have a fall masculine birthday card to share with you. Please read on to see how this quick card was made.

The base of my card is a folded half-sheet of Basic White card stock. It was cut in half on the short 8-1/2" side so once it's cut it measures 4-1/4" x 11".  It opens on the bottom and the fold is on the top.

I cut a 4" x 5-1/4" piece of Pecan Pie card stock.  Before taping it to the card base I die cut the rectangle layer from the "Deckled Rectangles" set. I used the second smallest one.

A 3-3/4" x 5" piece of Designer Series Paper (DSP) from the "Oxidized Copper" 12" x 12" package on top of the Pecan Pie layer.

The words are from the "Throughout the Year" set and were stamped using Pecan Pie ink on a scrap piece of Basic White card stock. I die cut them with the smallest Deckled Rectangle die. I taped the words to the Pecan Pie deckled layer. Then that piece was taped and glued to the front of the card. I wasn't sure if tape would hold well over the gold foil so I decided to add tape to the top and bottom and glue in the middle. I got it on a little crooked and it was very easy to remove so I'm assuming it doesn't stick well or I didn't press down hard enough. But I do know it's not going anywhere. 

The leaf is from the "Layering Leaves" set and were stamped using Crushed Curry ink first. Then I took my Cajun Craze cube ink pad and lightly touched the edges and tips of the leaves. Then I took the vein image, inked it up with Pecan Pie ink and stamped off once and then stamped off on the leaf. I die cut the leaf with the matching die from the bundle. It's too bad that the stem isn't included in the leaf die cut. But I probably would have cut it off for this layout anyway. So I guess it worked out, huh?  LOL The leaf was set in place using Dimensionals and the card was done.

This was a very fun, quick and easy card to make. I do like how it turned out and I really like that DSP!

Thank you SO very much for taking your time to stop in and see today's masculine birthday card,
Wanda

Friday, October 27, 2023

Darling Details, Get Well Card, Stampin' Up!

Hello and welcome to my blog. Today I have a get well card to share with you. I have a list of cards to make and get out in the mail and I'm late in doing that. SO much going on this time of the year with getting ready for craft fairs and canning/freezing vegetables for the winter. I'm looking forward to December when things really get stirred up!  I am thinking that December will be calmer but there's Christmas.  But I really am looking forward to December with all the hustle and bustle that it brings. And if I get my Christmas cards done by the end of November I will step into December with a smile on my face! So onto how I made today's get well card.

The base of my card is a folded half-sheet of Basic White card stock. I cut two 4" x 5-1/4" pieces of Basic White card stock. One for the top and one under it. I cut 2" off one piece. I textured the larger piece using the "Distressed" embossing folder. I glued it to the other piece of Basic White card stock. Then I glued the 2" piece in place too. 

The words piece is from the "Wanted to Say" die set. I die cut the words in Flirty Flamingo using a double-sided sticky sheet. And the layer behind it was die cut using Basic Black ink. I affixed the words to the Basic Black piece and I set it in place on the left of the card.

Next I stamped the large flower using Crushed Curry ink for the outline part and Daffodil Delight for the solid part. The leaves were stamped using Garden Green ink for both the veins of the leaves and the leaves. These are from the "Darling Details" bundle. I die cut the flowers and leaves. I cut one leaf off the grouping of three. And the smaller flower was stamped using Flirty Flamingo ink for both the outline and the solid part. After all of the pieces were die cut I added them to the lower right of the card. I added the little flower first. Then the upper leaves were added and then the smaller one. The large flower was added using Dimensionals and it was set in place on top of the leaves. I covered a very little bit of the little flower with the large flower.

I took a piece of Flirty Flamingo ribbon (retired) and I taped the ends to the back of the Basic White piece. Then the whole piece was set in place on the card base and the card was done.

I think it turned out well. I find this set a little bit difficult to make. I think I just need to play with it more. Now to write inside and get it out in the mail in the morning. And onto the next one on my list that I need to get out in the mail!

Thank you SO very much for taking your time to stop in and see today's get well card,
Wanda

Thursday, October 26, 2023

Bag of Bones, Halloween Card, Stampin' Up!

Hello and welcome to my blog. Today I have a fun Halloween card to share with you. Please read on to see how I made today's card.

The base of my card is a folded half-sheet of Basic Black card stock. I cut two 4" x 5-1/4" pieces of Basic White card stock, one is for the outside and one is for the inside. I taped the one on the inside in place. 

I cut a piece of Designer Series Paper (DSP) from the "Them Bones" 12" x 12" package. I measured 3" down on the right side and made a little mark with my fingernail. I cut into the piece about 2-3/4". Then I set the piece on my scoring board and scored 1" from the edge to where the piece is cut on the inside of the piece. What I do is set my piece on the scoring board. I put my stylus on the cut mark on the inside of the piece. Then I score from there to 1". I will mark my piece at 1" on either side of the cut mark on the right edge, it makes it easier to score. If you don't have a scoring board you can always mark it at 1" and then fold it by hand. I taped those flaps down and then I taped the piece on top of the Basic White piece.

Two circles were die cut, one in Basic White and one in Basic Black card stock. I used the 1-3/8" for the Basic White piece and 1-5/8" for the Basic Black piece. I taped the two pieces together and set it on top of the card so I could see where the words would go. 

The words are from the "Bag of Bones" set and were stamped using black Memento ink. 

Next I taped the circle in place. The cat is from the "Bag of Bones" bundle and was die cut using Basic Black card stock. I set it in place using a couple of small Dimensionals. And the card was done.

This was a fun card to make and I like cutting the DSP like that. I don't know the name of the technique but it's fun, quick and easy.

Thank  you SO very much for taking your time to stop in and see today's Halloween card,
Wanda

Wednesday, October 25, 2023

Layering Leaves, Fresh as a Daisy, Thank You Card, Stampin' Up!

Hello and welcome to my blog. Today I needed to make a thank you card.  A friend of mine sent me a beautiful bouquet of daisies. A yellow and rust mix. SO pretty. So I thought I'd make her a card using the "Fresh as a Daisy" Designer Series Paper (DSP). It's got some pretty daisy papers in it. Please read on to see how I made today's card.

The base of the card is a folded half-sheet of Basic White card stock. It opens on the bottom and the fold is on the top.

I cut a 4" x 5-1/4" piece of Basic White card stock and I textured it using the "Distressed" embossing folder. I glued it to the front of the card base.

I took one of scraps of DSP in the package and I trimmed it down to 3-3/4" x 2-1/4" and I cut a 4" x 2-1/2" piece of Pebbled Path card stock for the layer. I taped the two pieces together and I glued the piece to the front of the card.

The words are from the "Layering Leaves" set and were stamped using Garden Green ink. I die cut them using the smallest die from the "Deckled Rectangles" set. I also die cut the layer behind the words using the second smallest die from that same set. I taped the two layers together and I set the words in place using Dimensionals. And the card was done.

This was a very quick and easy card to make. This layout is great for using up pieces of scrap DSP and still making a pretty card. I can see using up some of my Christmas DSP using this layout. My card will be going out in the mail in the morning.

Thank you SO much for taking your time to stop in and see today's thank you card,
Wanda

Tuesday, October 24, 2023

Autumn Leaves, Darling Details, Masculine Fall Birthday Card, Stampin' Up!

Hello and welcome to my blog. Today I have a masculine/fall birthday card to share with you. Please read on to see how I made today's card.

The base of my card is a folded half-sheet of Very Vanilla card stock. It opens on the right and the fold is on the left.

I cut a 4" x 5-1/4" piece of Pecan Pie card stock for the top layer. Then a 3-3/4" x 5" piece of Very Vanilla card stock was cut for the layer on top of the Pecan Pie piece. I textured this layer using "Painted Texture" embossing folder. I glued it to the Pecan Pie piece. 

Next I took out my "Deckled Rectangle" dies and used the two smallest ones. One was for the Pecan Pie piece (I cut two) and one was for the Very Vanilla piece (I cut two). I took one of those Very Vanilla deckled edge pieces and textured it using the "Distressed Tile" embossing folder. I glued that to one of the deckled Pecan Pie pieces. The other Very Vanilla deckled edge piece was stamped using the words from the "Darling Details" set and Pecan Pie ink. I taped that layer to the other deckled edge Pecan Pie piece. 

Then I die cut the leaves from the "Autumn Leaves" bundle. The Designer Series Paper (DSP) is from the "Oxidized Copper" 12" x 12" package. It's pretty DSP but it's only got two sheets of two designs in the package. And these are printed on only one side. I've been using them sparingly but I'm going to use them a bit more because I do not what to have more retired papers to my stash in a few months. I have enough retired papers stacking up as it is. Anyway, I had die cut a large leaf with the one paper with blues in it and two of the copper paper.

That's it for the prep work. Now let's assemble the card. The first think I did was I glued the word piece in place about 3/8" from the left edge of the Pecan Pie layer and 1" from the top of that same layer. 

One of the smaller leaves were added using glue. 

The textured deckled layered piece was set in place next. It's about 3/4" from the top Pecan Pie edge and 3/8" from the right edge of that same layer.

The large leave was then glued in place and the smaller one was added using Dimensionals.  And the card was done. 

This was a very fun and quick card to make. I like this DSP and I'm pretty pleased with the way it turned out. My goal was to make a masculine birthday card and that's what I got. 

Thank you SO very much for taking your time to stop in and see today's masculine birthday card,
Wanda

Monday, October 23, 2023

Color & Contour, Throughout the Year, Joy of Christmas, Christmas Card, Stampin' Up!

Hello and welcome to my blog. Today I have a Christmas card to share with you. It's a very quick and easy one and you can use small amounts of Designer Series Paper (DSP) to make it. Perhaps get some use out of the scraps you have???  Please read on to see how I made today's card.

The base of my card is a folded half-sheet of Cherry Cobbler card stock. It opens on the right and the fold is on the left. I cut a 4" x 5-1/4" piece of Basic White card stock for the inside and two for the outside. I used one on the outside for a base for the DSP and top layer to be attached to for better stability and to line things up and get it sized right. But you can omit that piece if you like.

The DSP is from the "Joy of Christmas" 12" x 12" package and was cut at 4" x 3".  I taped this to the Basic White piece. 

Next I took the other Basic White piece and I die cut the scallop from the "Color & Contour" bundle. I set it very close to the bottom of the piece so I would have lots of space for trimming. Once the piece was cut I taped it to the other piece, just barely on top of the DSP.  Then I trimmed the excess off the top.

The words were stamped next. They are from the "Throughout the Year" set and were stamped using Cherry Cobbler ink.

Using the Mono glue, I added the holly sequins from the "Loose Holly Gems & Sequins" container. 

The 4" x 5-1/4" piece of Basic White was taped to the inside of the card and the card was done.

I can't believe how quick and easy this card was to make. I have lots of retired Christmas DSP and could whip out our holiday cards in no time.  Hmmm. I think this layout may be the one I use. My goal is to have our holiday cards made and ready to mail the day after Thanksgiving and worse case December 1st.  Nice goal to have, I hope I can do it!

Thank you SO very much for taking your time to stop in and see today's Christmas card,
Wanda
Sunday, October 22, 2023

Bag of Bones, Halloween Card, Stampin' Up!

Hello and welcome to my blog. Today I have a fun, quick, and easy card I found on Pinterest. You can see the original card here. The link is a quick tutorial on how the card was made. No measurements, no voice, just a fast video. Please read on to see how I made the card.

The base of the card is a folded half-sheet of Basic Black card stock. It opens on the right and the fold is on the left. 

I cut a 4" x 5-1/4" piece of the Designer Series Paper (DSP) from the "Them Bones" 12" x 12" package. I taped it to the front of the card base. I also cut a 4" x 5-1/4" piece of Basic White card stock and taped it to the inside. I don't usually stamp on the inside of my cards but in the video they show you what they did. It's cute but like I said, I don't usually stamp on the inside.

The two skeletons were die cut from another piece of DSP in the same package, using the dies from the "Bag of Bones" bundle. They were glued in place on top of the DSP.

The words are from the "Bag of Bones" set and were stamped using Versa Mark. They were heat embossed using white embossing powder. They were die cut using the 1-3/8" die from the "Layering Circles" set. It was then set in place on the front of the card using Dimensionals.

I had die cut a few extra bats using Basic Black card stock. I set them in place with a little dot of glue. And the card was done.

This was such a quick and fun card to make. I think the skeletons should have been popped up with Dimensionals. It would have given them more depth. 

Thank you SO very much for taking your time to stop in and see today's Halloween card,
Wanda

Saturday, October 21, 2023

Bag of Bones, Them Bones, Halloween Card, Stampin' Up!

Hello and welcome to my blog. Today I have a Halloween card to share with you. It's pretty simple to make and I had a lot of fun making it. Please read on to see how I made today's card.

The base of my card is a folded half-sheet of Starry Sky card stock. It opens on the right and the fold is on the left.

I cut a 4-1/8" x 5-3/8" piece of Basic Black for the layer. Before taping it down I die cut the tombstone from the "Bag of Bones" bundle.

I cut a piece of Designer Series Paper (DSP) from the "Them Bones" 12" x 12" package to measure 4" x 5-1/4".  I took the large tombstone die and die cut over the tombstone on the DSP. Then I took the smaller tombstone die and die cut the piece of DSP so I could make it fit on the Basic Black tombstone. I taped the DSP tombstone to the Basic Black one. Then I set that piece back in place on the 4" x 5-1/4" piece of DSP. I turned it over and taped the Basic Black tombstone in place using scotch tape. Then I taped the piece to the top of the Basic Black piece.

I fussy cut a tiny skeleton from one of the sheets of DSP. I added two small Dimensionals to the back and I set it in place on the front of the card.

I die cut a cat and the bats using some scrap Basic Black card stock. 

The moon was cut using the 1-5/8" circle die from the "Circling Layers" set using Basic White cardstock. I set it on the card where I thought it should go and then I set the tombstone die on top so I could die cut a piece off of it so it looked like it was behind the large tombstone. 

The cat was set in place using a couple of small Dimensionals. I added a dot of glue on the bats that were already printed on the DSP and put the card stock ones in place. Plus I added a few more bats to the card. Don't forget the one on the moon!  

A 4" x 5-1/4" piece of Basic White was added to the inside and the card was done.

This was a very fun, quick, and easy card to make. I do like how it turned out. It's a bit different than what I had in my head but what ended up on paper was perfectly fine with me!

Thank you SO very much for taking your time to stop in and see today's Halloween card,
Wanda

Friday, October 20, 2023

Autumn Leaves, Heartfelt Hexagon, Masculine or Fall Birthday Card, Stampin' Up!

Hello and welcome to my blog. Today I have a quick and easy masculine fall birthday card to share with you. Please read on to see how I made today's card.

The base of my card is a folded half-sheet of Basic White card stock. It opens on the right and the fold is on the left.

I cut a 4" x 5-1/4" piece of Pumpkin Pie card stock for the layer. And the top Basic White layer was cut at 3-7/8" x 5-1/8". I taped it on the front of the card.

I took the 1-5/8" die from the "Layering Circles" die set and cut a circle from a scrap piece of card stock. I used the circle as a stencil for the top layer. For my circles I used Pumpkin Pie, Crushed Curry, and Old Olive ink. Using my Blending Brush I scrubbed in the color for each circle.

Once the circles were done I textured the piece using the "Distressed Tile" embossing folder. Then I glued the piece to the front of the card. 

I cut three leaves using the Designer Series Paper (DSP) from the Oxidized Copper 12" x 12" package. The dies are from the "Autumn Leaves" bundle. I took one leaf and scrubbed on some Old Olive and I took another leaf and scrubbed on some Pumpkin Pie ink. I just wanted them to have a little bit more color variation. I set them aside after wiping them off because I thought some ink may remain on the shiny copper part of the leaves.

The word piece is from the "Heartfelt Hexagon" set. I stamped the outline using Old Olive ink and the words using the Pumpkin Pie ink. I punched it out using the matching punch. The piece was set in place using Dimenisonals. 

A little glue was added to the back of each leaf and they were slipped in place under the word piece and the card was done.

Wasn't that quick and easy? I am pleased with the way it turned out. Though if I were to make another one I might cluster the leaves instead of spreading them out.

Thank you SO very much for taking your time to stop in and see today's masculine birthday card,
Wanda

Thursday, October 19, 2023

Christmas Classics, Shining Brightly, Christmas Card, Stampin' Up!

Hello and welcome to my blog. Today I am going to share a Christmas card I made that is super easy and quick. I was gifted some Designer Series Paper (DSP) and card stock and I thought today was a good day to play with it. Please read on to see how I made today's card.

The base of my card is a folded half-sheet of Basic White card stock. I used Basic White because I didn't have a lot of the Poppy Parade so I needed to use it sparingly.  I cut a 4-1/8" x 5-3/8" piece of the Poppy Parade and I taped it to the card base.

Next I cut a piece of Basic White card stock that measures 4" x 2". I textured it using the "Snowflake Sky" embossing folder. I glued that strip to the right side of the card.

The DSP is from the "Shining Brightly" 12" x 12" package and was cut at 2-3/4' x 4".  And the Poppy Parade layer behind it was cut at 3" x 4-1/4".  I taped the two pieces together. Dimensionals were added behind it and the piece was set in place on the front of the card. I centered it as well as I could by eyeing it.

The words are from the "Christmas Classics" bundle and were stamped using Old Olive ink. I die cut them with a stitched circle from the "Stylish Shapes" set and the scalloped layer is cut from a scrap piece of Poppy Parade using the die from the "Layering Circles" set. I taped the two pieces together. The piece was set in place on the front of the card using Dimensionals. And the card was done.

This was a very quick and easy card to make. If I hadn't had a scrap piece of Poppy Parade for the scalloped circle, I would have cut one out of the center of the layered piece before taping the two together. I love how colorful this card is. It's got such a festive feel to it.

Thank you SO very much for taking your time to see today's Christmas card,
Wanda

Wednesday, October 18, 2023

Autumn Leaves, Throughout the Years, Masculine Birthday Card, Stampin' Up!

Hello and welcome to my blog. Today I was looking on the internet for a card using the "Autumn Leaves" set. I had made a card at a Stamp-a-Stack that used the leaf dies and I just had to have the bundle. Well, beyond that I had no ideas on what to do with the set. So I went hunting. I found this card on and you can see it here. I did change it a little but not much at all. You can see the original card here. The original card used Very Vanilla card stock. I used Basic White because my large flower was already made and I want to use it.

My Basic White card base opens on the bottom and the fold is on the top. A 4" x 5-1/4" piece of Basic White was cut for the front of the card. It is textured using the "Distressed Tile" embossing folder. I glued it to the front of the card base.

The big leaves are stamped using Cajun Craze, Cherry Cobbler, and Crushed Curry ink. The veins were stamped using Pecan Pie ink. The pieces were die cut with the matching dies in the "Autumn Leaves" bundle. When I stamped the largest leaf using Crushed Curry ink I also tapped the ends on the Cajun Craze ink pad. I wanted a little more color on the tips.

The smaller leaves were die cut using Cajun Craze, Cherry Cobbler, and Crushed Curry card stock.

The words are from the "Throughout the Years" set and were stamped on a scrap piece of Basic White card stock using Pecan Pie ink. I die cut them using the die from the same "Autumn Leaves" bundle. The words on the original card were heat embossed. I just used ink.

The leaves were set in place on the front of the card. I used glue but the original card used glue dots. The words were set in place using Dimensionals and the card was done.

This was a fun card to make and I was glad I was able to use the large leaf I had in my stash. This is a great masculine card. I would like to try this again and add a pumpkin or two. I have to think on that one for a bit.

Thank you SO very much for taking your time to stop in and see today's masculine birthday card,
Wanda

Tuesday, October 17, 2023

Sparkling Snowflakes, Winter Meadow, Snowflake Sky, Christmas Card, Stampin' Up!

Hello and welcome to my blog. Today I have a very easy and quick Christmas card for you to make. If you have scraps of Designer Series Paper (DSP) than this is the card for you. It's a perfect way to use those up. You know the ones. They are too big to recycle and too small to try to do something with them but you hang onto them anyway. Well, grab your larger ones and let's make a card. 

The base of my card is a folded half-sheet of Night of Navy card stock. It opens on the right and the fold is on the left.

I cut a 5-1/4" x 4-1/4" piece of Basic White card stock and I textured it using the "Snowflake Sky" embossing folder. Then I cut the piece down so it measured 5-1/4" x 2-1/8". You get two strips out of this to make two card. I know you have more scraps of DSP!! The textured card stock was glued to the front right of the card. It creates a nice looking layer/border, doesn't it?

Next I trimmed my scrap piece of DSP from the "Winter Meadow" 12" x 12" package to measure 4" x 2-3/4".  And the Night of Navy layer behind it measures 4-1/4" x 3".  If your DSP is smaller you can trim it accordingly. 3-3/4" x 2-1/2" will work too and then add a 4" x 2-3/4" layer behind it. I taped my layers together and added Dimensionals to the back. I set the piece in place on the front of the card, centering it as best as I could.

The words are from the "Sparkling Snowflakes" set and were stamped using Night of Navy ink on a scrap of Basic White card stock. They were die cut using the second smallest circle die in the "Stylish Shapes" set. Dimensionals were added to the back and the word piece was set in place on the front of the card.

A 4" x 5-1/4" piece of Basic White card stock was cut and was taped to the inside of the card and the card was done.

Isn't it a fun card? You can use this layout for other occasions and use up some of that DSP you're hanging onto. I don't like the word hoarding. I try to use them, I'm not holding back, I just have too many to pick from. Stampin' Up! prints on both sides so you've got 12 designs to work with. That makes it difficult to use it all up too!

This was a super quick card to make and that leaves me with some free time to clean up my worktable a bit. I'd love to clean it all off but I need a few more days of quick cards to have that kind of time!  At least the space I have to work is now larger than a dinner plate!  LOL  Funny but kind of sad too!

Thank you SO very much for taking your time to stop in and see today's Christmas card,
Wanda

Monday, October 16, 2023

Pick of the Patch, Dainty Delight, Days to Remember, Fall Birthday Card, Stampin' Up!

Hello and welcome to my blog. Today I have a fall birthday card to share with you. Please read on to see how I made it.

The base of my card is a folded half-sheet of Basic White card stock. The card opens on the right and the fold is on the left.

I cut a 4-1/8" x 5-3/8" piece of Designer Series Paper from the "Fresh as a Daisy" 12" x 12" package. The other side has some really pretty daisies with a beautiful mauve colored background. I hated to use this piece like that but I needed something fallish and I didn't have any fall DSP. I taped the DSP to the card base.

Next I die cut the lattice Basic White piece from the "Split Card Textures" dies using a 4" x 5-1/4" piece of Basic White card stock. I used glue to set it in place, I thought it was the only way to go around that thin edge without making a mess. I should have used double-sided sticky sheet but I always think of this stuff after I'm done cutting. But I made it work, it's on the front of the card.

The Garden Green vine is from the "Dainty Delight" bundle. Again I should have used a double-sided sticky sheet but I didn't. So I added a dot of glue on each leaf and I set it in place on the front of the card.

Then I stamped the pumpkins from the "Pick of the Patch" set using Pumpkin Pie ink on Basic White card stock. I fussy cut them out. The leaves were stamped next. I used both leaf shapes in the set with Garden Green and Mossy Meadow ink. I fussy cut them out too. And the stems were stamped using Pecan Pie ink and they were fussy cut out. I glued the stems in place and then the leaves were added.

Dimensionals were used to set the pumpkins on the vine starting with a medium size one on the bottom and two smaller ones on the way up the vine. Just before I set the larger pumpkin in place, I thought the background there was just a bit to bright. So I took my Blending Brush and scrubbed on some Garden Green ink. 

And I waited to add the pumpkin so I could stamp the words. They are from the "Days to Remember" set and were stamped using Pecan Pie ink. The large pumpkin was set in place with Dimensionals and the card was done.

This was a fun card to make. I enjoyed creating it as I went. I had no idea where I was going with it. I just knew I wanted to use the "Split Card Textures" die on a card. And this is what I ended up with.

Thank you SO very much for taking your time to stop in and see today's fall birthday card,
Wanda

Sunday, October 15, 2023

Petal Park, Pick of the Patch, Through The Years, Birthday Card, Stampin' Up!

Hello and welcome to my blog. Today I have a fall birthday card to share with you. It was pretty simple to make and I was able to turn a spring/summer set into a fall one with just a little bit of color! Please read on to see how I made today's card.

The base of my card is a folded half-sheet of Garden Green card stock. I taped a 4" x 5-1/4" piece of Basic White card stock to the inside. I also cut another 4" x 5-1/4" piece of Basic White card tock for the outside of the card.

I stamped the leaves from the "Petal Park" set using Garden Green ink. I had set it up in my Stamparatus and I stamped twice, that's why it's so dark. And in being so dark I had to use black Memento ink for the details.

The flowers were stamped next. I used Crushed Curry ink for the solid part and Pumpkin Pie for the details. There is a punch for the flowers but I just fussy cut them (because once again I was too lazy to get up and get the punch. It's so involved. I would have to get off my chair, walk over to where the punches are kept, find the right punch, and walk back to my worktable.  See, so involved!!! It just screams "LAZY" doesn't it?  LOL). Once the flowers were cut I set them aside.

I stamped the pumpkin from the "Pick of the Patch" set using Pumpkin Pie ink on a scrap piece of Basic White card stock. I stamped the stem using Pecan Pie ink and the leaf using Garden Green ink. I fussy cut the three of those out.

Before adding the words I assembled the card. If I were to make the card again, I would just set the pieces on the front so I could see where to add the dots. I ended up getting ink on the one flower and I had to redo it. I stamped off once using Pecan Pie ink for the dots. You can also do the words at this time as well. I didn't! Sometimes I do things a bit backwards when I'm designing because I'm not really sure where I'm going with the card/project.

The pumpkin was set in place first using Dimensionals. Then the little flower on the right and the larger flower on the left were added using Dimensionals. I taped the medium size flower in place.

I added my wording from the "Through the Years" set using Pecan Pie ink.  I taped the piece to the front of the card and the card was done.

I though this was a fun card to make and I was glad I could work a fall card into the "Petal Park" set.

Thank you SO very much for taking your time to stop in and see today's fall birthday card,
Wanda

Saturday, October 14, 2023

Them Bones, Pick of the Patch, Halloween Card, Stampin' Up!

Hello and welcome to my blog. Today I have a Halloween card to share with you. It's a quick and easy card to make and it was fun too! Please read on to see how I made today's card.

The base of my card is a folded half-sheet of Basic Black card stock. I cut a 4" x 5-1/4" piece of Basic White card stock and I taped it to the inside.

Next I took an image from the "Them Bones" 12" x 12" Designer Series Paper package. There is a sheet of different scenes and this was one of them. I trimmed it down to 4" x 5-1/4".  I taped that to the front of the card base.

I die cut the cat from another sheet using a matching die. I set it on the fence using Dimensionals.

The pumpkin is from the "Pick of the Patch" set and was stamped using Pumpkin Pie ink. And the face was stamped using black Memento ink.  I also stamped a Pecan Pie stem and a Shaded Spruce leaf. I fussy cut them because I was too lazy to get up and get the punch. There's a matching punch for two pumpkins, a stem, and a leaf.  I set the pumpkin in place on the bottom left of the card using Dimensionals.

I also die cut three bats from the "Them Bones" bundle and I set them in place with a little dot of glue under each one.  And the card was done.

I didn't use any wording on the card. It's kind of obvious it's a Halloween card. I think the jack-o-lantern gives it away.  What do you think? Does it need words?

This was a fun and quick card to make. I really like that cat!!

Thank you SO very much for taking your time to stop in and see today's Halloween card,
Wanda

Friday, October 13, 2023

Christmas Classics, Winter Meadow, Christmas Card, Stampin' Up!

Hello and welcome to my blog. Today I have a quick and simple Christmas card to share with you. Please read on to see how I made today's card.

The base of my card is a folded half-sheet of Lost Lagoon. My card opens on the right and the fold is on the left. After scoring my card in half I cut off a piece from the front right side. I cut away 1-1/2".  You can save this piece for layering of your words if they differ from mine.

I cut a 4" x 5-1/4" piece of Basic White card stock and I textured 1-5/8" on the right side using the "Snowflake Sky" embossing folder. I glued that piece to the inside of the card.

Next I cut a 2-3/8" x 5-1/4" piece of Designer Series Paper (DSP) from the "Winter Meadow" 12" x 12" package and taped it to the left side of the card.

The words are from the "Christmas Classics" set and were stamped using Crumb Cake ink. I thought it would have a nice golden look to it without using gold embossing powder. I die cut them using the second largest rectangle die from the "Nested Essentials" set. And the Lost Lagoon layer behind it was cut using the largest stitched rectangle in that set. I taped the two layers together and then the piece was set in place on the front of the card using Dimensionals. I put two Dimensionals on the edge of the piece that was cut off and on the left side of the word layers, and one in the middle. This way there's no guessing where to put the Dimensionals. You get it right every time! And the card is done. You can add some embellishments if you want but I thought keeping without any gives it a more peaceful looking card.

This was a super easy and quick card to make. You can make 10 cards from one 12" x 12" piece of DSP. I may give this one a second glance when it comes to making our annual card!

Thank you so very much for taking your time to stop in and see today's Christmas card,
Wanda


Thursday, October 12, 2023

Them Bones, Halloween Card, Stampin' Up!

Hello and welcome to my blog. Today I have a fun layout to share with you. And a fun Halloween card.
Please read on to see how I made this card.

The base of my card is a 5-1/2" x 4-1/4" piece of Basic Black card stock.  Yes, this is actually the base. 

On that base I took two strips of Designer Series Paper (DSP) that measured 4" x 1".  And here you thought it was a solid piece of DSP on that layer.  Isn't that fun?  The DSP is from the "Them Bones" 12" x 12" package.

The part of the card that open is the Basic Gray piece in the center. It measures 4" x 8-1/2".  I scored it in half at 4-1/4".  I stamped the front with leg bones from the "Bag of Bones" set using black Memento ink. This piece was then taped to the front of the card. I tried to make sure it was centered from left to right. It's close enough!

I took the same design of DSP and cut a piece for the front. It measures 2-3/4" x 2-3/4".  And the Basic Black piece was cut at 3" x 3". I taped the DSP to the Basic Black piece and then I taped that piece to the Basic Gray piece.

I die cut the skeleton and dog from a sheet of the DSP from the same "Them Bones" 12" x 12" package. I set them in place on the front of the card using Dimensionals.

The words are from the same set and were stamped using black Memento ink on a scrap piece of Basic White card stock. I die cut them using the second smallest stitched circle from the "Stylish Shapes" die set. I also die cut a Basic Black layer using the 1-3/8" circle die from the "Layering Circles" set. I taped the circles together and then they were set in place on the front of the car using Dimenisonals.

I added a 3-3/4" x 4" piece of Basic White card stock to the inside of the card and the card was finished.

Thank you SO very much for taking your time is to stop in and see today's Halloween card,
Wanda

Wednesday, October 11, 2023

Christmas Classics, Winter Meadow, Christmas Card, Stampin' Up!

Hello and welcome to my blog. Today I have another Christmas card to share with you. It's a very quick and easy card to make. Please read on to see how I made it.

The base of my card is a folded half-sheet of Pretty Peacock card stock. I cut off 1-3/4" from the front right edge.

The Designer Series Paper (DSP) is from the "Winter Meadow" 12" x 12" package. It measures 2-3/8" x 5-1/4".  I should have put my DSP on top of the card then I could have seen that it needed to be trimmed a hair shorter on the long sides.  But it's okay, I still like it the way it is. What's nice about a card like this is that when you add the DSP to the front it looks like you've layered it.  So quick and simple, huh? I used tape to affix my DSP.

The words are from the "Christmas Classics" bundle and were stamped using Moody Mauve ink on a scrap piece of Basic White card stock. I die cut them using the stitched rectangle dies from the "Nested Essentials" set. I used the second largest for the words and the largest for the Pretty Peacock layer behind them. 

I centered the word piece and got it to where I thought it looked best. I held it in place with my left hand while I lightly drew a pencil line on the back with my right hand. This way I would know where to line it up after I added my Dimensionals. I put Dimensionals on the edge of the card front and more on the upper part of the word piece. Looking for my pencil line, I set the piece in place.  As simple as that!

I had bought the fun "Loose Holly Gems & Sequins" pack and glued the pieces in place. It gave the card a little bling and a little bit of life.  

For the inside of the card I used the "Snowflake Sky" embossing folder. I set the Basic White card stock inside and lightly marked on the right and left edges where I wanted the piece to be embossed.  I only embossed that area. I glued the piece inside the card and the card was done.

This was a fun and quick card to make. I really do like this layout. I am thrilled with the look of  layering when it's just a piece of DSP on top of the card.

Thank you SO very much for taking your time to stop in and see today's Christmas card,
Wanda

Tuesday, October 10, 2023

Christmas Classics, Winter Meadow, Christmas Card, Stampin' Up!

Hello and welcome to my blog. Today I have a Christmas card to share with you.  As a customer of Terri Gaines, I received a packet in the mail with the paper supplies in it to make 3 cards. She also has a PDF to download for ideas if you want. Those you can find via the link above. Terri is a wonderful demonstrator and stamper. She shares so many fun ideas, card layouts, and techniques. I love attending her Stamp-a-Stacks. Such a fun time and great cards to make. She's got a lot of different ones you get to pick from and there's always something there I just have to make! I've never been disappointed yet! Anyway, I just thought I'd wing it with the card stock and Designer Series Paper (DSP) that was sent to me. I was not able to play on the "World Cardmaking Day" but that's okay, I knew I'd have time to play a few days later. Please read on to see how I made today's card.

The base of my card is a folded half-sheet of Pretty Peacock card stock. I cut off 1-5/8" off the front right side. You can add that piece to your scrap stash! 

I took the piece of DSP in my packet and trimmed the length to 5-1/4" long. I taped that piece to the front of the card, lining it up on the top, bottom, and sides.

On the inside I took a piece of the Basic White card stock in the package and cut it to 5-1/4" x 4", I textured it using the "Snowflake Sky" embossing folder. I only textured about 1-1/2" on the right edge. I glued that piece to the inside of the card. I prefer to use glue when I texture card stock because tape doesn't always stick enough when there's too much texture. There's not enough solid space for the tape to stick to and you have a chance of the piece coming off. My rule of thumb is, if it's textured, glue it.

The words are from the "Christmas Classics" set using Blueberry Bushel ink on a piece of Basic White card stock that was in my package. I die cut them using the second smallest stitched rectangle die in the "Nested Essentials" die set. Then I used the next size larger and die cut a piece of Pretty Peacock. I did not use the other sheet of Pretty Peacock in my package, I just used some scrap that I had. I wanted to make another card using this same layout so I saved the piece sent to me.

I taped the layers together and then set it in place on the front of the card using Dimensionals. I added Small Dimensionals to the upper part of the words layer and I laid it on top of the card to see where I though it looked centered enough. Then I added some small Dimensionals to the bottom edge of the card front. I removed the backing from the Dimensionals and set the piece in place. And the card was done.

I think it has a very peaceful look to it. And I'm glad I had bought that DSP (now I have to open the package!! LOL). 

Thank you SO very much for taking your time to stop in and see today's Christmas card,
Wanda

Monday, October 09, 2023

Bag of Bones, Halloween Card, Stampin' Up!

Hello and welcome to my blog. Today I have a card to share with you that I found in the Stampin' Up! 2023 Fall Mini Catalog.  I don't usually copy a card from there, not because they are not pretty or fun but because I forget about looking in there for ideas and inspiration.  But when I had cut some Designer Series Paper (DSP) from the "Them Bones" 12" x 12"package, I remembered seeing a card made using that one piece. I remembered seeing it in the mini catalog and I turned to page 48 and started in on making it. Please read on to see how the card was made.

First of all I took a half-sheet of Basic Black card stock. Basic White would work too because the DSP covers the whole front.  The DSP from the "Them Bones" package was cut at 4-1/4" x 5-1/2".  I taped it to the front of the card base.

Next I took the piece of DSP that was cut from a sheet of other designs and I taped it to the front of the card, centering it on all sides. 

The skeleton was stamped from the "Bag of Bones" set using Pumpkin Pie ink on a piece of Basic White card stock. I die cut him out using the matching dies. The words are from the same set and were stamped using black Memento ink on a scrap piece of Basic White card stock and that was it for the stamping. I die cut the words using the smallest stitched square die from the "Stylish Shapes" die set. 

The hat, shoes, cane, bowtie, and bats were die cut on Basic Black card stock.

A scrap piece of Basic White card stock was used for the moon and stars. I cut two (they are all on one die). 

Basic Gray card stock was used for the stake "holding" the words, it was 1/8" wide and about 3" long. I kept it long so I could trim off the bottom later once I got the piece in place. I think placing that strip was about the most difficult part of making the card. I had to get it just right or they skeleton wouldn't be centered. The bottom part of the stake was glued to the DSP about 1/4" from the bottom right corner. And the top part of the stake is about 5/8" from the right side.  Hope that gets you the measurements you need when you make yours. The word piece was taped down over a little bit of the top part of the stake.

Next the bats were glued in place. It was easy to figure where they went because the DSP has the bats printed on it and I just covered up the printed ones. The moon was added next and then the stars.

On my worktable I assembled the skeleton. I glued his shoes first, then the bowtie, then the cane, and the hat was last. Dimensionals were added to the back and it was set in place on the front of the card, centering it as much as I could.  

A 4" x 5-1/4" piece of Basic White card stock was added to the inside and the card was done.

I think it turned out rather well. I think it's cute and I don't regret making it. I do regret not paying more attention to the card samples in the catalogs. There was a reason I liked the sets I bought and I'm sure it had to do with a sample in the catalog! I need to pay better attention to those samples for some inspiration.

I thank you SO very much for taking your time to stop in and see today's Halloween card,
Wanda

Sunday, October 08, 2023

Sparkling Snowflakes, Timeless Arrangements, Christmas Card, Stampin' Up!

Hello and welcome to my blog. Today I have two cards to share with you and I'll explain why as I go. Please read on to see how the cards were made.

The base of my cards is a folded half-sheet of Basic White card stock. They open on the bottom and the fold is on the top. 

Then I cut a 4" x 5-1/4" piece of Basic White card stock and textured them using the "Snowflake Sky" embossing folder for each card. I glued those pieces in place on the front of the card base.

Two vellum stitched circles were die cut using the third largest circle die from the "Stylish Shapes" die set. I set them aside.

Next I stamped the "Let it snow" from the "Sparkling Snowflakes" set using Boho Blue ink. I die cut them using the second smallest die in the same set. 

The frilly frozen looking stuff behind the circle is from the "Timeless Arrangements" bundle. I die cut 4 sets of them from the one die. I did cut them into pieces and glued them around the back of the circle. 

Dimensionals were added to the circles and it was set in place over the vellum circles. Then glue was added to the part of the vellum circles behind the card stock. You don't want the glue to show through the vellum. Once the glue was added and the backing removed from the Dimensionals, the piece was set in place on the front of the card.

The circle one was what I ended up with but the rectangle one is what was in my head. I didn't have any stamps with the "Let it Snow" that fit nicely in the rectangle from the "Timeless Arrangements" bundle. But now that I'm looking at them together I am liking the circle one better.  Oh, I forgot to mention the words on the rectangle piece were printed from my computer. The snowflake is from a punch (not Stampin' Up!).  But I had to try it to know which I liked better. How about you. Which one do you like better?

Thank you SO very much for taking your time to stop in and see today's Christmas cards,
Wanda

Saturday, October 07, 2023

Throughout the Year, Around the Bend, Sentimental Park, Birthday Card, Stampin' Up!

Hello and welcome to my blog. Today I have a very quick and easy birthday card to share with you. Please read on to see how the card was made.

The base of the card is a folded half-sheet of Basic White card stock. It opens on the right and the fold is on the left.

I took a 4" x 3-1/2" piece of Designer Series Paper (DSP) from the "Fresh as a Daisy" 12" x 12" package and I taped it to a 4" x 5-1/4" piece of Basic White card stock. When I cut the Basic White piece, I cut it just a hair shorter so no white would show through on the edges after taping the DSP down.

Then I took another piece of DSP from the same package and taped it to the bottom. It was cut at 4" x 2".  A 4" x 1/2" strip of Copper Clay card stock was cut for the strip and it was taped in place between the two pieces of DSP.

Next I stamped the words from the "Throughout the Year" set using Copper Clay ink. I die cut them using the die from the "Sentimental Park" bundle.

The flower is from the "Around the Bend" bundle. I die cut two larger ones and one smaller one for the center. I took a little makeup applicator (tiny spongy thing on a plastic stick) and brushed on some Copper Clay ink on the petals. I also scrubbed a little in the center of one of the larger flowers. 

Then I took some Moody Mauve ink and rubbed some over the little flower for the center. I added a dot of glue to the two larger flowers. I lined them up first (usually I'm doing that while to glue is drying and by the time I figure it out the glue is too dry).  Dimensionals were added to the back and the piece was set in place on the front of the card. The flower cluster was added using a little bit of tape on the left side and a Dimensional on the lower side. And that was it, the card was done.

It is a very quick and easy card, isn't it?  

Thank you SO very much for taking your time to stop in and see today's birthday card,
Wanda

Friday, October 06, 2023

Timeless Arrangements, Pick of the Patch, Halloween Card, Stampin' Up! 2023

Hello and welcome to my blog. Today I have a sweet little Halloween card to share with you. Please read on to see how I made today's card.

The base of my card is a folded half-sheet of Basic White card stock. It opens on the bottom and the fold is on the top.

I cut a 4" x 5-1/4" piece of Basic White card stock and I textured it using the "Distressed Tile" embossing folder. 

Next I stamped the words from the "Pick of the Patch" set using Mossy Meadow ink. I die cut it using the rectangle die from the "Timeless Arrangements" bundle.  I cut it so the words are on the left side.

Three different leaves pieces were die cut using Basic White card stock. I colored one using Pumpkin Pie ink, one using Mossy Meadow ink, and one using Crushed Curry ink. I started out by gluing the Mossy Meadow one first, then the Pumpkin Pie one, and for the Crushed Curry one I only had part of it because I just wanted to fill in an open area. I though about using the other end of it but I just left it as it was. I wanted to keep it simple. I added it to the textured piece using Dimensionals.

The pumpkin is from the "Pick of the Patch" set and was fussy cut. I also stamped and fussy cut the stem and leaf using Pecan Pie on the stem and Mossy Meadow on the leaf. The stem was glued to the back of the pumpkin and the leaf was added next. I added the pumpkin using a Dimensional. 

Dimensionals were added to the back of the textured piece and it was set in place on the front of the card base. And the card was done.

I do like now this card turned out. I think I want to try this making a birthday card and maybe a Christmas card. We'll see how my mind can work that one out! LOL

Thank you SO very much for taking your time to stop in and see today's Halloween card,
Wanda

Thursday, October 05, 2023

Pick of the Patch, Halloween Card, Stampin' Up! 2023

Hello and welcome to my blog. Today I have a Halloween card I found on Pinterest to share with you. You can see the original card here. I chose this card because I struggled with the Designer Series Paper (DSP) image.  I was thinking I probably would not be using it because the other side had the fun skeletons on it that have a matching die. But how many of those cards can you make?  I did manage to find a part of the DSP that had a color skeleton that I was not one of my favorites. Please read on to see how the card was made.

The base of the card is a folded half-sheet of Very Vanilla card stock. It opens on the right and the fold is on the left.

I cut a 4" x 5-1/4" piece of Very Vanilla card stock and textured it with the "Distressed Tile" embossing folder. 

The DSP is from the "Them Bones" 12" x 12" package was cut at 5-1/4" x 2". I took some black and white checked ribbon (mine is retired) that I cut at 6". I taped the ends over the to the backside using scotch tape. Then I glued piece to the card base.

I die cut the Cajun Craze circle using the 9th circle in "Deckled Circles" die set. Then I die cut a Very Vanilla one using the 10th die from the same set.

On the Very Vanilla circle I stamped the words from the "Pick of the Patch" and were stamped using Mossy Meadow ink. 

Next the pumpkins were stamped. The smaller one was stamped using Pumpkin Pie ink and the face was added using black Memento ink. And the other pumpkin was stamped using Cajun Craze ink. They are from the "Pick of the Patch" set.

Two leaves and stems were stamped using Mossy Meadow ink. The pumpkins, stems, and leaves were punched out using the matching punch.

The pumpkins were set on top of the circle to see where the little leaves would be stamped. The pumpkins were moved and the little leaves were stamped using Wild Wheat ink. Then the pumpkins were added. The tall one was glued in place and the smaller one is set in place using Dimensionals. The leaves and stems were glued in place.

The circle piece was added to the front of the card using Dimensionals.  I tied a know using a small piece of ribbon. I didn't measure it because I just tied it while it was still on the spool.

I took some retied gems I had and colored them using the dark Cajun Craze Blends pen. I set them in place on the front of the card and the card was done.

This was a fun card to make and I like how it turned out. I changed my card to a Halloween card instead of a thank you card.

Thank you SO very much for taking your time to stop in and see today's Halloween card,
Wanda

Wednesday, October 04, 2023

Timeless Arrangements, Days to Remember, Wedding Card, Stampin' Up!

Hello and welcome to my blog. Today I was looking on the net for a wedding card to make and I ran across this one. You can see the original card here. What caught my eye was all of the frill around the word piece and the scored lines. SO I got out my supplies and dug in.

The first thing I did was to make the card base, it's a folded half-sheet of Basic White card stock.

I took my scoring board and scored the front (on the inside of the card so the outside would have the bump and not a groove) and I scored at 1/2" from all edges. I think it should have been 3/8" but 1/2" worked just fine too. 

Next I die cut all the pieces from the "Timeless Arrangements" bundle using Basic White card stock. I die cut two of each of the designs. There are individual flower clusters, not attached that were die cut using Vellum. I cut one of each.

The words are from the "Days to Remember" set and were stamped using Boho Blue ink. I die cut it with the die from the "Timeless Arrangements" bundle. Then I began adding the die cut pieces behind it. Some I snipped so they would fill in the open areas and some I just moved over a bit. The object was to fill in the areas. Once that was done I took some glue and glued in the Vellum pieces.

That whole piece was the added to the front of the card using Dimensionals.

A few pearls were added and the card was done.

This was a quick card but not as quick as it sounds on here. It did take a bit of time to die cut all of the pieces, many of them had to be carefully removed from the die.  But all in all it really didn't take that long and it's something I could see myself making again.

Thank you SO very much for taking your time to stop in and see today's wedding card,
Wanda

Tuesday, October 03, 2023

Autumn Leaves, Go To Greetings, Masculine Birthday Card, Stampin' Up!

Hello and welcome to my blog. Today I have a card, actually two cards to share with you. I struggled with which way the Designer Series Paper (DSP) should go. SO I made two and I'll let you decide which one you like. Please read on to see how I made the cards.

The base is a folded half-sheet of Basic White card stock. I cut a 4" x 5-1/4" piece of Early Espresso card stock for the layer.

Then I took the DSP from the "Earthen Elegance" 12" x 12" package and cut it at 3-7/8" x 5-1/8". I couldn't decide if I was going to use it as it is or split it and flip it. SO I did both, thus having two cards. I taped the DSP to the Early Espresso card stock and then I taped that to the card base.

The center strip was made by cutting a 3-7/8" x 1-3/4" piece of Basic White card stock. I sponged the edges using Early Espresso ink. I also took my Blending Brush and just tapped it on the Basic White piece. I had used it with a little bit of Cajun Craze still on it. The words are from the "Go To Greetings" set and were stamped using Early Espresso ink. I taped that to a piece of Early Espresso card stock measuring 4" x 2". And then that was taped to the center of the card.


The leaf was die cut using the "Autumn Leaves" bundle. I took my Blending Brush and brushed on some Flirty Flamingo ink and then some Cajun Craze on the tips. I prayed it with my misting bottle and got way too much water on it so I pressed it into a paper towel and it leaf some nice looking color behind. That is what I meant in the above paragraph about a little bit of Cajun Craze still on the brush.

I colored the stem of the leaf using my Early Espresso marker. Dimensionals were added to the back and the leaf was set in place on the right side of the panel piece.

This was an interesting experiment. I'm leaning towards the split DSP piece than the plain one.

Thank you SO very much for taking your time to stop in and see today's masculine birthday card,
Wanda

Monday, October 02, 2023

Sparkling Snowflakes, Christmas Classics, Christmas Card

Hello and welcome to my blog. Today I am going to share with you a card I found on Pinterest. I thought it was so pretty and I hadn't played with my "Sparkling Snowflakes" set yet. You can see the original card here. And please read on to see how the card was made. Have you ever noticed that most of the cards I seem to find on Pinterest do not have much listed for instructions?  So let me tell you how I made it.

The base of my card is a folded half-sheet of Basic white card stock. I cut a 4"x 5-1/4" piece of Basic White card stock for a layer and a 3-7/8" x 5-1/8" piece of Basic White card stock for the focal piece. I didn't cut that piece down to the needed size until I was done stamping on it, just in case I got too much ink on the edges.

The next thing I did was I stamped the snowflakes on the focal piece using Versa Mark and I used white embossing powder and heat set it. Then I took my Blending Brush and scrubbed on some Highland Heather on the upper part and Pretty Peacock on the lower part. I taped this piece to the other piece of cut Basic White and then those were taped to the card base.

I die cut a vellum circle using the 10th circle in the "Deckled Circle" die set.

The words are from the "Christmas Classics" set and the "Merry" was stamped using Versa Mark on a scrap piece of Fresh Freesia and heat set using white embossing powder. Then I just fussy cut it.

The "Christmas" was stamped using Highland Heather ink on a scrap piece of Whisper White card stock. I fussy cut it out too.

Glue was used behind the "Christmas" words. The original card used Dimensionals behind it. I thought it would look better if it were flat. And Dimensionals were added behind the "Merry" piece. 

I did not have the same snowflakes that were used on the original card. Those were from the "Chic" die set. I did not buy it because the snowflakes were the only dies in it that were of interest to me and I figured I could get by without it. I die use the snowflake dies from the retired "Itty Bitty Christmas" bundle. The were kind of glumped together so I just cut away the ones I wanted to use. I got four pieces and glued two together and then I glued them to the circle. 

Turning the circle over I could see where I would be able to place the Dimensionals so they wouldn't show through. The circle was then set in place on the front of the card.

Some small pearls were added to the center of the snowflakes and the card was done. The original card used a little piece of ribbon. I omitted it and thought it looked just fine.

This was a fun card to make and I love using ink over embossed images. It's fun to see them start to appear.

Thank you SO very much for taking your time to stop in and see today's Christmas card,
Wanda