Pin It

Thursday, March 31, 2022

Artistically Inked, Thank You Card, One Sheet Wonder Technique, Stampin' Up!

I have not done a "One Sheet Wonder" in a long time. When I've done them I've often just used a half sheet of card stock but here I used a full sheet. It was quick and easy and I got 4 cards out of the deal!  I found this card here

The base of the card is a folded half-sheet of Basic White card stock. I cut a 4" x 5-1/4" piece of Fresh Freesia card stock for the layer.  Then I took a half-sheet of Soft Sea Foam and I cut it into 8 strips so I could tape one to each side of the card. I only needed a hair of it showing.  So you can cut your strips as small as 1/2" each. 

To make my "One Sheet Wonder" I took a full sheet of Basic White card stock and stamped all over it. The  "Artistically Inked" stamp set was used here. I used Flirty Flamingo for the larger flowers. Highland Heather was used for the smaller flower and a really small flower was stamped on the inside of the Flirty Flamingo flowers. The leaves were stamped using Soft Sea Foam ink. And the dots were stamped using black Memento ink.

The "thanks" is from the same set and was stamped using black Memento ink. I cut my sheet to 3-3/4" x 5-1/8".  The Soft Sea Foam strips were cut at 5-1/8" long x 1/2".  And the Highland Heather piece was cut at 4" x 5-1/4".

I taped the Soft Sea Foam Strips to the "One Sheet Wonder" piece. Then I tied a ribbon around it. I like to wrap the ribbon around the piece (the ribbon is about 6" long. I use snail tape first and than add scotch tape to make sure it stays in place. Then that piece was taped to the Highland Heather piece and then that was taped to the card base.

A piece of ribbon was slipped under the taped ribbon and a knot was tied.  And the card was done!

Not only is it a "One Sheet Wonder" but a quick one at that too!  Now I have 4 cards that were made in hardly any time at all! And I love the colors. I'm SO ready for spring colors. All of our snow is melted but it's still very brown out there. 

This was a very fun card to make and I really like "One Sheet Wonders"!

Thank you SO much for taking your time to stop by and see today's thank you card and fun technique,
Wanda

To assemble the card, I taped the Soft Sea Foam strips to the 


Wednesday, March 30, 2022

Pansy Patch, Pansy Petals, Birthday or Friendship Card, Stampin' Up!

I couldn't decide if this is a birthday card or a friendship card. I guess it could be used for either. Ifound this card here.  I liked the look of the card and I liked that it used lots of Designer Series Paper (DSP). I also like the doily paper that was used but found out it was something that was purchased and not die cut. I didn't purchase those doilies but I did buy the "Encircled in Beauty" dies. But found out that they are retiring soon. That made me sad because I've hardly used them. So I plan to dig out a bunch of retired DSP and make a bunch of cards with this layout!  I need to use up my DSP!!!

So to make this card I took a 4" x 5-1/4" piece of Basic White card stock.  I added a 4" x 5-1/4" piece of DSP from the "Pansy Petals" 12" x 12" package. You could also use two pieces of the DSP for the sides instead of a larger piece if you only have strips left. The center panel was cut at 2" x 5-1/4".  I taped the larger piece to the card base and the smaller one on top. 

I die cut the lacy piece using a die from the "Encircled in Beauty" die set using a piece of Basic White card stock. I used a double sided stick sheet so it would be a sticker and easier to place on the front of the card. 

This die actually cut out the circle. I took the circle and stamped the words from the "Pansy Patch" set using black Memento ink. I set the lacy part in place and then added the circle to the middle and the card was done.

This is a super quick and easy card to make. And don't forget pretty too!!!

Thank you SO very much for taking your time to stop by and see today's super easy and quick card,
Wanda

Monday, March 28, 2022

Positive Thoughts, All Squared Away, Birthday Card, Stampin' Up!

Today I thought I'd play with some of the items that are going to be retiring. I found this card on Pinterest and I changed it a little. You can see the original card here

The base of my card is a folded half-sheet of Basic White card stock. This card opens on the right and the fold is on the left.

I cut a 4" x 5-1/4" piece of Pale Papaya card stock for the layer. 

The Designer Series Paper (DSP) is from the "You're a Peach" 12" x 12" package. I cut it at 3-7/8" x 5-1/8".  I also cut a piece of the dotted DSP from the same package that measured  3-7/8" x 1-1/2".  I taped the dotted DSP to the floral DSP and that was then taped to the Pale Papaya card stock. 

I took 20" of white Baker's Twine and folded it in half. Then I tied it around the card at the top edge of the dotted DSP.  I tied it in a knot first and then the bow. I didn't want it moving on me.  I trimmed the ends and then taped that piece to the card base.

The words are from the "All Squared Away" set and were stamped using black Memento ink. I die cut the words using the scalloped edge rectangle from the "Stitched So Sweetly" die set. 

I stamped a butterfly from the "Positive Thoughts" set using black Memento ink on a scrap piece of Basic White card stock.  Then I colored it in using light Pumpkin Pie and light Cajun Craze Blends pens.  I die cut the butterfly and set it in place on top of the word piece using a Dimensional. 

The word piece was set in place using Dimensionals and the card was done.

This was a very quick and easy card to make. It's also a very versatile card. You can use it for quite a number of occasions.

Thank you SO very much for taking your time to stop by and see today's birthday card,
Wanda

Sunday, March 27, 2022

Pansy Patch, Friendship Card, Birthday Card, Stampin' Up!

When I saw this card on Pinterest I thought it would be fun to make. Once I got into it I realized I didn't have some of the products used on the original card so I thought I'd just see what I could do with what I had. I really wanted to play with this set because I found out the other day that this set is retiring. It's sad because it's a pretty set and fun too.  But that must mean something even better is going to replace it, right? You can see the original card here.  With the wording here, I couldn't tell if this is a friendship card or a birthday card.  I'm thinking it could be used for either, making it versatile! I also saw that the "Pansy Petals Suite" is retiring. I'm never clear on how that all works. The whole suite or just the Designer Series Paper (DSP)?  I guess I'll just have to wait till the new catalog comes out to see.

The base of the card is a folded half-sheet of Fresh Freesia card stock. This card opens on the bottom and the fold is on the top. 

I took a piece of Fresh Freesia that measured 2-3/4" x 4" and textured it using the "Ornate Floral" embossing folder. I snipped one end into a ribbon bottom. This piece was done using Fresh Freesia vellum card stock. I didn't have any, that's why I went with regular card stock.

Next I stamped the words from the "Pansy Patch" set using Blackberry Bliss card stock. I did set the ribbon piece on top of the front of the card for placement of the words.  Once the words were stamped I glued the textured piece to the front of the card, making sure the space between the words and piece were about the same as the piece and the left edge of the card. 

Now for the die cutting. I took the matching dies and die cut the flower pieces. I used Fresh Freesia for the upper part of the flower, Basic White for the lower part of the flower and for the edging of the flower I used Blackberry Bliss card stock. I used my Blending Brush and scrubbed on some Fresh Freesia ink over the card stock. Then I glued all of the pieces together and I added a Crushed Curry center. I added Dimensionals to the back and set the piece aside. 

The leaves were die cut using Soft Succulent card stock and I used my Blending Brush and scrubbed on some Soft Succulent ink. The leaves were die cut using Soft Succulent Vellum card stock on the original card. I didn't have any so I just used regular card stock. 

I took 7-1/2" piece of Fresh Freesia ribbon and made a loop at the top and taped the ribbon on the front of the card at about the area where the flower would be covering.  The flower was set on top next but not pressed down. Glue was added to the back of the leaves and they were slid under the flower.  Then the flower was pressed down. 

The ends of the ribbon were trimmed and a 4" x 5-1/4" piece of Basic White card stock was added to the inside and the card was done.

This was a very fun and easy card to make. It was rather quick to make too.  And even without the same supplies, I like how it turned out. I am going to miss this set.

Thank you SO very much for taking your time to stop by and see today's Friendship/Birthday card,
Wanda

Saturday, March 26, 2022

Ornate Thanks, Expressions in Ink, Thank You Card, 2021- 2022 Stampin' Up! Catalog

Today I was in need of a thank you card. I saw this on on Pinterest so I thought I'd give it a try. Mine is a little different but it's basically the same. You can see the original card here

The base of the card is a folded half-sheet of Basic Black card stock. This card opens on the right and the fold is on the left.

I cut a 4" x 5-1/4" piece of Basic White card stock and textured it using the "Ornate Floral" embossing folder. I glued it onto the Basic Black card base.

Next I cut three 1" x 4" strips of Designer Series Paper (DSP) from the "Expressions in Ink" 12" x 12" package.  Then I cut three gold foil card stock pieces at 1-1/8" x 4-1/8". I glued the DSP to the foil pieces and then those were glued to the front of the card.

The words are from the "Ornate Thanks" set and were stamped using Versa Mark and gold embossing powder was heat set on it. This piece measured 4-1/8" x 7/8". The gold foil layer behind it was cut at 4-1/4" x 1". I glued the word piece to the gold foil piece. Dimensionals were added to the back and then set in place on the front of the card about 1-3/4" from the bottom edge of the card.

I had some black dots so I glued them to the front of the card. A 4" x 5-1/4" piece of Basic White card stock was added to the inside and the card was done.

I thought this card would be more difficult than it was considering I didn't have any instructions on how to make it, the link didn't take me to any.  I had to look at the design on the DSP and figure out the size from there. Fortunately I was able to figure it out quickly and the rest is history!   This was a fun and quick card to make.  And it's not ugly!!  LOL

Thank you SO very much for taking your time to stop by and see today's Thank You card,
Wanda


Friday, March 25, 2022

Sailing Home, Senior Years, Masculine Retirement Card, 2022 Stampin' Up! Spring Mini Catalog

After yesterday's "Hot Mess" of a card I decided to go with something a bit more simple (and not ugly!) LOL I found this card while surfing the net. You can see the original card here. This is a fun and easy card to make. 

The base of my card is a folded half-sheet of Basic White card stock. I cut a 4" x 5-1/4" piece of Misty Moonlight card stock and textured it with the "Painted Texture" embossing folder. I glued it to the card base.

The DSP is from the "New Horizons" 6" x 6" stack and was cut at 3" x 4-1/4". I cut a 3-1/8" x 4-3/8" piece of Basic Black card stock for the layer. 

I stamped the words from the "Senior Years" set on the bottom left using black Memento ink. I also used black Memento ink for the birds too. The birds are from the "Sailing Home" set.

I stamped the sail boat from the "Sailing Home" set using black Staz On ink on Vellum card stock. I die cut the boat after I set it dry for a few minutes.  I colored the bottom of the boat using Misty Moonlight ink and my blender pen. It didn't dry.  But it didn't matter. I colored it on the backside of the Vellum. I used my tape runner over the whole boat but it wouldn't stick to the colored part. But it was okay, the tape went on the bottom part of the image where the water is so there was tape all around. I set the boat in place and it was just fine. Even the part that didn't dry!

I took the layered piece and set it in place on the front of the card using Dimensionals and the card was done.

This was a very fun card to make. I enjoyed making it more (so much more) than I did with yesterday's card. And this one is not ugly!!! LOL

I forgot to add: Thank you for the comments yesterday. Gisela will be getting the card. But Mary and Christi, please email me and I will send you each a different card. Look to the right on the side bar where it reads: "Got a Question".  You will find my email there.  Thanks again!

Thank you SO very much for taking your time to stop by and see today's masculine retirement card,
Wanda

Thursday, March 24, 2022

Eden's Garden, Friendship Card, 2022 Stampin' Up! Spring Catalog

Hot mess!  That was what came out of my mouth when I finished this card. What could go wrong did!! And as I have always done, I have posted the good, the bad, and the ugly. This one bad and ugly!!! LOL I am not even sure I should post how it was made. I can't imagine anyone wanting to make one!! LOL But I will in the event someone can improve on it. If you can, I would gladly post it on here and give you full credit!  All I wanted to do was play with the tringle dies.

The base of my card was a folded half-sheet of Basic White card stock. This card opens on the right and the fold is on the left. So far so good!!

I die cut the stitched triangle from the "Stitched Triangle" die set. I used the 3-1/2" x 3-1/2" x 4-3/4" die for the outside and the2-1/2" x 2-1/2" x 3-2/3" for the center so it would create just a triangle frame. The solid Basic White piece that came from the middle was set aside for a future card (maybe!).  I had used a double-sided sticky sheet on the card stock to make my piece into a sticker. 

I used the 2-1/2" x 2-1/8" x 3-1/2" die for the Designer Series Paper (DSP) that was from the "Abstract Beauty" 4" x 6" package. 

I took the same die and cut a triangle from the center of a 4-1/4" x 5-1/2" piece of card stock. I had a piece that was ruined so it was nice to be able to use it for something useful. I made a stencil with it. Then I took my blending brush and scrubbed on some Granny Apple Green using that stencil. 

Then I set the Basic White triangle in place but I didn't press it down yet. I slipped the DSP triangle under the Basic White tringle and I did press it down where those points of the DSP went under it. I lifted the DSP triangle and added a bit of glue to hold it in place along the bottom part of the triangle. I needed the top part open for the leaves.

I die cut Balmy Blue and Blushing Bride leaves that came from the "Forever Fern" bundle. I also cut 3 gold foil small leaves. I added a little glue to the stems of all of the pieces and slipped them under the triangles. 

The words are from the "Eden's Garden" set and caused me problems too. I had wiped the word piece off and it wasn't completely dry when I inked it up with black Memento ink. Thus the bleeding of the ink. UGH!  Now I could have made a new one but at this point I figured this card couldn't get any uglier than it was, so I just went with it! I die cut the words with a die from the "Tasteful Labels" set and I set the piece in place using Dimenisonals.  And the card was done. Thank goodness!  The hot mess was over!  Now who is going to get this card?  My email in on the the right sidebar under "Got a Question".  If you'd like it, email me with your snail mail address. The first one to respond will get the card mailed to them in an envelope with the card and envelope so you can pass it along.  Kind of like that fruit cake at Christmas, you keep that thing moving along!  LOL

Thank you for bearing with me here!  I promise tomorrow's card will be better,
Wanda

Wednesday, March 23, 2022

Celebrating You, Artistically Inked, Mother's Day Card, 2022 Spring Mini Catalog

Quick. Easy. Elegant.  This card is also super simple too!  

The base of my card is a folded half-sheet of Basic White card stock. This card opens on the right and the fold is on the left. 

I cut a 3-1/4" x 4-1/2" piece of Designer Series Paper (DSP) from the "New Horizons" 6" x 6" set. I will be saving the strip for a future card. This paper is SO fun and pairs super well with the "Grassy Grove" bundle. I am hoping to play with that set a bit more.

A 3-3/8" x 4-5/8" piece of Highland Heather was cut for the layer.  I didn't tape the DSP to the layer because I needed to see what I was going to do about the words first.

I die cut the flowers using the die from the "Artistic Dies" set that went with the "Artistically Inked" bundle.  I used gold foil card stock to cut the flowers. I had also used the double-sided sticky sheet so it would become a sticker. I hate gluing tiny areas like that, especially when there are so many.

The words are from the "Celebrating You" set and were stamped using Versa Mark and gold embossing powder. I die cut them using the die from the "Tasteful Labels" die.  Then I die cut two more from the center of the Highland Heather card stock.

I taped the DSP to the Highland Heather layer and then I taped that in place on top of the card base.

The word piece as taped to the Highland Heather pieces, one above and to the left and one below and to the right. Dimensionals were added to the back and the piece was set in place. And the card was done.

Pretty, isn't it?  What mom wouldn't love to get that for Mother's Day?

Thank you SO very much for taking your time to stop by and see today's Mother's Day card,
Wanda

Tuesday, March 22, 2022

Celebrating You, Mother's Day Card, 2022 Stampin' Up! Spring Mini Catalog

While putting some Designer Series Paper (DSP) away and a piece fell out of the package. I need to start picking up these packages with the opening on the top. LOL

The base of the card is a folded half-sheet of Basic White card stock. This card opens on the bottom and the fold is on the top.

My piece of DSP from the "Expressions in Ink" 12" x 12" package, measures 2" x 4". I cut a 1/2" x 4" strip of the striped DSP from the same package. I taped the DSP pieces together. It now measures 2-1/8" x 4". Then I cut a piece of Magenta Madness card stock at 2-1/4" x 4-1/8". I taped the DSP to the card stock and that was taped to the front of the card. I eyed it so the left and top are pretty equal.

The words are from the "Celebrating You" set and were stamped using Melon Mambo ink because I didn't have any Magenta Madness ink. I die cut it with a die from the "Tasteful Labels" die set. And I die cut a piece of gold foil card stock using another die from the same set. I taped the gold piece down and added Dimensionals to the word piece and set it on top of the gold foil piece. Three gold "Metallic Pearls" to the bottom of the words.  And the card was done!

This is a very quick and easy card to make. I love it that I was able to use a piece of DSP that would have been considered scrap. I like how the card turned out.  I think this card can be used for several other occasions as well.

Thank you SO very much for taking your time to stop by and see today's Mother's Day card,
Wanda

Monday, March 21, 2022

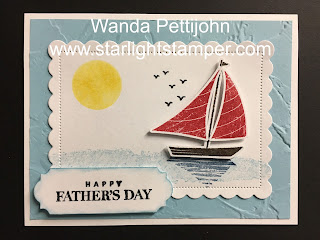
Let's Set Sail, Celebrating You, Father's Day Card, Masculine Card, 2022 Stampin' Up! Spring Mini Catalog

I have been using the "Celebrating You" set an awful lot. It's got a lot of fun wording in it and in different fonts.  I wanted to make a masculine card today and I saw the Father's Day wording so I went with that.  Here's how I made my card. 

The base of the card is a folded half-sheet of Basic White card stock. This card opens at the bottom and the fold is at the top.

I took a  4" x 5-1/4" piece of Balmy Blue card stock and textured it using the "Painted Texture" embossing folder. I glued it to the card base.

Then I die cut the scalloped edge rectangle from the "Colors & Contour" bundle. I stamped the water using Balmy Blue ink that was stamped off once. 

Next I stamped the boat using Early Espresso ink. The sails were stamped using Real Red ink. I punched them out with the matching punch.  I glued the sails to the mast and set it aside. 

I punched a 1" circle and used it as a stencil. I took my blending brush and scrubbed in some Daffodil Delight ink.  

Then I set the boat about where I wanted it to go so I could stamp the shadow. Did you ever get a stamp in your set and you look at it 15 different ways and still can't figure out what it is?  Well, that was this image for me. It wasn't until I saw it on a card someone had made and the lightbulb brightened up the room!!! LOL  Yup, it's a shadow!  I stamped it using Misty Moonlight ink. The birds were stamped using black Memento ink. 

The rectangle was then glued onto the front of the card. The sail boat was set in place using Dimensionals.  

The words are from the "Celebrating You" set and were stamped using black Memento ink. They were die cut using a die from the "Ornate Frames" die set. I took my blending brush and brushed the edges using Balmy Blue ink. I set the word piece in place using Dimensionals and the card was done.

This is a very quick and easy card to make. And I like the set even more now that I know what all the pieces are for! LOL  

Thank you SO very much for taking your time to stop by and see today's Father's Day card,
Wanda


Sunday, March 20, 2022

Flowering Fields, Forever Fern, Celebrating You, Mother's Day Card, 2022 Stampin' Up! Spring Mini Catalog

While I was putting my "Flowering Fields" Designer Series Paper (DSP) away, a piece fell out and I took it as an omen and thought I'd make a card with it for today's post.  This is what I came up with and here's how I made it.

The base of the card is a folded half-sheet of Basic White card stock. This card opens on the right and the fold is on the left.

I cut a 4" x 5-1/4" piece of Basic White card stock and I textured it using the "Ornate Floral" embossing folder. I glued this to the front of the card.

The piece of DSP from the "Flowering Fields" 12" x 12" package measured 2" x 4-1/4".  I cut a 2-1/8" x 4-3/8" piece of Pool Party card stock for the layer. I taped the DSP to the card stock and then I glued the piece in place on top of the textured card stock.

I die cut the gold foil flower/leaves using the die from the "Forever Fern" bundle. I also cut the smaller leaves from the same die set. I used a scrap piece of Basic White card stock for that.

Then I took some Linen Thread and made three loops. I use glue dots to hold the loops together where the ends of the thread meet.  I used a dot of glue to hold the thread in place.

The words are from the "Celebrating You" and were stamped on a scrap piece of Basic White card stock using black Memento ink. I die cut it using the die from the "Tasteful Labels" die set. I added Dimensionals behind the word piece.   A little bit of glue was added to the stem of the gold leaves piece and they were set in place over the area where the thread was glued down. I added a little bit of glue to the white leaves and then the words were added at the same time as the white leaves. I just slipped them under before I pressed down on the words.

Three "Polished Dots" were added to the front of the card and the card was done.  This was a quick and easy card to make and I used that piece of DSP that just fell out of the package. I like how the card turned out. It's got a bright springy feel to it.  And again, this is a very versatile card and can be used for a variety of occasions.

Thank you SO very much for taking your time to see today's Mother's Day card,
Wanda


Saturday, March 19, 2022

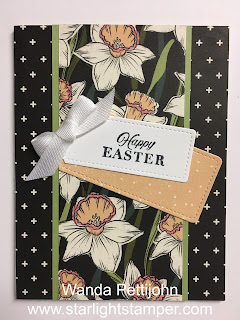
Celebrating You, Daffodil Afternoon, Easter Card, 2022 Stampin' Up! Spring Mini Catalog

Today I thought I would try a card using the other tag dies in the set. You can see the corners are rounded and on the white piece you can see how the corner starts to go inward. The ribbon is hiding the rest. 

The base of my card is a folded half-sheet of Basic Black card stock. You can use any color you want that goes with the Designer Series Paper (DSP). This card opens on the right and the fold is on the left.

I cut a 5-1/2" x 4-1/4" piece of DSP from the Sale-a-Bration "Daffodil Afternoon" 12" x 12" package. I forgot this was retired but I'm sure you still have some left in your stash!!! I know I do. You know I do!!! LOL  I taped the DSP to the front of the card.

I cut a 5-1/2" x 2-1/2" piece of the DSP for the center panel. Then I cut a 5-1/2" x 2-3/4" piece of Pear Pizzazz card stock for the layer. I taped the DSP to the card stock and then I taped that to the front of the card.

I took a dotted Pale Papaya piece of DSP and die cut the second smallest tag.  The words are from the "Celebrating You" set. I stamped them on a scrap piece of Basic White card stock using black Memento ink. I die cut it with the smallest tag die. I set the tags on top of each other and positioned them to where I liked the look and I lifted one edge and added a little tape and then lifted the opposite edge and added more tape. I turned them over and added tape to the back and set them in place on the front of the card. 

I tied a white bow and glued it to the area on the tags where the holes are.  

A 4" x 5-1/4" piece of Basic White was added to the inside of the card and the card was done.

This was a very fun and easy card to make. I may have to try this with some current DSP. Look how much was used!!! You can use this card for a number of other occasions, it's very versatile. 

Thank you SO very much for taking your time to stop by and see today's Easter Card,
Wanda


Friday, March 18, 2022

Daffodil Afternoon, Eden's Garden, Friendship Card, 2022 Stampin' Up! Spring Mini Catalog

When I finished making this card, the first words out of my mouth were "rich".  This card has such a rich look to it. This is a very easy card to make too.

The base of my card is a folded half-sheet of Basic White card stock. I cut a 4-1/8" x 5-3/8" piece of Basic Black card stock for the layer. I taped it to the front of the card.

I took a 4" x 5-1/4" piece of Basic White card stock and textured it using the "Ornate Floral" embossing folder. I glued that to the Basic Black piece. 

The Designer Series Paper (DSP) is from the "Daffodil Afternoon" 12" x 12" package. A 2" x 3-7/8" piece of the DSP was cut for the focal piece.

A 3" x 4" piece of Basic Black card stock was cut and the bottom was die cut using the die from the "Color & Contour" bundle. I lined up the bottom of the bumps to the bottom of the card stock so not a whole lot of card stock was cut off.  The piece measured about 2-7/8" when I was done. It's okay if yours is a little smaller, it's not going to distort the card at all.  You will just adjust the ribbon and make things look even.

I took some black ribbon that I had and cut a piece 5" long and taped the ends on the backside. I slipped the ribbon (still on the spool) under the taped ribbon, tied a knot and then snipped the ribbon. I like this kind of knot because I can slid it where I want it. I glued this piece to the front of the card.

The words are from the "Eden's Garden" set and were stamped using black Memento ink on a scrap piece of Basic White card stock. I punched them out using the "Double Oval" punch. I also punched out the scalloped Basic Black oval using the same punch. I taped the two ovals together and added Dimensionals to the back. I set the words in place and the card was done.

This is a very quick and easy card to make and it's a very rich looking friendship or sympathy card.

Thank you SO very much for taking your time to stop by and see today's friendship card,
Wanda

Thursday, March 17, 2022

Celebrating You, You're a Peach, Thinking of You Card, 2022 Stampin' Up! Spring Mini Catalog

It must be the luck of the Irish! I've been finding some fun card samples using larger pieces of Designer Series Paper (DSP). A part of my quest to use up DSP this year. I found this card here

To make this card I took a half-sheet of Balmy Blue card stock that was cut on the short side so it measured 4-1/4" x 11". This card opens on the bottom and the fold is on the top.

I cut a 4" x 5-1/4" piece of Basic White card stock and textured it using the "Ornate Floral" embossing folder. I glued that to the front of the card. I prefer glue here because of the texture. I want to make sure there's enough contact to stick to the card stock.

I cut the DSP from the "You're a Peach" 12" x 12" package. I did not order the bundle that goes with this DSP. I just loved the paper and hoped I could work with it and so far so good!  I cut the DSP with peaches on it at 5-1/4" x 3".  I also cut the blue striped strip from the same package. It was cut at 5-1/4" x 1/2".  I taped the strip to the left side of the larger piece of DSP.  Then I glued it on top of the Basic White textured card stock.

I die cut the tags from the "Tailor Made Tags" dies. I used the smallest and second smallest tags that had straight angles on the corner areas. The other tags have a concave circle in that same area.  I used the larger of the two tag dies to cut the white dotted peach (Calypso Coral) piece of DSP and the smaller cut a piece of Basic White card stock. After cutting, the smaller piece was textured. I used the "Painted Texture" folder. 

I took some Balmy Blue ribbon (retired but the only Balmy Blue ribbon I had) and cut four 12" pieces. I threaded them through the holes in the tags and tied a bow. I trimmed the ends. Then I glued the tags together so they wouldn't move. Then they were glued to the front of the card.

The words were stamped using the "Celebrating You" set on a scrap piece of Basic White card stock and black Memento ink. I punched them out using the "Double Oval" punch. Then I punched out the scalloped edge using a scrap piece of Balmy Blue card stock. I taped the two pieces together and set them in place using glue.

I found some enamel dots that looked like they matched close enough and I set them in place on the front of the card.  It's nice not stressing about not having the accessories I need. I am just using what I have. For those of you who are demonstrators you know all about switching products out to use what is current!  I use current items when I have them. I have so many here that I need to use up.

This was a very fun and easy card to make. It's got a few pieces to it but SO worth it. It went together quickly and turned out nice. I like it!!

Thank you SO very much for taking your time to see today's thinking of you card,
Wanda

Wednesday, March 16, 2022

Flowering Fields, Peaceful Moments, Thank You Card, 2022 Stampin' Up! Spring Catalog

Today's card is much like yesterday's card. It's from the same place and the same layout. I wanted to make this card because it used that very busy looking Designer Series Paper (DSP) from the "Flowering Fields" 12" x 12" package. That paper was a big challenge for me. One advantage to that DSP is that the backside was used for the grid paper behind the focal piece.  There is also another busy design in that package that I need to challenge myself with.  You can see the original card here. 

The base of the card is a folded half-sheet of Mossy Meadow card stock. This card opens on the bottom and the fold is on the top.

I cut the DSP to measure 4" x 5-1/4".  I taped it on top of the card base.

Then I cut a 4-1/2" x 3-1/4" piece of Granny Apple Green card stock. And a 4-3/8" x 3-1/8" piece of the busy tulip card stock was cut for the top of the Granny Apple Green piece.

I stamped the words from the "Peaceful Moments" using black memento ink in the middle of the Granny Apple Green piece. They were cut out using the die from the "Tasteful Labels" die set. I added Dimensionals on the back and set it aside.

The DSP was taped to the Granny Apple Green layer and a ribbon was wrapped around the front and the ends were taped to the back. I tied a ribbon bow and set it aside.

With the Granny Apple Green layers taped to the card base, the word piece as added and then the bow was glued in place.

A 4" x 5-1/4" piece of Basic White card stock was added to the inside and the card was done.

What a perfect way to use that busy DSP!  I need to see what other busy pieces I have that can be toned down using a large word piece die cut to cover a lot of it.  That's the secret!!!  

Thank you SO very much for taking your time to stop by and see today's thank you card,
Wanda

Tuesday, March 15, 2022

Peaceful Moments, Flowering Fields, Thank You Card, 2022 Stampin' Up! Spring Mini Catalog

When I saw this card I immediately knew I had to make it. Not only because it was so bright and cheery but because it used a nice size piece of Designer Series Paper (DSP), fulfilling my quest to use up lots of DSP!!  You can see the original card here

The base of my card is a folded half-sheet of Poppy Parade card stock. This card opens on the right and the fold is on the left.

I cut a 4" x 5-1/4" piece of DSP from the "Flowering Fields" 12" x 12" package and I taped it to the front of the card.

A 4-1/2" x 3-1/4" piece of Pool Party card stock was cut for the layer. And the DSP from the "Flowering Fields" package was cut at 4-3/8" x 3-1/8" and later taped to the Pool Party piece. A ribbon was to be wrapped around the piece and tied in a bow but I forgot to do that before I taped the piece in place. But it's okay, I still like the way it looks.

The words are from the "Peaceful Moments" set and were stamped using black Memento ink on the center of the Pool Party card stock for the layer. No one will ever know there's a piece missing out of that layer!  Or you can use a scrap piece if you have some. I die cut the words using the fun bordered die from the "Tasteful Labels" die set.  The words were set in place using Dimensionals.  I tied a bow and glued it onto the word piece. I also added a couple of red rhinestones to the word piece.  

A 4" x 5-1/4" piece of Basic White card stock was added to the inside of the card and the card was done.

This was a very fun card to make. I love the colors and I love it that I was able to use a larger piece of DSP!  And I love this layout. 

Thank you SO very much for taking your time to stop by and see today's thank you card,
Wanda

Monday, March 14, 2022

New Horizons, Wildflower Path, Thank You Card, 2022 Stampin' Up! Spring Catalog

I found this card on Pinterest. There was something about it that caught my eye. I'm not sure if it was how the card was made or if it was the "New Horizons" Designer Series Paper (DSP). You can see the original card here

The base of my card is a folded half-sheet of Basic White card stock. The sheet was cut on the short 8-1/2" side so once cut the piece measured 4-1/4" x 11".  

The piece was scored at 5-1/2" and folded in half. This card opens on the bottom and the fold is on the top.

I cut a 3" x 3" piece of the DSP and stamped the words from the "Wildflower Path" set using black Memento ink.

 A 3-1/8" x 3-1/8" piece of Misty Moonlight card stock. I taped the DSP to the card stock and that was taped to the front of the card. I lined up the left, top, and right sides eyeing it as equally as possible.  

Next I took my card to my scoring board and with the front facing the scoring board and the image side on the right, I scored lines at 9-1/2", 9-3/4", and 10".  I scored it this way because I wanted the front to have bumps and not indentations.  And that was it!

This was another super easy and quick card to make.  I'm still now sure what I like more, the DSP or the scored lines. It's a tossup!  I just like the looks of this card.

Thank you SO very much for taking your time to see today's thank you card,
Wanda

Sunday, March 13, 2022

Celebrating You, Mother's Day Card, 2022 Stampin' Up! Spring Mini Catalog

Today I used one of my favorite layout. It's my go to layout card. It's perfect for using up some strips of Designer Series paper (DSP)!  See, still on a quest to use up DSP!  A never ending quest, right? LOL

The base of my card is a folded half-sheet of Basic White card stock. This card opens on the right and the fold is on the bottom. 

My DSP measured 1-3/4" x 4-3/4" and it will be taped that to a 2" x 5" piece of Daffodil Delight card stock. Then it was taped to the front of the card.

I stamped the words from the "Celebrating You" set using black Memento ink and I punched them out using the "Double Oval" punch.  I used this same punch to punch out the Daffodil Delight scalloped oval for the layer. I taped those two pieces together and added Dimensionals to the back.

The word piece was set in place and a few black sequins were set on the bottom right of the card. The are retired but it was what I had on hand. That bottom area needed something.  If you have current products you can use them, I don't have any. I am trying to use up what I have here.

This was a fun card to make. It's super quick and pretty too. I have a nice stash of Mother's Day cards made and I plan to make more.  There's a place I found that you can send cards to people. I try to send a few every month.  You can also check in with senior buildings and senior homes in your area if you are interested in sending cards more locally.  I just think it's fun to do and it feels good doing it.

One thing I like about this card is it can be used for several other occasions too!

Thank you SO very much for taking your time to stop by and see today's Mother's Day card,
Wanda

Saturday, March 12, 2022

New Horizons, Let's Set Sail, Art Gallery, Friendship Card, Stampin' Up!

In my quest to find cards that use a lot of Designer Series Paper (DSP), I found this card on Pinterest. You can see the original card here

The base of my card is a folded half-sheet of Misty Moonlight card stock. This card was cut in half on the shorter side so it measured 4-1/4" x 11" after cutting.  I scored it at 5-1/2" and then folded it on that score line.

I cut a 4-1/8" x 5-3/8" piece of Blackberry Bliss.

Then I cut 1-1/4" x 5-1/4" strips of the DSP from the "New Horizons" 6" x 6" stack.  I cut the 3/4" off the top part of the DSP.

I taped the strips to the Blackberry Bliss piece. I love paneled cards but I hate assembling them because I struggle to get them even. I laid them out on the Blackberry Bliss piece to give me an idea where they should go and then I taped them in place. 
Next I stamped the birds from the "Let's Set Sail" set using black Memento ink.

The words are from the "Art Gallery" set and were stamped using Blackberry Bliss ink on a scrap piece of Basic White card stock. I die cut them using the stitched die from the "Tasteful Labels" die set. I also die cut a Blackberry Bliss one too. I could have die cut it from the piece I used to tape the panels to but I didn't want to mess with making sure I get it in the right spot. I had a scrap piece, so I used that. I taped the Blackberry Bliss piece behind the word piece. 

The Blackberry Bliss piece of card stock with strips on it were taped to the card base. 

Dimensionals were added to the word piece and it was set in place on the front of the card.

A 4" x 5-1/4" piece of Basic White card stock was added to the inside of the card and the card was done.

This was a super easy and quick card to make. I just can't get enough of this DSP!

Thank you SO very much for taking your time to stop in and see today's Friendship card,
Wanda


Friday, March 11, 2022

Artistically Inked, Flowering Fields, Birthday Card, Stampin' Up!

I gave my "New Horizons" Designer Series Paper (DSP) a rest today!  I didn't want to. I have found SO many cards that used it in the background but there's more days ahead to use it.  I still have a lot of paper in the "Flowering Fields" 12" x 12" package so I thought I'd put together a quick and easy birthday card. Here's how I made this card. 

The base of the card is a folded half-sheet of Basic White card stock. This card opens on the right and the fold is on the left.

I cut a 4" x 5-1/4" piece of DSP from the "Flowering Fields" package. I taped it to the card base.

Then I cut a 2-7/8" x 4" piece of DSP from the same package.  I taped that piece to a 3" x 4-1/8" piece of Basic White card stock. I added Dimensionals to the back and set it on top of the variegated green DSP.  

The words are from the "Artistically Inked" set and were stamped using black Memento ink on a 2-3/4" x 3/8" piece of Basic White card stock. I cut a 2-7/8" x 1/2" piece of Old Olive card stock for the layer.  I taped the two pieces together and then taped them to the front of the card about 1-3/8" from the bottom edge of the card base. 

A bow was tied and glued in place using Tombow Mono glue and the card was done.

It's sweet, pretty, quick, and easy too!  All the qualities I like in a card!

Thank you SO very much for taking your time to stop by and see today's birthday card,
Wanda

Thursday, March 10, 2022

Grassy Grove, Wildflower Path, New Horizon DSP, Masculine Birthday Card

Today's card is another one using the "New Horizon" Designer Series Paper (DSP). That 6" x 6" stack is a lot of fun to play with and has 48 fun sheets!  These are a great investment. You get a lot of fun designs and in sizes you can work with and hopefully use up??? I have yet to use one of those stacks but I have used up some of the same designs in packages like that! It's a start, right?  LOL

The base of my card is a folded half-sheet of Basic White card stock. This card opens on the right and the fold is on the left.

I cut the DSP from the "New Horizons" package at 3" x 3-1/2".  The trees were stamped using Soft Succulent ink. And the birds are from the "Let's Set Sail" set and were stamped using Soft Suede ink.

 I cut an Evening Evergreen piece of card stock at 3-1/4" x 3-3/4".  I taped the DSP to the card stock. I added Dimensionals to the back and I set it on top of the card base to see where the words were going to be stamped.

The words are from the "Wildflower Path" set and were stamped using Evening Evergreen ink.

The focal piece was set in place on the front of the card base and the card was done.

It doesn't get much easier than that!  This was a super quick and easy card to make. I SO love using this DSP!

Thank you SO very much for taking your time to stop by and see today's masculine Birthday card,
Wanda

Wednesday, March 09, 2022

Sailing Home, Peaceful Moments, New Horizons, Sympathy Card

I loved the layout from yesterday that I had to try another card using it today. 

The base of my card is a folded half-sheet of Basic White card stock. This card opens on the right and the fold is on the left. 

A 4" x 5-1/4" piece of card stock was cut from a quarter sheet of Basic White card stock and was textured using the "Painted Texture" embossing folder. I glued this to the front of the card base.

I also went with the Misty Moonlight card stock again. I liked that color with the Designer Series Paper (DSP).  That piece was cut at 3-1/4" x 4-1/2".

The DSP is from the "New Horizons" 6" x 6" stack. I cut the piece in half.  It reminded me of some of those Paper Pumpkin kits that I wasn't so fond of the original cards so you change them up a bit by cutting them up. Now you went from having 10-12 cards to 20-24! LOL It was a catch 22!  I'm trying to use up my DSP and a full sheet now made 2 cards instead of one.  LOL  So I did make two cards, why not? After cutting the DSP in half, I stacked the two pieces together and cut off 1/2" from the bottom and then cut the piece to measure 4-1/4" tall.  I like this new DSP because you get the effect of watercolor without having to mess with it yourself. I like watercolor but yet I don't. I don't like having to tape my watercolor paper down and wait for it to dry. And hope it dries flat and if it doesn't then you have to press it. And you also hope the colored bleed just right so they don't make mud. You need to control the amount of water. With this stack, I just grab a piece and go! 

I stamped the sail boat from the "Sailing Home" set using black Memento ink. I colored in the sails with Fresh Freesia ink and my Blender pen. The boat was colored in using Misty Moonlight ink and my Blender pen.  And the water was colored in using Soft Succulent ink and my Blender pen.  I die cut the boat using the matching die from the bundle.  Dimensionals were added to the back and I set the piece aside.

I took one of the pieces of DSP and set the sail boat on top to see where I was going to stamp the words and the birds.  The birds are from the "Sailing Home" set and the words are from the "Peaceful Moments" set. I stamped them using black Memento ink.  After I was done stamping, I taped the DSP to the Misty Moonlight card stock.  I added Dimensionals behind that piece and affixed it to the textured card stock. 

Then I added the sail boat and the card was done.

This was a super quick and easy card to make and I'm glad I made two of them. I am making up a box of cards to give to a friend for her birthday and I want a variety in it.  So one will go in my stash and the other will go in the box I have going for my friend.

Thank you SO very much for taking your time to stop by and see today's sympathy card,
Wanda

Tuesday, March 08, 2022

Let's Set Sail, Celebrating You, Father's Day Card, 2022 Stampin' Up! Spring Mini Catalog

I am still on a quest to use as much Designer Series Paper (DSP) as possible but I'm spotting some pretty cards on Pinterest that I'd like to make that have no DSP at all.  Defeats my quest, doesn't it?  LOL  Oh well, I'll try to use up as much as I can, when I can.  SO, today's card uses a sheet from the "New Horizons" 6" x 6" package.  I did find this card on Pinterest. You can see the original card here. 

The base of the card is a folded half-sheet of Basic White card stock. A 4"x 5-1/4" piece of Basic White card stock was cut for the textured layer. I textured it using the "Painted Texture 3D" embossing folder. I didn't have the same folder that was used on the original card so I just used what I had. All you need is a neutral texture. And if you don't have any embossing folders, you could crunch the piece up and open it back up or you could just leave it plain.  I glued my textured piece to the card base.

I cut the DSP at 4-1/4" x 3" and the Misty Moonlight card stock was cut at 4-1/2" x 3-/4".  

The words are from the "Celebrating You" set. I was looking for words of sympathy but I didn't have any that would fit in that area that were current. I could have used retired but I figured I could easily make this into a Father's Day card using the words from that set. I stamped them using black Memento ink. 

The birds are from the "Let's Set Sail" set and were stamped using black Memento ink. I taped the DSP to the Misty Moonlight piece. Dimensionals were added to the back and they were set in place on top of textured piece and the card was done.

This is a very quick and easy card to make. I may see about making a sympathy card using retired words. I don't have very many in my stash.

Thank you SO very much for taking your time to stop in and see today's Father's Day card,
Wanda


Monday, March 07, 2022

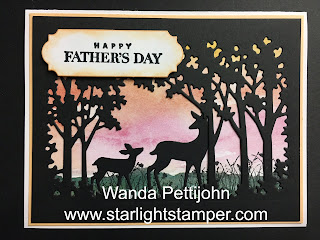
Celebrating You, Grassy Grove, Father's Day Card, 2022 Stampin' Up! Spring Mini Catalog

What I really like about this "Grassy Grove" set is that it's a perfect masculine set. It's great to use for a masculine birthday, Father's Day, get well, thinking of you, and even a sympathy card. My set was still sitting out (no surprise there, right?  LOL) so I thought I'd make another card with this set. It's super easy and quick too!

The base of my card is a folded half-sheet of Basic White card stock. The layer on top of it is a 4-1/8" x 5-3/8" piece of Pale Papaya card stock. You could make the card base a half-sheet of the Pale Papaya card stock if you want. I didn't because I was trying to save on my colored card stock. 

I took a piece of Basic Black card stock and cut it to 4" x 5-1/4".  I die cut the tree image using the die from the "Grove" die set that came with my "Grassy Gove" bundle. Then I cut a piece of Designer Series Paper (DSP) from the "New Horizons" 6" x 6" stack.  I cut it just a hair shy of the 4" x 5-1/4" size the Basic Black die cut piece is.   

Then I took some Basic Black card stock that I had sitting around with the double sided sticky sheet on it and die cut the two deers in the "Grove" set. 

I set the die cut tree piece on top of the DSP to see where I needed to stamp the grass from the "Grassy Grove" set. I used black Memento ink to stamp the grass in two places.  

Next I set the DSP down and put the Basic Black die cut tree on top to see where I wanted the deers to go. I removed the backing on the deers and set them in place. Then I glued the die cut tree image to the DSP. That piece was then glued or taped to the Pale Papaya piece. And then that was affixed to the card base. 

The words are from the "Celebrating You" set and were stamped on a scrap piece of Basic White card stock using black Memento ink. I die cut them with the die from the "Ornate Frames" die set. I took my blending brush and brushed the edges with Pale Papaya ink. I set the piece in place with Dimensionals and the card was done.

I think it turned out well. I LOVE the background. It's like a pretty sunset. I can seem making more of these for a masculine birthday, thinking of you and get well. They are quick, easy, and fun to make too.

Thank you SO very much for taking your time to stop by and see today's masculine card,
Wanda


Sunday, March 06, 2022

Grassy Grove, Many Messages, Thank You Card, 2022 Stampin' Up! Spring Mini Catalog

I found today's card on Pinterest. I was looking for a sample card using the "Grassy Grove" set. I wanted to keep it simple and quick. Plus I wanted to use some Designer Series Paper (DSP). I found the card here

The base of the card is a folded half-sheet of Basic White card stock. This card opens on the bottom and the fold is on the top.

I cut a 4" x 5-1/4" piece of Soft Succulent card stock for the layer.

A 3-7/8" x 5-1/8" piece of Evening Evergreen card stock was cut for the layer the trees were cut from. 
The trees are die cut using the "Grove" dies. 

A piece of DSP from the "New Horizons" 6" x 6" stack was cut just under 3-7/8" x 5-1/8".  I glued around the edges of the Evening Evergreen piece and set it on top of the DSP. I got mine a bit off and trimmed it with my scissors.  I added Dimensionals behind it and set it on top of the Soft Succulent piece. 

The words are from the same "Grassy Grove" set and were stamped on a scrap piece of Evening Evergreen using Versa Mark. Then heat embossed with gold embossing powder. I die cut them using the "Message" dies from the "Many Messages" bundle. There's a lot of fun dies in that set. It's fun because the words are all on one stamp and the dies are all on one piece of metal. So you can cut 20 words at one time. I only cut the one I needed. I was glad those words fit into that space because I really liked the ribbon look. I glued the word piece to a 2-1/16" x 1-1/16" piece of gold foil card stock. Dimensionals were added to the back of it and it was set in place on the front of the card.

I added a few gold "Metallic Pearls" to the front of the card and the card was done.

I want to play with this set some more. There's a LOT of DSP in that stack and there's some fun deers in the die set.  This would make a great Father's Day card, Masculine Sympathy card or Masculine get well card. Another versatile set!  I think I'll try another card without the DSP for those of you who didn't purchase the "New Horizons" package.

Thank you SO very much for taking your time to stop by and see todays' masculine card,
Wanda

Saturday, March 05, 2022

Color & Contour, Grassy Grove, Thank You Card, 2022 Stampin' Up! Spring Mini Catalog

I was sorting through my Designer Series Paper (DSP), pulling out the newly retired packages.  Feeling sad that I didn't use them enough. Though with Sale-a-Bration, you only have 2 months to work with them (unless you're a demonstrator).  So after setting them aside, I was looking at what I had out that was current and decided to make a card with the package that just happened to be on top. I wasn't in the mood to search for anything, just went with what was there! Here's what I came up with.

The base of my card is a folded half-sheet of Basic White card stock. This card opens on the right and the fold is on the left.

I cut a 4" x 5-1/4" piece of Petal Pink card stock. It was a toss up between Balmy Blue or the Petal Pink and I had a lot of Petal Pink so I went with that. I'm glad I did because it made a soft sweet looking card.

Next I cut a piece of Basic White card stock that measured 3-7/8" x 5-1/8" and I textured it using the "Ornate Floral" embossing folder. 

A 5-1/8" 1-3/4" piece of DSP from the "You're a Peach" 12" x 12" package. Before gluing it to the textured piece, I die cut a border using one of the rectangle dies from the "Ornate Layers" dies. I trimmed it to about 3/8" wide and I also had to cut it in half because the die was not long enough to cover that whole side of the DSP. You can't tell it's two pieces, the focal piece covers it. I glued the lacy border to the DSP.  Then the DSP piece was glued onto the textured piece. I prefer to use glue on textured pieces because I have had problems with tape not covering enough of the surface to stick. With glue, I know it will hold.  I also glued the textured piece to the Petal Pink layer and that was taped to the card base. 

The focal piece was die cut from a piece of Basic White card stock. The flower was stamped using Black Memento ink. I colored the leaves using my light Granny Apple Green Blends pen. The flowers were colored in using both light and dark Petal Pink Blends pens. The piece was set in place on the front of the card using Dimensionals.

The words are from the "Grassy Grove" set using black Memento ink on a scrap piece of Basic White card stock. They were punched out using the "Double Oval" punch. The layer behind the words was also die cut from that same punch using Petal Pink card stock. I taped the two ovals together. It was set in place on the front of the card using a Dimensional on the right side and tape on the left. And the card was done.

I do like how it turned out and I'm glad I used the Petal Pink color. I think it made a sweet looking card.

Thank you SO very much for taking your time to stop by and see today's thank you card,
Wanda

Friday, March 04, 2022

Flowering Fields, Sweet Ice Cream, Birthday Card

I have some Designer Series Paper (DSP) from the "Flowering Fields" package that I was struggling with. I'm still struggling with half of it but I was able to come up with something for a card with the bottom half. The DSP images came from the upper left corner and got larger as it went across the page. I didn't know how to work with it.  So here's what I did with a piece from the bottom of that sheet.  I was able to make two cards using that strip. The purple was on the left and the yellow ones were on the right.

The base of my card is a folded half-sheet of Basic White card stock.  I cut the full sheet on the shorter side so it measured 4-1/4" x 11".  This card opens on the bottom and the fold is on the top.

I cut the DSP from the bottom of the sheet at 1-3/4" x 4-1/4".  For the purple one I cut a piece pf Merry Merlot at 1-7/8" x 4-1/4" and I taped the DSP to it.  I did the same for the yellow piece.  When I cut the DSP, I cut the purple one across, leaving the factory edge on the left. And for the yellow one I left the factory edge on the right. I didn't want to catch any of the area where the two colors meet. 

The words are from the "Sweet Ice Cream" set and were stamped using black Memento ink. I stamped them about 1/2" up from the bottom edge.

I taped the flower layer strip in place about 3/4" down from the top. And that was it. It's super simple to make and when you cut the 1-3/4" strip from the 12" x 12" sheet you can get two cards.  I like them both and I really liked how easy it was to make them.  Plus I used a piece of DSP that I was struggling with.

Thank you SO very much for taking your time to stop in and see today's Birthday card,
Wanda

Thursday, March 03, 2022

Wildflower Path, Flowering Field, Birthday Card, Stampin' Up! 2022 Spring Mini Catalog

I think the theme this week is Designer Series Paper (DSP), the quest to use it up!  And then I laugh because the pieces I use are hardly enough to use up a package of DSP!  But it's the effort, right?

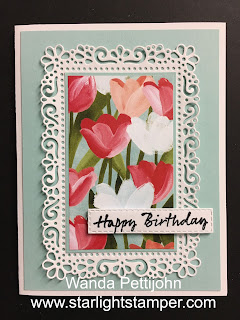
The base of the card is a folded half-sheet of Basic White card stock. The next layer is a 4" x 5-1/4" piece of Pool Party card stock.

I die cut the lacy frame from the "Ornate Layers" die set. I cut it from a piece of Basic White card stock. 

Then I cut a 2-1/4" x 3-5/8" piece of Pool Party card stock. When I cut this piece I had the edge on my card stock on the edge of the line on my cutter so it was a hair short of the actual measurement. I didn't want my card stock to go over the dots.  

I cut the DSP from the "Flowering Field" 12" x 12" package at 2-1/8" x 3-1/2" and I cut it a bit scant too. I taped the DSP to the Pool Party piece and then taped both of those to the lacy piece. Then that was taped to the Pool Party layer and then that was taped to the card base.

The words are from the "Wildflower Path" set and were stamped using black Memento ink on a scrap piece of Basic White card stock. I die cut them using the long thin "Rectangle Stitched Framelet". It's the one in the grouping of 4. I set the words in place using Dimensionals. And the card was done.

I think it tuned out nice, even though I didn't use as much DSP as I was hoping to. I do love those flowers. This would make a great Easter, Mother's Day, Thinking of You, or Get Well card.

Thank you SO very much for taking your time to stop by and see today's Birthday card, 
Wanda

Wednesday, March 02, 2022

Celebrating You, Flowering Fields, Mother's Day Card, 2022 Stampin' Up! Spring Mini Catalog

Since Sale-a-Bration is order, I took a look at the Designer Series Paper (DSP) that I had left over and I just shook my head. I need to hit the paper a lot harder. Not that a piece that is used in this card is going to put a big dent in the package but if you make several at a time, it will!

The DSP is from the "Flowering Fields" 12" x 12" package. I cut a 2" x 5-1/4" piece for my card.

The base of my card is a folded half-sheet of Basic White card stock. This card opens right and the fold is on the left.

I cut a 4" x 5-1/4" piece of Basic White card stock and textured it with the "Ornate Floral" embossing folder. 

I cut a 2-1/8" x 5-1/4" piece of Pumpkin Pie card stock for the layer behind the DSP. I taped the DSP to that layer. and then I glued that to the textured piece. 

Dimensionals were added to the back of the textured piece and it was set in place on top of the card base. 

The words are from the "Celebrating You" set and were stamped using Evening Evergreen ink. I die cut them using the die from the "Ornate Frames" set. I set them in place using Dimensionals.

I added a few "Genial Gems" to the front of the card and the card was done.

This is a very quick card to make. I made two because the piece of DSP I had was big enough for both. I chose Mother's Day because I still had that stamp sitting out.  My worktable is a mess!  But this card could easily make a Birthday, Get Well, Thinking of You, or even a Sympathy card. 

I like this layout and may use it for more cards to use up some DSP. I have quite the hoard of DSP!

Thank you SO very much for taking your time to stop by and see today's Mother's Day card,
Wanda

Tuesday, March 01, 2022

Celebrating You, Easter Card, 2022 Stampin' Up! Spring Mini Catalog

Oh, why not get a jump on Easter cards?  When I saw a card with these flowers on it, I immediately thought "Easter".  I saw that card on Pinterest. You can see it by clicking here

The base of the card is a folded half-sheet of Very Vanilla card stock. This card opens on the right and the fold is on the left.

I cut a 4" x 5-1/4" piece of Evening Evergreen card stock for the layer. Then I cut the Designer Series Paper (DSP) from the "Daffodil Afternoon" 12" x 12" package to measure 3-7/8" x 5-1/8". 

Before taping the DSP to the Evening Evergreen, I punched out the scalloped oval using the "Double Oval" punch. I made sure I didn't catch the smooth bottom oval on the edge of the card stock. It's too bad the punches weren't turned 90 degrees that way you could punch each one easier and maybe only punch the one you need. To use the smooth oval you need to punch them both out or punch the bottom one and catch some of the top depending on the size of your card stock. Anyway, I managed to get the scallop punched out without ruining the edge of the Evening Evergreen piece. Once the scalloped oval was punched out, I taped the DSP to the card stock. And then I taped that to the card base.

The words are from the "Celebrating You" set and were stamped using black Memento ink on Very Vanilla card stock. I punched them out using the smooth oval on the same punch. I taped the ovals together. Dimensionals were added to the back and the piece was set in place on the front of the card. And the card was done.

This was a very quick and easy card to make. And I got to use a large piece of DSP!  This would make a pretty Mother's Day card, Thinking of You card, Get Well card, and a pretty Birthday card.

Thank you SO very much for taking your time to stop in and see today's Easter card,
Wanda