Monday, January 31, 2022

Eden's Garden, Thinking of You Card, Fun Fold, 2022 Stampin' Up! Spring Catalog

I found this fun fold technique on Pinterest so I thought I'd give it a try. You can see the original card here. There's a brief show of how it opens there and if you click through there's instructions but they are for a 5" x 7" card. Here's how I made mine.

The base of my card is a folded half-sheet of Basic White card stock. Two pieces of Designer Series Paper (DSP) from the "Flowering Fields" 12" x 12" package were cut. One measures 4" x 5-1/4" and the other was cut at 3-3/4" x 5".  The larger layer is the backside of the smaller flowered layer.  I taped those two layers together.

Next I lined up my 1-7/8" circle die and cut it out in the upper part of the card. I tried to line up the sides and top to get the circle equal on those sides. After cutting the circle out I taped the layer to the front of the card. I set the die back in the open circle area and die cut the Basic White circle out on the front.

Then I cut a 5-1/4" x 8" piece of Merry Merlot card stock. I scored it at 4" and 6".  I folded the piece in half, the raw edges are on the left and the fold line is on the right. I took the left raw edge and folded the scored piece towards the folded edge. The piece has a valley fold and a mountain fold. I taped the large unscored part of this piece to the inside of the Basic White card base. 

I used the 1-1/4" scalloped die and cut another piece from the backside of the flowered DSP. The words were stamped from the "Eden's Garden" using Merry Merlot ink on a piece of Basic White card stock. Then I stamped the leaves from the "Eden's Garden" using Just Jade ink. The 2" scalloped circle die to cut them out. Dimensionals were added to the back and the piece was set in place on top of the scalloped DSP piece. 

Now here's the tricky part. I shut the card by first folding in the right Merry Merlot piece and then the font of the card base was closed. I slipped the scalloped circle layers between the piece so it showed up in the circle on the front of the card. I lifted the edge up a bit and put some tape under it. You can use glue if you prefer. Then I opened up the card and added some more tape to that side of the circle to make sure it stayed in place. Glue probably would have been easier to put in that tape but I often do things the hard way! LOL  After the piece was set in place, I added three crystal rhinestones to the Basic White circle.  A 3-3/4" x 5" piece of Basic White was added to the inside and the card was done.

This was a fun card to make. A very interesting fold too!  I am not all that fond of it because the card doesn't stay closed. It does catch on the circle by the Basic White scallop but it's still partially open. Not a look I like. But all in all it's a pretty card and will brighten up someone's day.

Thank you SO very much for taking your time to stop by and see today's thinking of you card,
Wanda


Sunday, January 30, 2022

Friendly Hello, Happiest of Birthdays, Birthday Card, 2022 Stampin' Up! Sale-A-Bration

I really liked yesterday's card layout so I thought I'd try it again with a more feminine spin on it. So here's what I came up with.

The base of my card is a folded half-sheet of Basic White card stock. This card opens on the right and the fold is on the left. 

I cut a 4" x 5-1/4" piece of Fresh Freesia card stock and taped it to the front of the card base.

The Designer Series Paper (DSP) from the "Friendly Hello" 12" x 12" package was cut at 3-7/8" x 5-1/8". The DSP is from the Sale-A-Bration book.  I taped it to the Fresh Freesia piece.

The words are from the "Happiest of Birthdays" set and were stamped using Fresh Freesia ink. I cut it out using the largest "Stitched So Sweetly" die set.  I taped this piece in place on top of the DSP.

The flowers are from the "Friendly Hello" set that was in the 2022 Stampin' Up! Sale-a-Bration book. I stamped them using black Memento ink and then fussy cut them.  Next I colored the centers with my dark Daffodil Delight Blends pen. The petals were colored in using the light Balmy Blue Blends pen. Then the dark Balmy Blue Blends pen was used to add some detail. I colored the center area of the flowers in using my Wink of Stella pen. I added Dimensionals, removed the backing and set it aside.

The leaves are from the "Bough" punch that I got in the 2022 Spring catalog.  I love having a leaf punch to add little leaves to my flowers. This was a perfect touch. I used Just Jade card stock for the leaves. I cut it into pieces and added the leaves to the back of the flower, making sure the leaves touched the Dimensional so it would stick. Then I set the flower in place on the front of the card. And the card was done.

This was a very fun, quick and easy card to make. I love the blue flowers at the bottom. 

Thank you SO very much for taking your time to stop in and see today's birthday card,
Wanda

Saturday, January 29, 2022

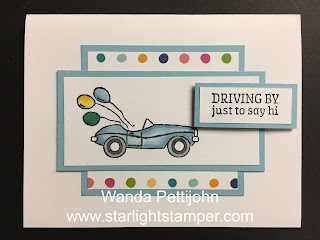
Driving By, Happiest of Birthdays, Birthday Card, 2022 Stampin' Up! Sale-a-Bration Catalog

I found this cute card on Pinterest and just had to give it a try. I think it was the blue colors that caught my eye. What ever it was, I knew I had to make it. You can see the original card here

The base of the card is a folded half-sheet of Basic White card stock. This card opens on the right and the fold is on the left.

I cut a 4" x 5-1/4" piece of Balmy Blue card stock for the layer.

Then a 3-7/8" x 5-1/8" piece of Designer Series Paper (DSP) from the "You're a Peach" 12" x 12" package was cut and taped to the Balmy Blue piece.

The words are from the "Happiest of Birthdays" and were stamped using Balmy Blue ink on Basic White card stock. I die cut them with the largest "Stitched So Sweetly" scalloped rectangle die.  I taped the word piece to the DSP and then I taped all of those to the card base.

The car was stamped using black Memento ink on a scrap piece of Basic White card stock. I colored the windows and above the tires using the light Balmy Blue Blends pen. Then the van was colored in using the dark Balmy Blue Blends pen. I colored over some areas again with the same pen just to make it darker. 

The wheels were colored in using the Basic Black Blends pen. I used my light one because it's darker than the dark one. The hubs were colored in using Smoky Slate Blends pen as well as the bumpers and headlights, tail lights and exhaust pipe. Then I fussy cut the car out.

Wink of Stella was used on the bumpers and the windows.

Dimensionals were added to the back of the van and it was set in place on the front of the card.

I colored some crystal rhinestones using my dark Balmy Blue Blends pen and I set them in place on the words and the wheels.

And that was it. This was a very fun and easy card to make. I really like how this looks. I still don't know what it is about this card but I'm really drawn to it.

Thank you SO very much for taking your time to stop by and see today's birthday card, 
Wanda

Friday, January 28, 2022

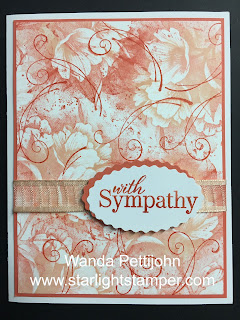
Calming Camellia, Special Moments, Sympathy Card, 2022 Stampin' Up! Spring Mini Catalog

Sadly to say, I am in need of a sympathy card.  So I found this one on the internet and made a few little changes.  You can see the original card here. It's really pretty!

The base of my card is a folded half-sheet of Basic White card stock. This card opens on the right and the fold is on the left.

I cut a 4" x 5-1/4" piece of Calypso Coral card stock. I used the "Double Oval" punch to punch out the scalloped oval piece that I was going to be using for the layer.  

Next I cut a 3-7/8" x 5-1/8" piece of Basic White card stock and stamped the flower from the "Calming Camellia" set. I stamped it using Petal Pink ink and then added Calypso Coral ink to the edges and a little in the center. I used my blending brush and dragged the Calypso Coral color inward and gave a quick swirl in the center. I stamped the image, cleaned off the stamp and repeated this until the piece was covered.  

The swirl was stamped next. I used Calypso Coral ink and stamped it all over the flowered piece. Then this piece was taped on top of the Calypso Coral card stock. 

I took a piece of Petal Pink ribbon I had in my stash and wrapped it around the two layers and taped the ends on the back. Then I taped the two layers to the front of the card.

The words are from the "Special Moments" set and were stamped using Calypso Coral ink. I punched them out using the "Double Oval" punch. I offset the word piece and the oval layer and taped them together. Dimensionals were added to the back and the piece was set in place on the front of the card.  And the card was done.

I really like the background of this card but I'm not so thrilled with the word piece. I think it should have been something larger. But it's still pretty, just not what I was hoping for.

Thank you SO very much for taking your time to stop by and see today's sympathy card,
Wanda

Thursday, January 27, 2022

Friendly Hello, Catch You Later, Friendship Card, 2022 Stampin' Up! Spring Catalog

I think Pool Party is one of my favorite Stampin' Up! colors. I especially love it on this card. 

The base of my card is a folded half-sheet of Basic White card stock. My card opens on the right and the fold is on the left. 

I cut a 4" x 5-1/4" piece of Pool Party card stock and I taped it to the front of the card. 

The Designer Series Paper (DSP) is from the "Sunshine & Rainbows" 6" x 6" stack from the 2022 Sale-a-Brations booklet.  My sweet friend, Colleen gave me a sheet of each design so I could play with them. I cut the DSP at 2" x 5-1/4".  And the Basic White layer behind it was cut at 2-1/8" x 5-1/4".  I taped that onto the Pool Party piece about 5/8" from the fold on the left. 

I stamped the bird from the "Friendly Hello" set using black Memento ink. I colored it in using my Pool Party, Petal Pink, Daffodil Delight and Granny Apple Green Blends Pens. I used the light only for the flower centers and leaves. For the branch I did use light Soft Suede.  I colored the flowers with some Wink of Stella when I was done and I added a couple of "Polished Dots" that I colored over with my dark Daffodil Delight Blends pen. I die cut the piece using the second largest circle from the "Layering Circle" die set. And I die cut a scalloped circle using the largest scalloped die in that same set. I taped the circles together. I added some white dots to every other scallop.  It was a necessary touch. Dimensionals were added to the back and the piece was set in place using Dimensionals. 

The words are from the "Catch You Later" set and were stamped on a scrap piece of Basic White card stock using black Memento ink. I cut the piece to measure 1-1/4" x 3/8".  I cut a 1-3/8" x 1/2" piece of Pool Party card stock for the layer. I taped the two pieces together and Dimensionals were added to the back. The words were then set in place on the front of the card. 

I found this layout on the internet. You can see the original card here. I followed the sketch and the colors but I changed the image and wording.  

This was a very fun, quick and easy card to make. I really like this layout. I've used it in the past but my panels were not that wide and my circles were not that big.  But the layout is pretty much the same.

Thank you SO very much for taking your time to stop in and see today's friendship card,
Wanda

Wednesday, January 26, 2022

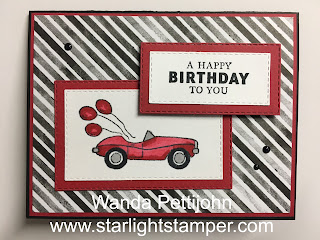
Driving By, Handsomely Suited, Masculine Birthday Card, 2022 Stampin' Up! Sale-a-Bration

Today I found a card on Pinterest that used the "Driving By" set with the red and black theme.  I wanted to make one but I did change mine a little. You can see the original card here

The base of the card is a folded half-sheet of Basic Black card stock. This card opens on the bottom and the fold is on the top.  

I cut a 4-1/8 x 5-3/8" piece of Real Red card stock for the layer and I set it aside. 

The striped Designer Series Paper (DSP) is from the "Abstract Beauty" 4" x 6" stack. I cut it at 4" x 5-1/4" and I set it aside.

The car is from the "Driving By" Sale-a-Bration set and was stamped using black Memento ink on a piece of Basic White card stock. I die cut it using the "Rectangle Stitched" dies.  In the package of dies, this one was the third smallest in the grouping of 8.  The Real Red layer behind it was cut with the next larger die and I used the Real Red layer piece. Plus I cut the second smallest die at the same time. I kept them close to the center of the Real Red piece so no one would know there's card stock missing in the middle!   I colored the car using my light and dark Real Red Blends pens and my light Smoky Slate Blends pen. and light Basic Black Blends pen. I found that my light Basic Black pen is darker than my dark one. SO odd. And now I have to remember that because I usually start out with the lighter color and then go darker.  I see future mistakes happening!!!  Anyway, once the coloring was done, I taped the Basic White piece to the Real Red piece.  

The words are from the "Handsomely Suited" set and were stamped using back Memento ink. I die cut them using the smallest "Stitched Rectangle" die. Then I taped them to the next largest Real Red piece that I had cut out when I cut out the layer for the car.  

And I was now ready to assemble.  I taped the largest Real Red piece to the Basic Black card base. Then the DSP was taped on top of that.

The card layers were taped to the bottom left of the front of the card and the words were set in place using Dimensionals.  I added a few enamel dots that I colored with my Basic Black Blends pen (I used my light one that colored dark!). A 4" x 5-1/4" piece of Basic White was added to the inside of the card and the card was done.

This was a fun and quick card to make. And it's a super nice masculine card too!

Thank you SO very much for taking your time to stop in and see today's masculine birthday card,
Wanda

Tuesday, January 25, 2022

Calming Camellia, Eden's Garden, Friendship Card, 2022 Stampin' Up! Spring Mini Catalog

Now I'm not sure if this would be a friendship card, a sympathy card or a get well card. I guess with the wording it could be all of the above.  I would love to make more of this design but changing the wording to Mother's Day or birthday.  It's such a pretty image. I found it on Pinterest and just had to make one. You can see the original card here.

The base of my card is a folded half-sheet of Gorgeous Grape card stock. I cut a 4-1/8" x 5-3/8" piece for the layer. I stamped the large flower image from the "Calming Camellia" set all around the edges using Gorgeous Grape ink. I didn't need to stamp in the middle because it was going to be hidden. I set the piece aside.

I took a 3-1/8" x 3-5/8" piece of Basic White card stock and stamped the flower using Gorgeous Grape ink. Then I cut a 3-1/4" x 5-3/4" piece of gold foil card stock.  I die cut the 2" scalloped circle from the "Layering Circle" dies from the center of the gold foil piece.  Then I glued the stamped image piece to the gold foil. I chose glue because I've had bad luck with the tape not sticking well to the foil. 

The words are from "Eden's Garden" set and were stamped on a scrap piece of Basic White card stock using black Memento ink. I die cut them with the round scalloped and stitched circle die from the "Tasteful Labels" dies.  I die cut the words closer to the bottom because I wanted to add something to the top of the circle.  Then I glued the circles together.

I glued the layers to the front of the card. And I added three gold "Metallic Pearls" to the upper part of the circle. I added a 4" x 5-1/4" piece of Basic White to the inside of the card and that was it. 

This was a very quick and easy card to make. It's SO elegant looking. I'd love to make more for Mother's Day and Birthdays.   

Thank you SO much for taking your time to stop by and see today's friendship card,
Wanda


Monday, January 24, 2022

Amazing Silhouettes, Sympathy Card, 2022 Stampin' Up! Spring Mini Catalog

My sweet friend, Colleen was over a couple of weeks ago and she had brought her "Amazing Silhouettes" set with her.  And she was so gracious to let me play with it.  Here is what I made with one of the images I stamped. 

The base of my card is a folded half-sheet of Basic White card stock. This card opens on the right and the fold is on the left.

I cut a 4-1/8" x 5-3/8" piece of Flirty Flamingo card stock for the layer.  I didn't tape it down yet because I needed the center of it for the word layer, which I will talk about further down in this post.

Then I cut a 4" x 5-1/4" piece of Basic White card stock for the next layer.

The Designer Series Paper (DSP) was cut at 3-7/8" x 5-1/8". I taped that to the Basic White piece and set it aside.

The image from the "Amazing Silhouettes" set was stamped using Flirty Flamingo ink on a piece of Basic White card stock that measures 2-3/8" x 4-3/4" and the Flirty Flamingo layer behind it was cut at 2-1/2" x 4-7/8".  I taped the stamped layer to the Flirty Flamingo layer.

The words are from the "Special Moments" set and were stamped on a scrap piece of Basic White card stock.  I die cut them with a die from the "Tasteful Labels" set.  I die cut the words up towards the top because I wanted to add something under them. I could have centered them but there's too much space between the top and bottom of them so I just moved them towards the top and hunted for something to put there. I had some retired Flirty Flamingo ribbon so I used that.  I was looking for some type of enamel element but when I saw the ribbon I grabbed it off the shelf and ran with it.

For the layer behind the words, I die cut two of the same shape/size as the word piece. I used the large 4-1/8" x 5-3/8" Flirty Flamingo layer. I die cut them from the center of the piece.  Then I taped the piece to the front of the card. The two die cut pieces were taped to the back of the word piece. One towards the top and left and the other towards the right and bottom.  I added Dimensionals to the back and set it aside.

The stamped panel was taped in place to the left of the card, lining it up on the top, left side and bottom.  Then the words were added. The ribbon was glued in place and the card was done.

This was a very fun and quick card to make. I'm starting to like the "Amazing Silhouettes" set. It's a quick image to stamp. I've seen some cards made with it using multicolored inks that I thought were very pretty.  

Thank you SO very much for taking your time to stop in and see today's Sympathy card,
Wanda

Sunday, January 23, 2022

Friendly Hello, Special Moments, Thank You Card, 2022 Stampin' Up! Spring Mini Catalog

I had my "Abstract Beauty" 4" x 6" Designer Series Paper (DSP) stack still sitting out.  If you know me, you'd have been surprised if the DSP had been put away!!! LOL Anyway, I thought I'd challenge myself today and see if I could use a piece of one of the more difficult looking designs.  I thought the one I had chosen would be a really good test! So here's what I came up with. 

This is one of my favorite layouts because it allows you to really highlight and focus on smaller images in stamp sets. This card is much prettier in real life, the gold that looks like dark mustard here is a gold foil and the light catches it so nicely.  But in the pic it looks like blah splotches.  If you have this DSP you'll see how pretty the gold is.

The base of my card is a half-sheet of Balmy Blue card stock. The full sheet was cut on the 8-1/2" side so after it was cut the piece measured 4-1/4" x 11". I scored it at 5-1/2" and folded it. I used my bone folder to make a nice sharp fold.

Next I cut a Basic White piece that measured 3-1/2" x 4-5/8".

I cut a piece of Highland Heather card stock to measure 3" x 4-1/8" and I cut the DSP to measure 2-7/8" x 4".

I added a little bit of tape on the area where I thought the hole would be punched out. I set the DSP and the Highland Heather pieces together, making sure they lined up nicely.  I took my 1-1/4" circle punch and punched the two pieces together.

Next I took the DSP piece and my 1-3/8" circle punch and with a piece of scrap card stock behind the DSP, I punched out a small thin ring. I tried to line the piece up so the ring was equal on all sides. Then I taped the DSP to the Highland Heather piece. 

I stamped the flower image from the "Friendly Hello" set using black Memento ink on a scrap piece of Basic White card stock. I colored in the leaves using my dark Mint Macaron Blends pen. The flower center was colored in using the light Daffodil Delight blends pen and the flower was colored in using my Blushing Bride marker. I could have used markers for all of them but as I was coloring I didn't pay attention that I didn't have a Blushing Bride Blends pen. I don't think Stampin' Up! makes one.  And if they do, I will need to order them!  Anyway, after I was done coloring I added some Dimensionals around the circle on the backside, centered the flower and set it in place. Then I added more Dimensionals around the rest of the piece and some double-sided tape to the backside of the Basic White stamped piece. If you add Dimensionals there your card will have a big bulge in the center.  And no, I have not done that (yet) to speak from experience.  I'm sure a day will come when I do make that mistake. But at least it will be on the back so when the unnecessary Dimensionals are removed it won't show.  So, I set this piece in place on top of the 3-1/2" x 4-5/8" piece of Basic White.  Tape was added to the back of the Basic White piece and I taped that in place on the front of the card. 

The words are from the "Special Moments" set and were stamped on a 3/8" x 1-1/8" piece of Basic White card stock. I am not really fond of the word "thanks". It doesn't sound as sincere as the full "thank you" does. But I needed something small and this is what I could find.  I think something better could have been used there. Something wider maybe? But this is what was in my head and this is what it looks like on paper!  Not exactly what I was thinking but it's close!  

I cut a 4" x 5-1/4" piece of Basic White card stock for the inside and the card was done. On other cards I've made using this layout,  I had wrapped a ribbon around the word area and tied a knot. I mostly do that when there are words inside the circle.  I've never done both, but I'm sure that would work if you place the ribbon a bit higher and the words right under it.  I'll have to give that a try sometime. 

So that is it. This card didn't take long at all to make and I was able to use a piece of DSP that I thought was rather challenging. 

Thank you SO very much for taking your time to see today's thank you card,
Wanda


Saturday, January 22, 2022

Wildflower Path, Special Moments, Thinking of You Card, 2022 Stampin' Up! Spring Mini Catalog

Today I had a lot of fun making this thinking of you card. And I also got to play with some pretty Designer Series Paper (DSP).  

The base of my card is a folded half-sheet of Basic White card stock. This card opens on the right and the fold is on the left.

Next I cut a 4-7/8" x 2-7/8" piece of DSP from the "Abstract Beauty" 4" x 6" stack.  Then I cut a 5-1/8" x 3-1/8" piece of Magenta Madness card stock for the layer. I taped the two together and then taped them to the right side of the card, lining up the top, bottom and right side.  

With a piece of scrap left over from cutting the larger piece of DSP, I flipped the piece over and used it for the strip under the focal piece.  That strip measures 1-1/8" x 3-3/8".  I cut a 1-3/8" x 3-5/8" piece of Magenta Madness card stock for the layer. I taped the two pieces together and then taped them to the front of the card, about 1-1/4" from the bottom edge and 1/8" from the fold.

Then I cut a 4-1/8" x 1-5/8" piece of Basic White for the focal piece.  I stamped the stem from the "Wildflower Path" set using Just Jade ink.  The flowers were stamped using Melon Mambo ink because I didn't have Magenta Madness.  I had to improvise and Melon Mambo was the closest color.  I stamped off two times for the larger flower part and I stamped off once for the smaller flower image. It looks close enough and you probably wouldn't have known if I hadn't told you.  But I wanted you to know that you can find colors that are close and make things work!  Stamping off did help make this color work better. I added Dimensionals to the back and set the piece in place 3/8" from the top, left and bottom of the large layer. I measured from the card stock piece, not the DSP.  

The words are from the "Special Moments" set and were stamped on a piece of Basic White card stock that measured 2" x 5/8" using black Memento ink. I cut the Magenta Madness layer at 2-1/4" x 7/8". I taped the two together.  I added tape to the right side and two small Dimensionals to the left side and I centered the piece over the horizontal strip layer.  And that was it. The card was done.

This was a very fun card to make. I love the colors, it's SO bright and cheery. That DSP is SO pretty. It's got some gold foil colors in it that pick up the light. I should have set my Stamparatus up so I could have made more. I really like this. I think it would be a great Mother's Day card, birthday card, get well card, or even a sympathy card. This is a very versatile set. I LOVE those kind the most.

Thank you SO very much for taking your time to stop by and see today's thinking of you card,
Wanda

Friday, January 21, 2022

Catching Butterflies, Thinking of You Card, 2022 Stampin' Up! Sale-a-Bration

The  "Catching Butterflies" sounded like a fun stamp set to play with. I wasn't sure where I was going with this design but this is how it ended up and I'm not all that fond of it. But it is what it is. I think I would like it a lot better if I had used different Designer Series Paper (DSP).

The base of my card is a folded half-sheet of Basic White card stock. I cut a 4" x 5-1/4" piece of Pool Party for the larger layer.

I took the largest circle die from the "Layering Circles" and die cut a piece of DSP from the "Sunshine & Rainbows" 6" x 6" stack from the "Sale-a-Bration booklet.  I cut it in half and flipped one of the pieces over. I taped them to the Pool Party piece.

Next I cut a 3-5/8" x 2-1/4" piece of Basic White card stock for the focal piece. I stamped the image from the "Catching Butterflies" set using black Memento ink. I used my Blends Pens to color her. I used the light Petal Pink for the skin. Then I colored in the hair using the Bronze pen and then the light Soft Suede for highlights. The dress was colored in using both light and dark Melon Mambo. I added a little light Gray Granite for the shadow under the girl. I taped this piece to a 3-7/8" x 1-1/2" piece of Bermuda Bay card stock.  Then I taped that to the front of the card.

I stamped the butterflies and I fussy cut one out and colored it using the light Mango Melody pen and the light Pumpkin Pie pen. I set the butterfly in place on the front using a Dimensional.  

The words are from the same "Catching Butterflies" set and were stamped on a scrap piece of Basic White using black Memento ink.  I die cut them with the "Layering Circles" dies. I also die cut a scalloped circle that was just a little larger than the word circle. I had used the second smallest circle in the set. I taped the circles together and added Dimensionals to the back.

When I was looking through the drawer that I keep my rhinestones and pearls in I ran across these little butterflies. They matched the colors perfectly so I thought I would add them. I may have gotten them at the dollar store. I have had them for a while. They are nail art. It's odd though, there were only 8 in the package but we have 10 fingers. Maybe the thumbs don't get any??  I just thought they'd add a bit of sparkle to the card and I can start using up some of this stuff I have sitting around here.  I also added some Wink of Stella to that fussy cut butterfly.

This was a fun card to make and other than the DSP, I think I would be happier with it.

Thank you SO very much for taking your time to see today's thinking of you card,
Wanda

Thursday, January 20, 2022

Flowering Flowers, Friendship Card, 2022 Stampin' Up! Spring Mini Catalog

So today I grabbed a different set. Trying to keep some variety here!  Though once I glom on to a set, I tend to make several cards using it before I set it aside and move on.

I thought this set was so pretty and I LOVE the variety of greetings in it. The font for a birthday greeting is beautiful and I can't wait to make a card using it.

This card is not set up as a usual card. The base of this card is a quarter sheet of Fresh Freesia card stock. It measures 4-1/4" x 5-1/2". Yup, that's it. 

I cut a 5-1/4" x 2-7/8" piece of Basic White card stock for the layer and a piece of Designer Series Paper (DSP) from the "Friendly Hello" 12" x 12" package cut at 5-1/8" x 2-5/8".  I taped the DSP to the Basic White piece and then taped them to the Fresh Freesia card stock. I left an 1/8" around the sides and bottom.

For the little note card itself, I cut a piece of Fresh Freesia card stock to measure 5" x 3-3/4".  I scored it at 2-1/2" and folded it. 

I cut two pieces of Basic White card stock that measure 3-5/8" x 2-1/4" each.  One for the outside and one for the inside. I taped the inside piece in place and then I stamped the outside piece using the pretty flower from the "Flowering Flowers" set. I inked up the leaves using Mint Macaron and the flower using Fresh Freesia. I sponged the edges with Fresh Freesia ink using my blending brush. The piece was taped in place on the front of the note card. I taped the note card in place on the front. 

The words are from the same "Flowering Flowers" set and were stamped using black Memento ink.  And the note card was done!  

This was a fun card to make, though I'm not that fond of making cards that are not "normal".  I step outside my comfort zone every now and then. So now I can say "done that, been there" and I can go back to my "regular normal" cards! 

Thank you SO much for taking your time to see today's note card,
Wanda

Wednesday, January 19, 2022

Catch You Later, Birthday Card, Children's Card, 2022 Stampin' Up! Spring Mini Catalog

There are three adorable images in the "Catch You Later" stamp set. I've used the cat with fish one twice and today I'm going to use the hanging monkeys.  There's also two quails. I will be using them sometime soon. I want to try to use all the images in a set. It's rare that I ever do. I often buy a set for just one image. Kind of what I did here because I'm such a cat lover!

So onto today's card. The base of my card is a folded half-sheet of Basic White card stock. I cut a 4" x 5-1/4" piece of Granny Apple Green card stock and taped it to the card base.

I used a piece of Designer Series Paper (DSP) from the "Friendly Hello" 12" x 12" package.  I cut three pieces of the leafy image 1" x 3-1/2" strips. I cut three 1-1/8" x 3-5/8" strips of Basic Black card stock for the layers.  I taped those layers together and I taped them to the Granny Apple Green piece. I taped them from left to right about 3/16" from the edge of the Granny Apple Green card stock. The inside edges are a bit less than 3/16" from each other and the last one is 3/16" from the right edge.  

I cut a 2-7/8" x 2-3/8" piece of Basic White card stock. Then I stamped the monkeys from the "Catch You Later" on it using black Memento ink.  I colored the faces in using my Blends pens. I used Light Petal Pink for the face and ears. The bodies were first colored in using the Bronze pen. Then I colored in some of the darker areas using the light Soft Suede Blends pen. I also colored in the branch using the Soft Suede Blends pen.  And the leaves were colored in using the Light Granny Apple Green Blends pen.

A 3" x 2-1/2" piece of Basic Black card stock was cut for the layer. I taped the stamped image to the black layer. Dimensionals were added to the back and it was set aside.

The words are from the same "Catch You Later" set but I masked off the "from us" that was below the "Happy Birthday".  And I actually remembered to remove the mask before I stamped the words on my card stock!!!  It's a good day!! LOL  The word piece measures 7/16" x 1-3/4".  The Basic Black layer was cut at 5/8" x 2". Dimensionals were added to the back and set aside.

I set the stamped image and the words on the front of the card for placement and when they were where I thought they were pleasing to the eye, I removed the backing on the Dimensionals and set the pieces in place. The words are about 1-1/8" from the top of the card base and the bottom piece is about 1/2" from the bottom of the card base.  And that was it!  Super easy, quick and cute! Don't you just love those little monkeys?

Thank you SO very much for taking your time to stop by and see today's cute monkey Birthday card,
Wanda

Tuesday, January 18, 2022

Driving By, Friendship Card, 2022 Stampin' Up! Spring Mini Catalog

I've been making a lot of friendship, hello, and thinking of you cards lately.  I have been sending them to strangers who need a lift.  They go to people who's names have been entered in "Letters to Elders".  You can find the link by clicking here if you are interested in sending a hello card to someone and brighten their day.

The base of my card is a folded half-sheet of Basic White card stock. This card opens on the bottom and the fold is on the top. 

I cut a piece of Designer Series Paper (DSP) from the "Sunshine & Rainbows" 6" x 6" stack. A sweet friend of mine (Colleen) gave me a sheet of each of the designs. How sweet, huh?  So I since I had them, I thought I'd add one to today's card. This piece of DSP was cut 2-3/4" x 3" and the Balmy Blue layer was cut at 3" x 3-1/4". 

The Basic White focal piece was cut at 2-3/4" x 1-3/4". I stamped the car from the "Driving By" set. It was stamped to the left side of the card stock using black Memento ink. I needed to make room for the words. I cut a 4" x 2" piece of Balmy Blue card stock for the layer.  I colored the car using my Blends pens. The car was colored in using both the light and dark Balmy Blue pens.  The tire was colored in using the light Smoky Slate Blends pen. Apparently one end colored darker than the other. The brush tip colored lighter and the drawing tip colored in darker. I did color the tire area with the brush end and then closer to the hub I colored with the drawing tip. 

The balloons were colored in using light Bermuda Bay, Light Daffodil Delight, and light Balmy Blue pens.  I taped this to the 4" x 2" piece of Balmy Blue card stock. 

The words are from the same "Driving By" set and were stamped on a 1-3/4" x 3/4" piece of Basic White card stock using black Memento ink.  The layer behind them measured 2" x 1".  I taped the two pieces together.

The DSP layered piece was taped on the front of the card, centering it all around. Then the focal piece was glued in place. I used glue because I thought it would be easier to center it than using tape. 

I added Dimensionals to the back of the word piece and set it in place on the front of the card.

This was a very fun and quick card to make. Super simple too!

Thank you SO very much for taking your time to stop by and see today's hello card,
Wanda


Monday, January 17, 2022

Catch You Later, Friendship Card, 2022 Stampin' Up! Spring Mini Catalog

I had to make one more cat image before I put the set aside to play with something else.  I have too many sets sitting in front of me!!!  Why do I do that?  UGH!!!  

The base of my card is a folded half-sheet of Basic White card stock. This card opens on the right and the fold is on the left.

I cut a 4" x 5-1/4" piece of Misty Moonlight card stock for the layer.  The DSP is from the "Simply Marbelous" 6" x 6" stack. I thought this piece had a nice movement and flow to it. It kind of looks like water.

I cut a 2-3/4" x 1-3/4" piece of Basic White card stock for the cat and fish image from the "Catch You Later" set. I stamped it using black Memento ink.  And I cut a 2-7/8" x 1-7/8" piece of Misty Moonlight card stock for the layer behind it.  I colored the image pretty much the same way I did with yesterday's card. I used my watercolor pencils and a Blender pen. Click here to see the card and how it was colored. I did a much better job coloring yesterday than I did today! I don't know why!!!

Then I cut a 2-1/4" x 1-5/8" piece of Basic White card stock for the words, they are from the same "Catch You Later" set. I cut a 2-3/8" x 1-3/4" piece of Misty Moonlight card stock for the layer behind it.

I taped the words behind the cat and fish image and then I added Dimensionals.  I set the piece in place on top of the DSP and the card was done!

This was a very fun and easy card to make.  I just love that cat and fish image. I will play with it again sometime in the future, but for now I'm off to play with the other new stuff!

Thank you SO very much for taking your time to stop by and see today's friendship card,
Wanda


Sunday, January 16, 2022

Catch You Later, Friendship Card, 2022 Stampin' Up! Spring Mini Catalog

I thought this card I found on Pinterest was just too darn cute and I had to give it a try.  There wasn't much for instructions when I clicked through the link so here's how I made the card. You can see the original card here.

I took a folded half-sheet of Basic White card stock for the base. Then I cut a 4" x 5-1/4" piece of  Smoky Slate for the layer.  And the focal piece measured 3-3/4" x 5".  

I stamped the image from the "Catch You Later" set using black Memento ink.  I was all set to color the image in using Blends pens but when I practiced on a piece of scrap card stock, I found the colors to be too dark. So I was going to use my Blender pen and ink pads.  I ended up using the "Watercolor Pencils" and my Blender pen.

I colored the cat in using the Basic Gray watercolor pencil. Then I colored over some areas with the Basic Black watercolor pencil. The water in the fish bowl was colored in using the Balmy Blue watercolor pencil. I colored over the cat color on the bottom left.

The goldfish was colored in using the Pumpkin Pie watercolor pencil and I took my Blender pen and colored right on the pencil to pick up a bit more color for the highlights. 

The background was colored in with the Balmy Blue watercolor pencil and after using the Blender pen over it, I colored it in using my blending brush and some Balmy Blue ink. I used a piece of scrap copier paper on the sides to give the color and edge and I also had made a mask for the cat and fish image so I wouldn't get any ink on them. 

The shadow/surface below the cat and fish was created by using the Crushed Curry, Cherry Cobbler, and Early Espresso watercolor pencils. 

My colors are a bit different than on the original card but I think this worked out just fine. I like how the colors worked here an it looks just fine to me!

Thank you SO very much for stopping by to see today's friendship card,
Wanda

Saturday, January 15, 2022

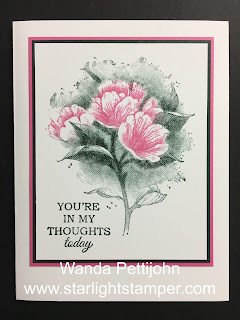
Calming Camellia, Thinking of You Card, Stampin' Up! 2022 Host Set

I'm having fun playing with the new stuff.  I found this card on Pinterest and I struggled a it with the sponging and this is what I ended up with.  You can see the original card here

The base of the card is a folded half-sheet of Basic White card stock. This card opens on the right and the fold is on the left. 

First I set up the image from the "Calming Camellia" set on my Stamparatus. I stamped the image on a piece of Basic White card stock that measured 3-3/8" x 4-1/4". I sponged on Polished Pink, Soft Succulent, and Evening Evergreen ink.  I used my sponge daubers to put the ink on the image but I struggled with this.  I had to redo it because the first one was just not looking quite right.  So when I redid it, I inked up the flower area and I made sure I didn't get any Polished pink on the leaves.  I stamped the image onto my card stock. I re-sponged and tried it again because I didn't think it was dark enough.

For the greens, I cleaned off the stamp but didn't remove it from the Stamparatus. I sponged on Soft Succulent ink and then I sponged over it in some areas with Evening Evergreen and then I stamped it on the card stock. Again I didn't think it was dark enough so I sponged on some more Evening Evergreen. I ended up using a Q-tip swab to tap on some Evening Evergreen in some areas that I thought should be darker and after stamping it on the card stock I liked it better.  But there were still areas around the top of the flower that I didn't like, so I took the swab and added some more Evening Evergreen and then I took my blending brush and pulled some of the ink outwards and that did the trick!  I was more pleasing to my eye and I stopped before I added too much.

The words are from the same set and I have this card in mind for a friend, I stamped them using Evening Evergreen ink and I was done with the stamping.

The layers were then cut. The Evening Evergreen piece measures 3-1/2" x 4-3/8" and the Polished Pink layer measures 3-5/8" x 4-1/2".  I taped the layers together and then the focal piece on top. Then all three were taped to the card base and the card was done.

Isn't it pretty?  What a fun set.  There's a pretty leaf in the set plus lots of words. I can't wait to play with this one again but I think I'll just stamp regular like without the sponging!! LOL

Thank you SO very much for taking your time to stop by and see today's "thinking of you" card,
Wanda

Friday, January 14, 2022

Sweet Conversations, Valentine's Day Card, 2022 Stampin' Up! Spring Mini Catalog

A sweet friend of mine (Colleen) came over today and she brought some of her new stamp sets with her. She was gracious enough to share them with me. I found this fun card on Pinterest and used her set to make it.  I changed the card a little.  Not because I didn't like how the original card was made but because I don't know vertical from horizontal (apparently! LOL) and I didn't stamp and cut the right size Coastal Cabana heart.  So I had to rearrange the hearts too. So here's how my card went together.

The base of the card is a folded half-sheet of Basic White card stock. This card opens on the bottom and the fold is on the top.

I die cut a piece of Designer Series Paper (DSP) from the "Sweet Talk" 12" x 12" package. I used the rectangle die from the "Ornate Layers" set.  I taped that piece to the bottom of the card front.

Next I die cut the lacy Basic White piece using another die from the same die set. 

I stamped the words from the "Sweet Conversations" set using black Memento ink.

Then I stamped the hearts. I used Pale Papaya, Granny Apple Green, Daffodil Delight, Coastal Cabana, Flirty Flamingo and Gorgeous Grape inks. I stamped the word piece first and with the same color ink I stamped the solid image.  There's matching die so I die cut each heart.

Then I die cut a "Stitched Rectangle" it was the largest one in the grouping of four in the "Rectangle Stitched" framelitsset.  I cut it in half because it was too large for that space. Dimensionals were added behind it and then it was set in place on the front of the card about 1-3/8" from the bottom edge of the card base.

I added the larger hearts using Tombow mono glue. And the two smaller ones were added using a Dimensional. 

I didn't have the candy looking pieces that are on the original card so I used the "Ice Cream Corner Sprinkles" pieces.  They matched the colors of the DSP and hearts pretty close so I went with it. I used my Tombow mono glue to set them in lace.  And that was it, the card was done.

This was a very fun card to make and I do have some regrets about not getting it but I have SO many new sets to play with and I am grateful to my friend that I was able to play with her set and make this fun Valentine's Day card!

Thank you SO very much for taking your time to see today's Valentine's Day card,
Wanda

Thursday, January 13, 2022

Let's Set Sail, Senior Years, Masculine Birthday Card, 2022 Stampin' Up! Mini Catalog

The new stuff arrived!  YAY!  So today I thought I'd use the new "Let's Set Sail" set and matching punch!  Ya gotta love those matching punches and dies!!! I know I do!  

The base of my card is a folded half-sheet of Basic White card stock. My card opens on the right and the fold is on the left.

I cut a 5-1/2" x 3-7/8" piece of Designer Series Paper (DSP) from the "Simply Marbleous" 6" x 6" stack from the Sale-a-Bration catalog.  I taped it to the front of the card.

I took a piece of DSP from the "New Horizons" 6" x 6" stack and die cut it using the 4th largest stitched die in the "Rectangle Stitched" Framelits.  If you don't have these dies you can cut the piece 2-5/8" x 4".  And I cut the Basic White layer behind it 1/4" larger. So it would measure 2-7/8" x 4-1/4". 

I stamped the boat using Soft Suede ink and the sails were stamped using Pool Party ink on Basic White card stock. I did stamp and punch them all separately because I tried to cut them all together and I made a mess of it, so I found it easier to just cut them one at a time. I added small Dimenisonals behind them and set them in place on the stitched rectangle piece of DSP. Then I stamped the birds using black Memento ink.

The words are from the "Senior Years" set and were stamped on a piece of Basic White card stock using Soft Suede ink. I cut the piece 3/8" x 1-1/2".  I added Dimensionals behind it and set it in place on the DSP.

I added Dinensionals behind the stitched rectangle piece and set it on the Basic White piece. Then I wrapped some white Baker's twine around the two pieces 3 times and tied a not in the front. This piece was glued to the front of the card and the card was done.

I do like how this card turned out. It's a great masculine card and would be a great Father's Day, sympathy or thinking of you card too.

Thank you SO very much for taking your time to stop by and see today's masculine card,
Wanda

Wednesday, January 12, 2022

Artistically Inked, Happiest of Birthdays, Birthday Card, 2021-2022 Stampin' Up! Catalog

With all the new stuff arriving soon, I wanted to see if I could come up with a card that uses a substantial amount of Designer Series Paper (DSP).  I always end up with so much left over, even while it's still current but the new stuff seems to be what I want to play with and the old (still current) stuff is pushed aside.  SO, I thought I would make a card using a larger piece of DSP.  Here's what I came up with. 

The base of my card is a folded half-sheet of Basic White card stock.  My card opens on the right and the fold is on the left.

I cut a 4-1/8" x 5-3/8" piece of Shaded Spruce card stock for the layer.

Then I cut a 3-7/8" x 5-1/8" piece of DSP from the "Expressions in Ink" 12" x 12" package.

I took a 4-1/4" x 5-1/2" piece of Basic White card stock and stamped the words from the "Happiest of Birthday's" set using Shaded Spruce ink.  Then I die cut them using the lacy die from the "Ornate Layers" die set. I don't use it very much because the card stock sticks in the holes and it takes a while to clean it all out. Plus removing the pieces still stuck in the card stock.  But once I remove it I'm glad I used the die.  I added Dimensionals to the back of the piece and set it in place on top of the DSP.

Then I stamped three little flowers from the "Artistically Inked" set using Pale Papaya and Mango Melody ink. I die cut them out. I also stamped a Granny Apple Green leaf and die cut it out at the same time. I glued the flowers together and slipped the leaf in between them. I set them in place on the front of the card using a Dimensional.  And that was it.  A very quick and easy card using a larger piece of DSP.  Mission accomplished.  I may be making more of these using that larger piece of DSP.  

Thank you SO very much for taking your time to stop by and see today's birthday card,
Wanda

Tuesday, January 11, 2022

Sailing Home, Senior Years, Masculine Birthday Card, 2021-2022 Stampin' Up! Catalog

I took out the "Sailing Home" set to make another masculine card this week.  This has been chilly week here in Minnesota but today seems a little warmer. January always seemed to be the coldest month here.  Once January passes than it's like no time till summer.  Kind of like how after the 4th of July the summer just flies by.  So odd. I need to have a more boring life to slow time down! But for now I have a million projects to do and tons of cards to make. And here's one of them!

I found today's card on Pinterest and I made a few little changes. You can see the original card here. The base of my card is a folded half-sheet of Basic White card stock. I opted for the Basic White half-sheet instead of a half-sheet of Pool Party because I'm low on Pool Party card stock and it's a great way to still get the color you want without using a lot of card stock.  Card stock keeps going up in price and you have to cut back where you can.

Next I took a 4" x 5-1/4" piece of Basic White card stock and stamped the anchor and compasses images. I used Early Espresso ink for the anchor and Pool Party ink for the compass. I cut that piece to 2" wide.  Then I cut a 5-1/4" x 1/2" piece of Basic Black card stock for the right edge of that strip. I should have used Early Espresso, the black is just too dark.

So, since I was taping as I was going, I had to keep going with the Basic Black. I die cut a circle using the "Layering Circle" die set. I used the largest and the second largest on my card. I used the largest for the Basic Black circle and the second largest for the focal piece.

Next I stamped the boat from the "Sailing Home" set on Basic White card stock using black Memento ink. Then I die cut it with the matching die. I am SO spoiled by dies now that fussy cutting is something I'd prefer not to do. I colored the boat using both light and dark Pool Party Blends pens. I set the boat on the circle for placement. Then I stamped the birds from the "Sailing Home" set using Early Espresso ink. And then the words from the "Senior Years" set were stamped on the circle using Early Espresso ink. 

The boat was set in place using glue. I didn't want to mess with the tape and have it get all over the place, so I just glued in the obvious places and set it in place on the circle. Then I taped that circle to the Basic Black circle. Dimensionals were added to the back and it was set in place on the front of the card.  And that was it.  SO quick and simple.  And had I not messed up on the other half of that 4" x 5-1/4" piece of Basic White card stock, I could have made two cards. 

This was a very fun card to make and I'm pretty sure this set will be retiring in the spring. It's been around for a couple of years now and that seems to be the trend. So I need to use it a little bit more to feel I've gotten some decent use out of it before I sell it. I need to find some time to put some stamp sets in my web store. It's been a while since I've been able to do that and the retired sets are piling up here!

Thank you SO very much for taking your time to stop by and see today's masculine Birthday card,
Wanda

Monday, January 10, 2022

Painted Poppies, Artistically Inked, Friendship Card, 2021-2022 Stampin' Up! Catalog

Today I thought I would make a to send to a stranger.  I found a site on the internet "Letters to an Elder" where you can send a card to an elderly person.  I sent out some last month and I'm going to try to do this every month.  I make enough cards each month that I can afford to send one to a complete stranger and hopefully make their day.

I got out my "Painted Poppies" set and yes, the "Artistically Inked" set but I only used the words in that set. I found this card on Pinterest. It was a sympathy card so I changed it to a friendly hello greeting.

The base of the card is a folded half-sheet of Basic White card stock. The full sheet was cut in half on the short side so the card measured 4-1/4" x 11".  I scored it at 5-1/2" and then I textured the front using the "Painted Texture" embossing folder. 

I took the 4th largest stitched rectangle die from the "Rectangle Stitched" Framelits die set. There's two groups of dies in the set. This was from the larger one that has 8 dies nestled together. I die cut it on a piece of Basic White card stock. Then I stamped the flower image from the "Painted Poppies" set using Gray Granite ink. I colored the flowers in using both light and dark Poppy Parade Blends pens. And the leaves and stems were colored in using both light and dark Old Olive Blends pens.

Then the splatter was stamped using Gray Granite ink that was stamped off once. I stamped it twice on the card.

The words are from the "Artistically Inked" set using Basic Gray ink. 

I cut a piece of Basic White card stock that was just a bit larger than the stitched rectangle piece.  Mine measured2-3/4" x 4-1/8".  I taped the two rectangles together. I added Dimensionals on the back and I set it in place on the front of the card.

I colored an enamel dot using my Basic Black Blends pen and I set it in place on the front of the card and the card was done.

SO fun. SO easy. SO quick.  Oh and SO cute too!  So now I'm off to write a little something about me inside and get it out in the mail tomorrow.  The lady mine is going to happens to love handmade cards!!  That's why I chose her!  There's several people to pick from and they all have a little description of what they like or do so you can relate and know what to write about. So if you have time, send a card to someone and brighten their day.  

Thank you SO very much for taking your time to stop by and see today's friendship card,
Wanda

Sunday, January 09, 2022

Sweet Ice Cream, Birthday Card, 2021-2022 Stampin' Up! Catalog

Do you ever look at a stamp set and see images in it you've never used or see images you have to stop and ask, "what is that?". I have occasionally done the "what is that?" on an image but not as often as I've had images in a set that I have not used.  Last summer I made several cards using the "Sweet Ice Cream" set and there's some images in there I've never used. So today I thought I would give some of them a try.

I have never  used the popsicle image before. It was a different experience for me and I wasn't very good at lining it up. You can really see it on the green one on the right edge.  The popsicle has two stamps to create the image.   SO here's how to make this card.

The base of my card is a folded half-sheet of Basic White card stock.  I cut a 4" x 5-1/4" piece of Granny Apple Green card stock. And the Basic White focal piece was cut at 3-3/4" x 5". 

I took the focal piece and I stamped the Highland Heather popsicle first. I stamped the bottom piece of the popsicle and then I stamped the top. I lined it up pretty good. Not perfect but pretty good.  The stick was stamped using Soft Suede ink that was stamped off once. Then I added the Highland Heather drip.

Next I added the Granny Apple Green popsicle. I did a horrible job lining it up and the stick is off center.

Fortunately the Bermuda Bay popsicle didn't need a stick or centering!  

Once the popsicles were done I added the dotted images. I stamped off once with the inks.

The words are from the same "Sweet Ice Cream" set and were stamped using Soft Suede ink.

I taped the focal piece to the Granny Apple Piece. Dimensionals were added to the back of the Granny Apple Piece and it was set in place on the card base.  And you know me, I just can't leave well enough alone. I had to add some "Wink of Stella" to each of the popsicles, but not the sticks.  It gave the popsicle that chilly look. If you click on the photo you might be able to see the sparkle. In real life, it's pretty.

This was a super quick and easy card to make and I think I'll try it again and try a little harder at lining up the two images.  I've seen some fun images using two different colors for the popsicle.  A challenge! LOL

Thank you SO very much for taking your time to see today's quick and easy Birthday card,
Wanda

Saturday, January 08, 2022

Sweet Ice Cream, Birthday Card, 2021-2022 Stampin' Up! Catalog

Today I needed to make a birthday card. I actually don't need it today, which is a good start for me in this new year!! I am also biding my time until my order arrives. I am anxious to play with the new stuff and I know what I have will be ignored and probably be retired. I always say I'm not going to order as much the next time but I find too many things I like and end up ordering more than I know I'm going to play with to do them justice.  But it's all about having fun, right? 

So I decided I would play with the "Sweet Ice Cream" set and the "Ice Cream Corner" Designer Series Paper (DSP). Both are perfect for birthday cards for kids and adults alike! I did have a problem making my card. I couldn't decide which DSP images to use. So I ended up making two cards. And after seeing them both together, I'm leaning towards the one with the stripes.  What do you think?

I love using this layout because you can focus on the smaller images and bring them to light. So to make this card I took a half-sheet of Coastal Cabana card stock. I cut the card stock on the short side so it measured 4-1/4" x 11" after cutting.  Then I cut a 3-1/2" x 4-5/8" piece of Basic White card stock for the layer.

The DSP was cut at 2-7/8" x 4" and the Bermuda Bay piece behind the DSP was cut at 3" x 4-1/8".  I used the 1-5/8" circle die to cut the first circle. I taped the DSP to the card stock only in the area where the circle would be cut. I needed to cut these out at the same time to make sure they line up after the second circle.  So after cutting the circle, I set the Bermuda Bay piece aside.  Then I took the 1-7/8" circle die and lined it up over the DSP circle opening.  I used Post It Note tape to hold it in place so it didn't shift when I ran it through my Big Shot.  After cutting, I taped the DSP to the Bermuda Bay piece. 

I found the ice cream cone I wanted from a piece of the DSP in the "Ice Cream Corner" package. I added several Dimensionals around the circle on the back of the Bermuda Bay piece, centered the ice cream cone and set it in place.  

Next I turned the Bermuda Bay piece over and added Dimensionals to the back and double-sided tape to the back of the DSP. Don't add Dimensionals there or the card will bulge funny in the middle.  And not a good funny either! LOL I lined up the piece and set in place on the 3-1/2" x 4-5/8" Basic White piece.  Then this was taped to the front of the card.

The words are from the "Sweet Ice Cream" set and were stamped using black Memento ink. I put them on my paper trimmer and cut them to 7/8" x 3-1/8".  I cut a piece of Coastal Cabana card stock to measure 1" x 3-1/4".  I added Dimensionals to the back but made sure I didn't get them too close to the edge where it hangs over the DSP piece. 

A 4" x 5-1/4" piece of Basic White card stock was added to the inside and the card was done.

These were fun cards to make and I am really leaning towards the striped one, it's not as busy looking as the cake sprinkles one is.

Thank you SO very much for taking your time to stop by and see today's birthday card,
Wanda

Friday, January 07, 2022

Color & Contour, Thank You Card, Stampin' Up! 2021-2022 Catalog

I'm just biding my time until my order comes. It's only been a couple of days since I placed my order but it feels like it's been a month. Why does it always seem like it's along time when you're waiting for things?  I feel like a little kid! LOL So I make card with what I have while I wait.  I did need another thank you card so here's how I made this one.

The base of my card is a folded half-sheet of Basic White card stock. This card opens on the right and the fold is on the left.

I cut a 4" x 5-1/4" piece of Mint Macaron and taped it to the card base.

I took a 3-3/4" x 5" piece of Basic White and I die cut the right side using the stitched scalloped edge die from the "Scalloped Contours" set. Then I textured it using the "Painted Texture" embossing folder.

Then I cut a 5" x 2" piece of Designer Series Paper (DSP) from the "Hand-Penned" 12" x 12" package. I taped the DSP on the right side of the Mint Macaron card stock and the Basic White textured piece was glued on top and it overlapped the DSP.  

The flower was stamped using the "Color & Contour set" on Basic White card stock and black Memento ink. I die cut it with the matching die. Then it was colored using Dark Daffodil Delight Blends pen and the light Mango Melody Blends pen. The leaves were colored in using the dark Mint Macaron Blends pen.

I die cut the leaves from the "Forever Flourishing" dies that go along with the "Forever Fern" bundle. I used Mint Macaron card stock and then I took my blending brush and scrubbed on some Mint Macaron ink to darken the leaves up a bit more towards the ends.  Before I set them in place, I cut off the two "branches" on the left side. They made it more difficult to see the flower. I can use them on a future card.

The words are from the same "Color & Contour" set and were stamped on a piece of Basic White card stock using black Memento ink. I die cut them using the stitched die from the "Tasteful Labels" set. I set the words in place using Dimensionals. I had moved the words to the left of the die because my plan was to add some pearls or rhinestones or something there. I have not decided what I am going to do but I needed to get my card posted so I just left it open for now.  I am thinking of going with the greenish "Genial Gems".  I have quite a few left in my package and since I don't use them very often I thought I should so I won't regret having them leftover when the new catalog comes out. These gems don't stick too far off the face of the card but I am going to put some shirt board over the top before I mail it. Shirt board is the same thing that is used to make cereal boxes.  I happen to have a relative that works in the printing industry and once in a while I get some little fun things that the company was going to recycle. Many of the things come in handy, like the shirt board. Adding that to the front of the card prevents any issues at the post office. It keeps the front smooth so it goes through their machines nicely and I don't have to pay that extra fee, unless my card is over 1/4" thick. And this one is not.

There you got information on how to make and send a card today! LOL

Thank you SO very much for taking your time to stop by and see today's Thank You card,
Wanda

Thursday, January 06, 2022

Butterfly Brilliance, Color & Contour, Thank You Card, 2021-2022 Stampin' Up! Catalog

Did you ever have to have a stamp set so badly and then when you got it you didn't use it much at all?  I just had to have this "Butterfly Brilliance" bundle and it just sits on my shelf. I used it a few times and that was it.  I don't know what I saw that made me want it so badly.  I should do a search and see if I can come up with some cards to make with it. But for today, here is what I made using it. Oh and did you notice that I did NOT use the "Artistically Inked" set?  LOL  I gave it a rest.

So to make this card, I started off with a folded half-sheet of Basic White card stock. This card opens on the bottom and the fold is on the top. I cut the full sheet in half on the 8-1/2" side so it measured 4-1/4" x 11" when I was done.

I cut a 1-1/2" x 4" strip of Designer Series Paper (DSP) from the "Expressions in Ink" 12" x 12" package.  I centered it on the front of the card and I taped it in place.

Next I cut a 1-3/4" x 2-1/4" piece of Pear Pizzazz card stock and textured it using the "Ornate Floral" embossing folder. I glued that in place over the DSP strip.

The words are from the "Color & Contour" set and were stamped using black Memento ink. I die cut them using the 1-7/8" circle die. I also die cut a scalloped circle using Pale Papaya card stock. I taped the two circles together. Dimensionals were added to the back and the piece was set aside.

The butterflies were die cut from the "Brilliant Wings" dies, using gold foil card stock. I cut two of the smallest butterfly. I added a small Dimensional behind each one and I set them aside.

I took some gold cord and wound it around my fingers three times and I took glue dots and set them on both sides of the cord where the cut ends were. I removed the backing and set the cord in place on the front of the card.

The circle was then set in place over the cord and the little butterflies were added. And that was it.

This was a very quick and easy card to make. I actually made two of them at the same time. The 4th was my birthday and I had gotten gifts from my twin sister-in-laws and I need to send thank you cards to them.  Now off to write on them and sent them off!

Thank you SO very much for taking your time to stop by and see today's thank you card, 
Wanda

Wednesday, January 05, 2022

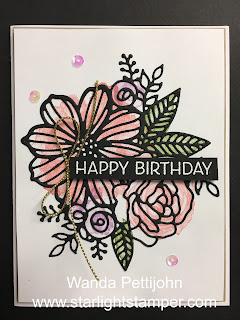
Birthday Card, Artistically Inked, 2021-2022 Stampin' Up! Catalog

Do you see why I can't wait until the new stuff arrives. I just had to make another "Artistically Inked" card that I found on Pinterest.  I will put the set away and grab a different set to play with while I wait for my new stuff to arrive.  You can see the original card here

This beautiful card was a little more challenging than I thought it would be though.

First I made the card base which was a folded half-sheet of Basic White card stock. Then I cut a 4-1/8" x 5-3/8" piece of Crumb Cake card stock.  And the top piece is a 4" x 5-1/4" piece of Basic White card stock.

I die cut the open flower from the "Artistic" die set using Basic Black card stock. I uses a double sided sticky sheet to make it into a sticker.  That was awful. Those little pieces were sticking to the backing which had somehow come off.  What a sticky mess.  But I managed to remove them all.  

I also die cut another open flower image using a scrap piece of Basic White card stock. I set it on top of the 4" x 5-1/4" piece of Basic White card stock which I had set up in my Stamparatus.  I did this so I could just lay the rubber images on top and close the lid. It was the easies way to stamp them where they needed to go.

The larger flowers were stamped using Flirty Flamingo ink and the smaller ones were stamped using Fresh Freesia ink. The leaves were stamped using Granny Apple Green ink.  It worked out nicely and I was glad because this started out on a bad note with the sticky piece!!

Next I stamped the words on a 1/2" x 2-7/8" piece of Basic Black card stock.  I did trim it up a little because I thought it was too wide.  Mostly because I didn't get the words even on each end.  Perhaps if I make another one I would stamp the words first and then take them to the cutter to cut them evenly.  I used Versa Mark to stamp them and I heat set white embossing powder. Then I set the words in place using Dimensionals.

I tied a gold cord bow and I glued it in place.

A few sequins were added and the card was done.

I do like how it turned out. It was easy enough to make if you don't consider the issue with the sticky side!  LOL I am going to put this set away and find something else to play with tomorrow!  I promise!

Thank you SO very much for taking your time to see today's birthday card,
Wanda