Wednesday, January 31, 2018

Party Panda, 2018 Stampin' Up! Sale-a-Bration, Children's Birthday Card

I found some fun black and white Decorative Series Paper (DSP) in the "Whole Lot of Lovely" 12" x 12" pack. I never seem to make children's cards.  Probably because I don't own many children's stamp sets.  But this little bear is great for kids and adults too!

The base of my card is a folded half-sheet of Basic Black. On top of that is a 4" x 5-1/4" piece of the black and white dotted DSP.  On top of that is a 4" x 3" piece of Basic Black and the focal piece was cut 3-7/8" x 2-7/8".

The bear was stamped on a scrap piece of Whisper White and fussy cut.  Yup, you need to fussy cut.  But this card is SO quick to make that the couple of minutes you spend fussy cutting is SO worth it!

I colored the hat in with Real Red and Daffodil Delight markers.  That's all the coloring. The bear is stamped with black Memento ink and he didn't need any coloring!!

The words are from the "Panda Party" set using black Memento ink.  I set the bear in place using Dimensionals and the card was done!!

Thank you SO much for visiting today,
Wanda

Tuesday, January 30, 2018

Heartfelt Blooms, Thank You Card, 2018 Stampin' Up! Sale-a-Bration

Today's card was a fun, easy and quick one.  This new "Heartfelt Blooms" Sale-a-Brations set is a lot of fun to play with. It's so detailed.  All you have to do is ink it up and stamp, nothing more. You can use lighter colors and color in the details but just ink alone is perfect!!!

The base of my card is a folded half-sheet of Crushed Curry card stock.  On top of that is a 3-7/8" x 5-1/8" piece of Basic Black card stock.  On top of that is a piece of the fun "Color Theory" Designer Series Paper (DSP) 6" x 6" stack.  There's lots of fun papers in those stacks.  I think it's a great value.  The DSP was cut 3-3/4" x 5".  On top of that is another piece of Basic Black cards stock cut 3-1/4" x 4-5/8".  And the focal piece is Whisper White cut 3-1/8" x  4-1/2".

I stamped the flower using Crushed Curry ink and the words from the "Heartfelt Blooms" set were stamped using Basic Black ink.  Tape all the layers together and you are done!!

See, I told you it was fun, easy and quick!!

Thank you SO much for visiting today,
Wanda

Monday, January 29, 2018

Magical Day, Beautiful Bouquet, Children's Birthday Card, 2018 Stampin' Up! Occasions Catalog

I found a fun card on Pinterest using the "Magical Day" stamp set.  I was so excited to play with this card because my granddaughter loves mermaids.  She's 4 and she's very good at it!!! LOL  She wants to be a mermaid when she grows up!  I thought she might have some fun stamping and coloring this image. So before I go out on my own with a stamp set I usually get a few ideas off the net and run with them until I feel the ideas come in.  

I didn't use the wording and the or the netting that was used on the original card. I moved the seahorses apart a bit more too.  I also added some tiny pearls above each of the seahorses.  

The wavy things are from the "Swirly Bird" bundle dies.  
The paper is from the "Myths and Magic" Decorative Series Paper (DSP).  I cut that piece 3-3/4" x 5". The Tranquil Tide piece behind it is cut 4" x 5-1/4". And the base of the card is a folded half sheet of Crumb Cake.  I stamped the image and the words on Whisper White card stock and the seahorses were stamped and die cut from Crumb Cake card stock.

It's a pretty simple card to make, most of the work was done!!!  Ya gotta love those matching dies! 

I colored in the mermaid using the Bermuda Bay new Blends pens.  So easy to color with those new alcohol markers.  Remember the Blender Pens?  These are much like them except the cover is much easier to remove and the tips seem to be nicer and not so easy to squish down.

The words are from the "Beautiful Bouquet" set and I layered them with a scalloped oval of Crumb Cake. I set the words and the seahorses in place using Dimensionals.

I can't wait to make more mermaids with my granddaughter.

Thank you SO much for visiting today,
Wanda

Sunday, January 28, 2018

Amazing You, 2018 Stampin' Up! Sale-a-Bration, Beautiful Bouquet, Southern Serenade, Birthday Card

I combined a few stamp sets here to get this card.  I used the "Amazing You" from the 2018 Sale-a-Brations catalog, "Southern Serenade" from the 2018 Occasions catalog and "Beautiful Bouquet" from the 2017-2018 catalog. 

The base of my card is a folded half sheet of Smoky Slate card stock. On top of that is my focal piece, Whisper White card stock cut 4" x 5-1/4".  

I took the lace image from the "Southern Serenade" set. I inked it up with Smoky Slate and stamped off once. I turned the stamp the so it stamped longer from side to side. I repeated this just beneath the first one.  Next I stamped the flowers on a scrap piece of Whisper White card stock and one on a scrap piece of copier paper to use as a mask.  I cut out the flower only.  I used some removable tape on the back of the masked piece and stuck it to the stamp. I inked up the stamp with Wild Wasabi ink and added the leaves and flowers in three different places.  Don't forget to remove the mask before stamping on the card front!

I used the new Stampin' Blends markers to color in the flowers.  I punched out three leaf sets using the leaf hand punch.  I set them around the area where I thought the flowers would go.  Then I taped down the larger flower.  By larger I mean the one that I didn't cut the center of.  Then I set the smaller (flower center one) in place using Dimensionals.  I slipped some Calypso Coral ribbon just under the flower. I did use a couple of glue dots to hold it in place.  I tied another piece of ribbon to the left into a knot.  I added a clear faceted gem to the center of the top flower.

The words are from the "Beautiful Bouquet" set using Wild Wasabi ink. I die cut it with the oval framelits and I die cut a scalloped one for the layer behind it.  I set the words in place using Dimensionals.

And for the final touch I added some coral colored sequins from the "Iridescent Sequin Assortment" pack.  I glued them in place.  After the glue set I added a small rhinestone to the center of each sequin.  Pretty, huh?  And that was it.

Thank you SO much for visiting today,
Wanda

Saturday, January 27, 2018

True Gentleman, Guy Greetings, Happy Birthday Gorgeous, Masculine Birthday Card

I have been having some fun with the new "True Gentleman" Decorative Series Paper (DSP).  I thought I would make a masculine birthday card today and this is what I came up with.  

The base of my card is a folded half-sheet of Very Vanilla card stock.  On top of that is a 3-1/2" x 4-5/8" piece of Night of Navy.  

Next I took a 4" x 2-3/4" piece of the "True Gentleman" DSP and taped it onto a piece of Very Vanilla that was cut 4-1/8" x 2-7/8".  I set those two layers in place using Dimenisonals.  I stamped the shoes from the "Guy Greetings" set using Tranquil Tide ink and Very Vanilla card stock. I used the 1-3/4" circle punch and punched them out.  For the ring, I used a stitched circle framelit and the 1-3/8" regular circle framelit.  I don't know the size of the stitched framelit but it's the one that fits over the 1-3/8" circle framelit.  The stitched ones have no size chart available. I will have to search the net sometime to see if I can find one. I found the circle ones on the net at www.stampwithbrian.com.  I'll have to check there to see if the stitched ones are listed. I printed the other ones out and put them inside the plastic sleeve that holds the dies.  

I took a strip of the foam adhesive and wrapped it around the shoes image along the edge.  You could get by with pieces too, it's not a shaker card so you can have openings and gaps between the pieces of tape.  I just wrapped because it was easier for me.  Then I hovered over the shoes and set the Night of Navy ring in place. I taped the back and set it on the DSP panel. 

The words are from the "Happy Birthday Gorgeous" set. I stamped them using Tranquil Tide ink and I used the Classic Label punch and punched them out.  I also punched two out of Night of Navy and taped them behind the word piece.  I set the words in place using Dimensionals.  And that is it.  Super fun and simple and SO masculine!!!

Thank you SO much for visiting today,
Wanda


Friday, January 26, 2018

Amazing You, 2018 Sale-a-Brations Card

This card is far from the one that was in my head, though I do like how it turned out.  The one in my head was kind of a mess anyway!! LOL

This was fun to make, though I am not a big fan of heat embossing but I sucked it up and did it anyway!!!

The base of my card is a folded half-sheet of Bermuda Bay, the next layer is a 4" x 5-1/4" piece of Pool Party and the top layer is a 3-7/8" x 5-1/8" piece of Whisper White.

I masked off the edges of the Whisper White piece. I used removable tape, though I think some retired Washi tape would work well too. I always forget to use that. I took copier paper and some removable tape and masked off about 1" on the bottom and 1-1/2" on the top.  You don't have to be exact.  Then I stamped the flower from the "Amazing You" set using VersaMark and I heat embossed white embossing powder on it.  Leaving the masks on, I sponged in some Pool Party ink first and then some Marina Mist.  I could have added some Bermuda Bay, but that color was just too dark and the Bermuda Bay ribbon from the "Shimmer Ribbon Combo Pack in the 2018 Sale-a-Bration catalog blended in nicely.  I was glad because I don't have a lot of current ribbons.

After sponging, I took a paper towel and wiped across the sponged band to make sure there was no wet ink on the flowers.  Still leaving the masks on, I stamped some Crump Cake images on the bottom part and the top right.  I removed the mask and stamped an entire flower on the upper left side.  

The words are from the same "Amazing You" set. I stamped them using Bermuda Bay ink.  I wanted to use a piece of a paper doily but I didn't have any current ones, so I decided to use the scalloped tag punch and cut off the scallopy end of that tag.  I had used a piece of Whisper White that I had spritzed with Pool Party ink mixed with rubbing alcohol and I added about 8 drops of Wink of Stalla to give it a shimmer.  I wrapped the new Bermuda Bay ribbon around the card and taped the edges on the backside.  I slipped the scalloped tag topper under the ribbon and I tied a ribbon bow to hide the hole of the tag.  

I die cut the "amazing" from the "Celebrate You" thinlits dies using the metallic silver card stock.  I glued the word in place and set it aside to dry while I taped the other layers together. By the time I was ready to tape the front panel on, the word was set up enough to work with.  And that was it.  But now that I look at it, I think it could maybe use some rhinestones.  Or maybe not???  I do like how the card looks, just as it is.

Thank you SO much for visiting today,
Wanda

Thursday, January 25, 2018

Epic Celebrations, Timeless Textures, Playful Backgrounds, 2018 Stampin' Up! Sale A Bration

Today I brought out the "Epic Celebrations" set and thought I would make a masculine card.  I plan to make a lot of masculine cards with this set until it's retired at the end of March.  Sale a brations sets retire after the sale is over. It's kind of sad because some of them are too nice to let go.  Plus there's not always a lot of masculine sets.  

So onto my card.

The base of my card is a folded half-sheet of Whisper White. On top of that is a 4" x 5-1/4" piece of Night of Navy.  I did punch the "Tailored Tag" piece out of it before I taped it to the card. I dropped the card stock as far into the punch as I could to get the cut as far away from the edge as I could.  That way on one will notice a piece of that card stock is missing!!!

I die cut a 1-5/8" circle from the "True Gentleman" Decorative Series Paper (DSP). And I die cut a 1-7/8" circle of Tranquil Tide card stock.  I taped those two pieces together.  I set them on the card front and traced a the circle so I knew where I wanted to work my designs around.  I lightly penciled in the circle and I erased it when I was done.

The Whisper White piece was cut 3-3/4" x 5".  I used the "swash" image and Tranquil Tide ink, I did stamp off once with the ink. I stamped that image several times on the card stock.  

Next I took the Night of Navy ink and the "coffee stain" image from the "Timeless Textures" set and stamped that directly from the ink pad.  I also used the Night of Navy ink on the small dotted image from the "Timeless Textures" set. 

I stamped the guitar and fussy cut it out.  I colored it with Night of Navy and a blender pen. The neck of the guitar was colored using the Crumb Cake marker.  I set the guitar in place on top of the circles using Dimensionals.  The circles were taped to the focal piece.  The words are from the "Epic Celebrations" set. I stamped them using black Memento ink and I punched them with the "Tailored Tag" punch.  I took the Night of Navy tag and cut it in half. I taped each half to the back of the word piece and I set that in place with Dimensionals.  And that was it.  This card looks harder than it is.  It stamped up really quick and went together just as fast!!!  The fussy cutting took the longest.  Do that first and get it out of the way if you're not fond of fussy cutting!!

Thank you SO much for visiting today,
Wanda

Wednesday, January 24, 2018

Sure Do Love You, Lots To Love Box Framelits, Valentine's Day Box, January Paper Pumpkin

This isn't a very good picture of a box, it's pretty flat looking, but trust me, it's the new "Lots to Love Box" framelits.  

To make the box I used a piece of the Sweet Soiree Specialty Decorative Series Paper.  You need to cut two pieces. If there is a pattern to the paper, you need to remember to turn the framelit 180 degrees so the pattern is going the same direction all the way around the box.  Once I die cut my box, I then die cut the center heart.  Next I used the pretty heart border with some Versa Mark and white embossing powder. After heat setting the powder I took a piece of Window Sheet and glued it in place. I set one of the larger punches on top of it to hold it in place while it set up.  

I took out a sheet of mailing labels and stamped the "Love" from the January 2018 Paper Pumpkin set.  I wrapped 10 Hershey Nuggets and set them aside.  I stamped the "You make my heart happy" from the same Paper Pumpkin kit. I also used the vellum ribbon looking piece and the Calypso Coral ribbon looking piece from the Paper Pumpkin kit.  I used a few glue dots and set that in place on top of the box front.  I used Dimensionals to put the White word piece in place.  Then I taped the sides of the box together.  You want the cover of the box to have it's flaps on the outside, so tape accordingly.  I punched a half circle on the edge of the back piece, at the top so you have a better grip for opening the lid. 

Now here's a fun and helpful tip for you.  Clip the edges of the flaps about 1/8", on the fold that is closest to the end of the flap.  On the flap side, curl the clipped piece inward.  This will catch on those side flaps and make the lid stay shut.  Yup, even if you didn't glue/tape the sides perfectly.  If they are really off, then you will need to make a larger clip and curl it in a bit more.  This works 99% of the time!  I added a bow to the front using ribbon from the Paper Pumpkin kit and the box was done!!

Wasn't that fun?

Thank you for stopping by today,
Wanda


Tuesday, January 23, 2018

Party Pandas, Valentine's Day, Love You Card. 2018 Stampin' Up! Occasions Catalog

Isn't this card adorable?  What a fabulous "Love You" or Valentine's Day card.  I found it at Inkspired Treasures.  I didn't have some of the same supplies but I made do with what I had. It's going to be my motto this year.

I didn't have the same embossing folder for the Real Red card stock, so I used the "Falling Snow" embossing folder.  I didn't have the black and white background Decorative Series Paper DSP) so I used some larger dotted paper from the "Whole Lot of Lovely" DSP pack.  

The base of my card is a folded half-sheet of Whisper White.  On top of that is the Real Red embossed piece with the DSP attached at the top.  I added a 1/2" piece of Real Red glitter paper to cover the edge of the DSP. I stamped the panda and used a stitched oval to die cut it. I die cut a heart to cover where the balloon went. I set the balloon in place with a glue dot.  I stamped the words using Real Red ink. I added Dimensionals to the back of the oval and one on the heart and set it in place, centering it on the card front. 

This was a super quick and easy card to make!

Thank you SO much for stopping by today,
Wanda

Monday, January 22, 2018

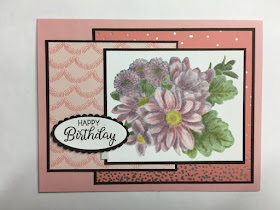
Heartfelt Blooms, Beautiful Bouquet, Birthday Card, 2018 Stampin' Up! Occasions Catalog

This was a very fun card to make.  I wanted to bring out the details of the "Heartfelt Blooms" stamp set, so I added some colors.

I stamped the image using Memento black ink stamped off once.  I needed some guide lines but I didn't want that ink to reveal it all.  I did try stamping off twice but the image was way to light to see what was what.  

I used the new Stampin' Blends and markers.  First I colored in the leaves with the light Old Olive Blends.  Then I colored in the center of the flowers using Daffodil Delight light.  I colored in the flowers using Pink Pirouette light and dark.  When I was done coloring with the Stampin' Blends, I added more detail using the regular markers.  I just wanted to highlight some areas a little more.  It was fun to sit and color, I haven't done that for a long time, probably because it takes a while to do.  To be honest, I don't think I would color another one in like that, mostly because of the time.  But all in all, I do like the card.

The words are from the "Beautiful Bouquet" set.  I stamped them using Early Espresso ink.  I die cut them with the oval die and I cut a scalloped oval for the layer.

The base of my card is a folded half-sheet of Blushing Bride card stock.  On top of that are some fun layers. I cut a piece from the "Sweet Soiree" Specialty Designers Series Paper (DSP).  The specialty part of this pack is that the papers have silver foil in the designs on one side.  I used the falling snow looking DSP here and I cut that piece 3-7/8" x 3-1/2". The Early Espresso layer behind it was cut 4" x 3-5/8".  The next layer was cut 3-1/8" x 3-1/8" and the Early Espresso layer was cut 3-1/4" x 3-1/4" and the focal piece was cut 3-3/8" x 2-3/4" and the Early Espresso layer was cut 3-1/2" x 2-7/8".  After taping them, I added the words layer using Dimensionals.  And the card was done.

Look really close under the words.  There's a hanging "thing" from the back of a tiny square Dimensional. LOL  It's SO dry in my house that these things cling to anything, not just limited to my hands anymore.  

Thank you SO much for visiting today,
Wanda

Sunday, January 21, 2018

Heartfelt Blooms, Thinking of You, 2018 Sale a Brations

I found this beautiful card on Pinterest. You can see the original card here. I changed the wording and the strip between the Decorative Series Paper (DSP) and the Whisper White focal piece.

This was a quick and easy card to make.

The base of the card is a folded half-sheet of Night of Navy card stock.  On top of that is a 4" x 5-1/4" piece of Whisper White card stock. I stamped the flowers image on the right side of the card stock using Tranquil Tide ink.  Then I taped a piece of the "True Gentleman" DSP to the left side.  

I cut a piece of the Night of Navy corduroy ribbon 3-3/4".  I stamped the words from the "Heartfelt Blooms" set using Night of Navy ink. I punched them out using the new "Tailored Tag" punch. I also punched out one out of Night of Navy card stock. I cut that piece in half and used it as a layer for the background of the word piece.  I added Dimensionals to the back of the word layers and set it on top of the ribbon. I added some snail to the ribbon and set it all in place on top of the card front. I did line up the tips of the punched piece with the edge of the DSP.

See, I told you beautiful, quick and easy!!

Thank you SO much for visiting today,
Wanda

Saturday, January 20, 2018

Truly Tailored, True Gentleman, Masculine Birthday or Father's Day Card, 2018 Stampin' Up! Occasions Catalog

Here's a fun masculine card to make.  And it's pretty darn quick to make too!

The base of this card is a folded half-sheet of "Tranquil Tide" card stock.  On top of that is a 4" x 5-1/4" piece of Very Vanilla. I scored lines every half inch. I started in the middle at the 2" mark and worked each side, just in case the card wasn't cut perfectly at 4".  Any measurements difference wouldn't show.

On top of the Very Vanilla piece I added a 2-1/2" x 4" piece of the "True Gentleman" Decorative Series Paper (DSP).  There are LOTS of fun designs in that pack.  It was hard to pick which one to use. I chose this one because I was going to be using the new Night of Navy corduroy ribbon. After I taped the DSP to the Very Vanilla, I taped a 7" piece of the corduroy ribbon to the back of it.  I used scotch tape to hold it in place. 

I punched some Crumb Cake card stock using the "Starburst" punch.  On top of that I stamped the words from the "Truly Tailored" set using Night of Navy ink.  Then I punched it out with the new "Tailored Tagged" punch. I taped the words on top of the Starburst piece. I set that in place using Dimensionals.  And that was it!!

Thank you SO much for stopping by today,
Wanda

Friday, January 19, 2018

Beautiful Bouquet, Picture Perfect Party, Thank You Card

Today I played with the new "Picture Perfect Party" Decorative Series Paper (DSP) (6" x 6") stack. I liked these fun confetti looking circles.  

The base of my card is a folded half-sheet of Whisper White card stock. On top of that is a 3-1/2" x 4-5/8" piece of Bermuda Bay card stock.  On top of that is a piece of Whisper White cut 3" x 4-1/8" and on top of that is the DSP cut 2-7/8" x 4".  The DSP and the Whisper White pieces are taped together and those layers are set in place on the Bermuda Bay piece with Dimensionals. But you need to add the ribbon before you set it in place.

I used a stitched circle die and a smaller circle die to cut out the center ring. I took the die I used on the center ring and turned it upside down on a scrap piece of Whisper White and I traced it on the outer ring. I hand cut the circle and used it for the words.  I stamped the words, getting them centered as much as I could and then I added Dimensional pieces to the ring and set that in place over the words.  I taped the back of the words and set that in place on the DSP.  

It's a pretty simple card to make and a great way to use smaller words or images.

Thank you SO much for visiting today,
Wanda

Thursday, January 18, 2018

Party Pandas, Birthday Card

Switching to a new set today, I thought I would give the "Party Pandas" set a try.  I was a bit concerned that I would not get the entire solid part of the panda covered and it would have to be colored in with marker. I saw some sampled out there and I could see where they touched up the missed spots. So, I inked it and inked it and inked it again to make sure it looked like it was all covered and it was!!! I also made sure that I didn't get any ink on the edges since I was planning on pressing down a bit harder than I usually to, to make sure that the image leaves all the ink!  I like how it turned out, no touch ups here. Oh, I used black Memento ink here.

After I stamped the panda, I die cut it with the oval die and I also die cut the scalloped oval at the same time. 

I took a folded half-sheet of Bermuda Bay card stock as the base of my card.  On top of that I taped a piece of Whisper White that I had textured using the "Falling Snow" embossing folder.  And on the right side I added a scrap piece of the "Picture Perfect Party" paper from the 6" x 6" paper stack.  My scrap measured 2" x 5-1/4". I also took the balloon images from that stack and the balloon punch and lined up the orange balloon and punched it out. I chose the orange balloon because it was one of the few that you could get the knot of the balloon in the view of the punch.  So now it is a tiny balloon with a knot!!  Such fun.  Before I taped the Whisper White textured piece to the card base, I added the piece of decorative paper and then I wrapped a piece of the "Bermuda Bay Mini Chevron" ribbon around the card and taped it in back.  Then I taped the layer to the card base.  

Next I stamped the "Happy Birthday" from the panda set using black Memento ink. I set the taped ovals in place using Dimensionals and then I added the balloon.

It was a pretty simple and quick card to make.

Wednesday, January 17, 2018

Waterfront, Beautiful Bouquet, Masculine Birthday Card

Well of course I didn't put the "Waterfront" stamp set away.  You must know me by now!!! LOL  So that means that I had to play with it again. I even left out all the ink pads too!!

The card I made yesterday I had copied but today I winged it. Since I got a feel for the image pieces yesterday I felt I could give it a try and have some fun.  And I did!

The base of my card is a folded half-sheet of Always Artichoke. On top of that is a 4" x 5=1/4" piece of Soft Suede. And the focal piece is cut 3-3/4" x 5".

First I stamped the mountains. I used Soft Suede and stamped the darkest one you see. Then I stamped the next darkest one without inking up the image again. I also stamped the smaller mountain top to the right and I gave it one last little stamp between the mountain top on the right and the little bit darker one. Click on the photo and you can see that mountain way off in the distance.  I did ink up once more but stamped off twice before I stamped the mountains on the left side.  

Next I took the tree image and inked it up with Garden Green ink. I took 2 post it notes and covered the bottom part under the mountains. I just wanted short trees here.  I stamped my trees all across the mountains.

Then I took the long strip image in the set and I stamped the green under the mountains. I used Wild Wasabi ink. Then I took the large scribble like image and inked it up with Soft Sky. I stamped just under the Wild Wasabi image. I moved it over and stamped another one, I wanted to cover a lot of area across the Wasabi line with it. I inked up the image one more time and this time I stamped off, I turned the image 180 degrees and stamped between the two darker Soft Sky images. I also stamped on the other side of the darker Soft Sky image. I didn't ink up my image again, I just used what was left on the stamp.  It was light, but it's visible.  I cleaned off that image and inked it up with Wild Wasabi and stamped it on the bottom corner area.  I turned it 90 degrees, inked it up and stamped on the left side of the card.

Next I inked up the trees image using Garden Green and I took my Always Artichoke marker and tapped on the green areas of the tree to give it a darker contrasting look.  I used my Chocolate Chip marker on the tree trunks and I stamped it on the bottom right area of the card.  I inked up the trees again using Always Artichoke and colored in the stems and added a few trunk lines up the tree. I stamped that to the left of the card.  

For the sun I stamped it using Daffodil Delight ink. I punched out 3 3/4" circles from the sticky part of a post it note and set them over the sun.  I sponged in some Soft Sky ink.

The words are from the "Beautiful Bouquet" set. I stamped them using Soft Suede ink. I die cut them and I die cut a Soft Suede scalloped oval for the layer.  I set those in place using Dimensionals. And there you have it.  A fun masculine card!

Thank you SO much for visiting today,
Wanda

Tuesday, January 16, 2018

Waterfront, Guy Greetings, Father's Day Card

Today I wanted to play with the new "Waterfront" set. I bought it because I thought it would be a great masculine set. I just can't seem to find enough masculine sets and when I see one I have to buy it!  I found this card on Pinterest.  You can see the original here.  I did change it a little.  Plus I used the "Guy Greetings" set and made this into a Father's Day card.

I pretty much used the same colors as the original card. I thought I would copy a card first before I try one on my own. There's so many pieces to it and it was a great way to familiarize myself with them. 

So to make this card I used a folded half-sheet of Always Artichoke for the base of the card.  On top of that is a 4" x 5-1/4" piece of Island Indigo. And the focal piece is Whisper White cut to 3-3/4" x 5".  

I stamped the mountain piece using Crumb Cake ink.  Next  I added the green strip under it by using Pear Pizzazz. Then I added the trees. I inked up the trees with Old Olive and used a Chocolate Chip marker to color in the trunks. Next I stamped Pool Party using the largest stamp in the set.  I'm assuming this is a lake. And then Island Indigo was used to stamp the two darker marks.  The sun was stamped using So Saffron. I punched out a 3/4" circle on the sticky part of a post it note and set it over the sun and sponged in the sky using Soft Sky ink. The original one was done using the Soft Sky alcohol marker. I tried that and it didn't look so nice going around the sun.  SO this is my version of the card I saw.  I like how it turned out and now I have a Father's Day card for my stash!!

Thank you SO much for visiting today,
Wanda

Monday, January 15, 2018

Southern Serenade, Timeless Treasures, Thank You Card, 2018 Occasions Catalog

So there was a problem with me getting my card posted earlier. I had it almost all done. I was stamping a tiny flower image from the "Southern Serenade" on a 4" x 5-1/4" piece of Very Vanilla for the inside of the card. Something that could have waited until after the card was posted. But no, I had to make the inside right away!  And I dropped the ink pad on my 100% finished card.  UGH!!!  I added the photo below so you could see it.  It's not even fixable!

So the top card is the new finished card without the ink pad mark on it!!  First I stamped the flower image from the "Southern Serenade" set using black Memento ink. Next I stamped the coffee ring looking image from the "Timeless Treasures" set, I used Crumb Cake ink for that. I used the grid looking image from "Timeless Treasures" and Pirouette Pink ink. I stamped it on the upper right corner, left side near the single flower and at the bottom, it's under the "thank you" and doesn't show up.  I stamped the lace piece from the "Southern Serenade" set using Crumb Cake stamped off once. I stamped it on the upper part of the card, across the top edge. Along the left side and over the bottom right corner. I stamped off with each one. Then I took the fleur dis lis looking image from the "Timeless Textures" set ad I stamped Pear Pizzazz directly from the pad.  I also used the Pink Pirouette ink on the small dotted image from the "Timeless Textures" set. I filled in some of the open areas with it. I stamped once and then stamped again in another spot.  In the open areas I stamped the small flower image from the "Southern Serenade" set using black Memento ink.  And that took care of the stamping.

I colored in the flowers using the Rich Razzleberry light Blends pen on the flowers.  I used Old Olive light to color in the leaves and stem.  I added tiny pearls to the center of each flower.

The words are from the "Southern Serenade" set and I stamped them using Soft Suede ink.  I sponged some Rich Razzleberry lightly over the thank you and then I sponged the edges with Crumb Cake ink. I also added a little over the words. I used the Stitched circle die to cut the words out. Behind that is a scalloped piece of Rich Razzleberry and then a piece of Soft Suede for the back layer.  I added Dimensionals and set it in place.  

I cut a piece of doily, about 1/3 of the doily, it's about 3/4" wide at the thickest point (the center). I taped the stamped piece to the Rich Razzleberry layer together.  Then I sponged the doily with Crumb Cake ink. I took a piece of the lace ribbon and wrapped it around the two layers. I taped it on the back using scotch tape. I added a little tape to the doily and slid it under the lace ribbon. I taped the two layers to a folded half-sheet of Soft Suede card stock.  Next I set the words in place using Dimensionals and for the finishing touches I added tiny pearls to the center of each flower.  

It was fun but frustrating because of the ink pad mishap but I was able to create another one and all is well!!

Thank you SO much for stopping by today,
Wanda

Sunday, January 14, 2018

Sure Do Love You, Lots to Love Framlits, Valentine's Day Gift for the Birds, Weekend Project.

I LOVE making these types of Valentine's Day gifts.  No candy, nothing for someone to set on a shelf but bird seeds!  No, not for the receiver to eat!!!  It's for the birds. A Valentine's Day gift for the birds.  Every so often I make one of these. I LOVE giving them out and in February in Minnesota, the birds love the treat!!

I used the new "Sweet Soiree" Decorative Series Paper" to make this box. The "Lots of Love" Framelits are fun and easy to play with.  

I stamped 5 hearts from the "Sure Do Love You" set using Blushing Bride ink. I die cut them and glued them in place on the front of the box.  Before I assembled the box, I used a Window Sheet to cover the heart after I had die cut it out.  I saved that die cut piece and used it to attach the words to. I taped the words together and then punched a hole in the piece.  After the box was set I added the bird seed. I used a 3" x 4" plastic zip bag.  I wrapped some silver fine thread around the box and tied the heart in place using the ends of that thread.  Oh, about the heart. I typed up the words and used my Blushing Bride ink pad and slid it across them. I die cut the words and then I taped them to the die cut piece from the center of the box.  

I have a couple I made in the past that you can take a look at.  One is found here.  Another can be found here. And my favorite can be found here.  My favorite one is more for a class or group project.  You can find the poem for this project on any one of those links.  

This was a fun box to make. And now I'm on a quest to see what all I can fit in that box so I can make more boxes and have more fun!!!

Thank you SO much for visiting today,
Wanda

Saturday, January 13, 2018

Southern Serenade, Beautiful Bouquet, Anniversary Card, Double Fold Window Card Technique


 Here's a fun card I found using a Google search. I needed to make an Anniversary card and as I was looking for something fun using the new "Southern Serenade" set, I found this fun "Double Fold Window Card".  What a fun and easy technique.  It did take a little time but it was easy to do. You can see the original card here.  

The base is a folded half-sheet of Sahara Sand card stock. The inside piece (seen in photo 2) is an 8-1/4" x 5-1/4" piece of Whisper White that was folded in half.  

I cut a piece of Basic Black 5-3/8" x 4-1/8" and a piece of Whisper White cut 5-1/4" x 4".  I centered the oval die on the Basic Black piece.  I die cut it and then I taped it to the Sahara Sand piece. I inserted the die cut in the Basic Black opening and die cut the Sahara Sand piece.  I lined up the Whisper White piece over the Basic Black piece and then lined up the largest oval die. I taped it in place with small post it notes. I die cut that piece and then taped it in place.  
Next I set the folded Whisper White piece inside and closed the front. I traced the oval lightly with a pencil.  This allowed me to know where I needed to stamp.  

I stamped the lace using Sahara Sand ink. I wished I would have stamped off once, I think the lace is a little too dark.  Then I stamped the 

flower piece. I colored in the flowers with Daffodil Delight, Pear Pizzazz and Cajun Craze markers. I taped this Whisper White piece to the inside of the card, lining up the edges.

I stamped the small flower on the front and colored it in.

The words are from the "Beautiful Bouquet" set. I stamped them using black Memento ink. I die cut the with a small oval die. I die cut an oval scallop of Sahara Sand to layer behind the words. I set them in place with Dimensionals. Be careful not to add a Dimentional to the bottom left or it may stick to the inside of the card.

See, I told you it wasn't hard to make, just a little time consuming.  But SO worth it.  This would make a great wedding card, birthday card, get well card, thinking of you card, Mother's Day card, or a thank you card.

Thank you so much for stopping by today,
Wanda

Friday, January 12, 2018

Heartfelt Blooms, 2018 Sale a Bration, Thank You Card

When I first saw the Sale a Bration catalog, I knew this was the set I wanted to get.  I thought this flower bouquet was so pretty and versatile.  The set comes with 3 sets of words but you can grab some words from another set to create birthday cards and Mother's Day cards as well. 

I opted to use a "Thank you" from the set.  I found this fun card on Pinterest.  You can see the original here.  I did change it.  I used Pool Party for all my colors because that was the color ribbon I had.  I don't have many ribbons, I don't use them enough and end up with lots of retired ribbon.  

So to make this card I used a folded half-sheet of Pool Party for the base.  On top of that I used a 1-1/4" x 5-1/4" piece of the new "Picture Perfect Party" 6" x 6" Decorative Series Paper (DSP).  I cut my Whisper White piece 2-3/4" x 5-1/4".  I ran some snail along the back right side of the Whisper White piece and attached the DSP so the piece was 4" x 5-1/4".  Or you can take a piece of Whisper White and cut it 4" x 5-1/4" and layer your pieces on top.  Actually that is a better way to go because the ribbon tends to bend the paper a bit.

After getting my piece to measure 4" x 5-1/4", I cut a piece of ribbon about 7" and taped the ends on the backside.  I slipped the ribbon under the piece I taped down and tied a bow. I cut the ribbon off and trimmed up the edges. I don't have a measurement for that because I used the ribbon directly from the spool to tie the knot.  

I stamped the words on a scrap piece of Whisper White card stock and die cut it with the stitched oval die.  At the same time I die cut a scalloped oval for the layer.  I taped those two pieces together and set them in place using Dimensionals. I taped the piece to the card base and that was it!

Super easy and such a beautiful card.  Other than my card being a little different in color, I did use different ribbon and I placed the words a little higher on the card.  It's a fun card to make, give it a try!

Thank you SO much for stopping by today,
Wanda

Thursday, January 11, 2018

Amazing You, Celebrate You, Picture Perfect Party, Stampin' Up! 2018 Sale a Bration

Today I thought I'd play with something that involved a thinlit die.  I LOVE playing with those. The image cuts out so amazingly!! So I used the Amazing You set and the Celebrate You dies. 

The base of my card is a folded half-sheet of Basic Black card stock.  On top of that is a 4" x 5-1/4" piece of "Picture Perfect Party" Decorative Series Paper (DSP) 6" x 6" stack.  What a fun stack of paper that is. One side is photo images and the other is the regular design images that are what we usually expect to see on DSP. On the reverse side of this paper is party hats.  A fun image but I didn't think it would work on this card because the focal piece would cover most of the images, so I needed something like what I found and I think it worked rather well.  

The image panel was cut 2-5/8" x 3-3/4".  I cut the Basic Black layer 2-7/8" x 4".  First I die cut the "amazing" and set it in place but didn't affix it. I wanted to see where to add the sun ray image.  I stamped that ray image using Daffodil Delight ink.  Then I stamped the "are simple" and then the "you" above that.  I affixed the "amazing" under the ray and added a few sequins and the card was done!  I set that panel in place using Dimensionals.  A very simple and quick card to make.

Thank you SO much for visiting today,
Wanda

Wednesday, January 10, 2018

Guy Greetings, True Gentleman, Masculine Birthday Card. 2018 Sale a Bration

Today I received a fun package from UPS.  I thought it was my order but when I picked up the box my thought was wow, I thought my order would be a lot heavier than this!  This was some items sent to me by Terri.  

I thought it would be fun to play with the "True Gentleman" Decorative Series Paper (DSP).  But I didn't have my order so I thought I would take out the "Guy Greetings" set and whip up a card. 

I used a folded half-sheet of Tranquil Tide for the base of my card.  On top of that I taped down the DSP. 

I stamped the car using black Memento ink. I used a 2-5/8" x 1-3/4" piece of Very Vanilla card stock. I layered it with a 2-7/" x 2" piece of Tranquil Tide.

I stamped the words using black Memento ink onto a 2-3/8" x 3/4" piece of Very Vanilla card stock.  I layered it with a 2-5/8" x 1" piece of Tranquil Tide. 

I set the layers in place on the card using Dimensionals and there it is, a super quick masculine card!

Thank you SO much for visiting today,
Wanda

Tuesday, January 09, 2018

Touches of Texture, Teeny Tiny Wishes, Get Well Tissue Holder, Weekend Project

About 500 emails ago (in a few days) I was asked about a tissue holder that I had posted on my blog almost 10 years ago.  Apparently the links to the instructions are no longer available.  Some people take down their blogs when they are no longer into whatever it was that got them starting on that blog.  Here it was stamping. It's sad that happens because the blog doesn't cost anything and it can be left open for others to go to now and then to get inspired or to find instructions.  I have no intentions of no longer blogging and should I decide to, I will leave my blog up.  Anyway, I knew I didn't have the tissue holder, it's been a long time since it was created and I don't have room to keep everything I make.  I probably gave it to someone who was under the weather.  You can see my tissue holder here.  It's the one I made back in 2008.

So, I updated it using current paper and in 10 years it will be obsolete too! LOL  But the instructions will be here so that's a positive, right? 
To make this tissue holder you will need a purse pack of tissue. I had gotten mine at the Dollar Tree a while back. I don't know if they still carry these but I'm sure you can find some at Target or Wal-Mart.  I am not sure if they vary by size so you may need to adjust your holder if necessary.  I will be giving you measurements for the one you see here.

You will need tissue, lip balm, card stock, decorative paper, stamped image, markers or whatever it is you like to color with, Snail tape, tiny half pearls, ribbon and scissors.

I cut the base of the holder 3-1/2" x 10".  I scored it at 4-1/2" and 5-1/2". 

Next I cut the layers.  I cut 3 pieces of Pool Party card stock that measured 4-1/8" x 3-1/8".  One goes on top, one goes on the inside top and the third one goes on the inside bottom. The decorative paper is from the "Delightful Daisy" paper pack and measures 4" x 3".  

The image I used came from the "Touch of Texture" set.  I colored in the image using markers.  I added some Wink of Stella to the flowers and then I added the tiny half pearls.  I trimmed that piece to 3-3/8" x 1-3/4".  The Pool Party layer behind it measures 3-1/2" x 1-7/8".  

The words are from the "Teeny Tiny Wishes" set and I used the Modern Label punch. I punched one end and then I slid the punched piece in so I could just punch the other end only.  You do this by flipping the punch over and sliding the punched piece in between the blades so you can see the words and how far you need to punch.  

I set the image and the words on using Snail tape. 

I punched two holes in the top part of the holder. You may need to punch the holes more than once, moving it over to make it larger, depending on your ribbon size.  I used 3/8" ribbon and a 1/4" circle punch.  A regular old fashioned paper punch is the correct size.  

I uses Snail tape to affix the tissue pack and the lip balm.  I was going to use glue dots but they are a little stronger than I needed. I didn't want the holder ruined while trying to remove the items.  

These are very fun and simple to make. I think they would be fun to sell at the fall craft fair!

Thank you for visiting today,
Wanda
 

Monday, January 08, 2018

Better Together, Daisy Punch, Birthday Card

I'm looking through my papers and stamps to see what I can put together to quickly make a birthday card.  Don't you hate it when you need a quick card?  I LOVE Decorative Series Paper (DSP) because it can take up a lot of real estate on a card and leave you with little more to do!  Here I used the "Delightful Daisy" DSP, I cut it 4" x 5-1/4" and taped it in place. 

Next I took the Daisy punch and punched out two flowers and stuck them together with a glue dot.  I set the daisy in place using a Dimensional.  I added a gold faceted gem to the center.

I stamped the words from the "Better Together" set and punched them out using the "Everyday Label Punch".  I also punched out a piece using Wisteria Wonder card stock. I cut that piece in half and lined up the right and left edges on the word piece with them.  I taped those pieces in place and then set them in place using Dimensionals.  And that was it. A very super quick and easy card to make. Oh and with little clean up too!!! LOL

Thank you SO much for visiting today,
Wanda

Sunday, January 07, 2018

Happy Birthday Delivery, Birthday Memories, Birthday Card

Well since I still had all of the stuff out from my card yesterday, I thought I'd find a card on the net that looked like it would be fun to make. I found this one on Pinterest. You can see the original here.  I did find the measurements were a bit off though.  I ended up cutting the Whisper White piece to 2-1/2" x 3-1/4". And I think the next layer could have been a little larger.  Anyway, here is the measurements for the card as you see it here:\

The base of the card is a folded half-sheet of Basic Black card stock. On top of that is a piece of the "Birthday Memories" Decorative Series Paper (DSP) cut 4-1/8" x 5-3/8". The yellow layer is a piece of the same DSP cut 3-3/4" x 2-1/2" and the Basic Black layer behind it was cut 3-7/8" x 2-3/8".  Next the 1" wide strip of Black DSP was taped down over the yellow layer.  I used the Triple Punch to make the right ribbon looking end and then I trimmed the on the left side piece after I taped it in place.

The Whisper White piece was cut 2-1/2" x 3-1/4" and the Basic Black layer was cut 2-5/8" x 3-3/8". I stamped the greetings from the "Happy Birthday Delivery" set.  I die cut the cake using the matching dies that go with the set. I set the layer in place using Dimensionals and then I set the cake in place with more Dimensionals. 

This is a very easy card to make and I really like the layout. Though if I were to make it again I would add a half inch to the yellow layer to make it longer so it would measure 4-1/4" x 2-1/2" and the Basic Black layer would be cut 4-3/8" x 2-5/8". And if I wanted a little more yellow to show, I would trim off the top of the Whisper White piece another 1/8".  But I think the card looks great the way it is.

Thank you SO much for visiting today,
Wanda


Saturday, January 06, 2018

Birthday Delivery, Birthday Memories, Birthday Card

I was asked about the measurements of the circles in a card I created back in November of 2015.  I hadn't included the size punch I used so I emailed my reader back and told her I would make a new updated card in a few days.  As I thought about what card I was going to make today I thought I would go ahead and make that updated card.  So here is what I came up with!  You can see the card in question here.  

I used the "Birthday Delivery" bundle to stamp the words. I had used black Memento ink on them.  I also used the balloon framelit for the balloon.  I die cut it from the "Birthday Memories" Decorative Series Paper (DSP).  

The base of the card is a folded half-sheet of Pacific Point.  The layer on top is a piece of the DSP from the "Birthday Memories" pack.  I also punched out the circles from the DSP.  I used a 1-3/8" circle punch to do that.  I taped them in place, one slightly on top of the other. I recommend you lay them out first to make sure the bottom and the top circle are about the same distance from the DSP edges. 

Now for the balloon.  I had tried to tie a knot around it but it didn't want to stay. So I punched a tiny hole in it, about 1/16".  I threaded the Baker's Twine from the back to the front.  I tied a bow and then held the thread tight around the punched opening and threaded the end back through.  I cut the end, leaving about 3/4". I taped that 3/4" to the back of the balloon with clear scotch tape. Then I held the twine firmly and used my scissors (closed scissors) and pulled the thread between the edge of the scissors and my thumb, like you would with curling ribbon, and I gave the thread a curl. I did have to do mine twice because I didn't like the first curl, it wasn't curly enough.  But if you do it too many times it won't curl at all.  I set the balloon in place using Dimensionals.  Then I trimmed the end of the twine and the card was done!

This was quick and fun to make and I do like the balloon in the corner!

Thank you SO much for visiting today,
Wanda


Friday, January 05, 2018

Stylized Birthday, Paint Play, Birthday Card

Yup, you guessed it. I did leave the "Paint Play" set out!  I wanted to get a little more use out of it before the new stuff arrives. I tend to set aside the older (even unused) sets to play with the new ones!  Bad habit.

Today's card was very fun and I used the same colors as I did yesterday.  Flirty Flamingo, Daffodil Delight, Pear Pizzazz, Fresh Fig and Basic Gray.

The words are in Basic Gray and I think you can figure out the rest of the colors.  I'm still not fond of green centers on flowers but the fig color would have been too dark and the pink would have your eyes moving from corner to corner.  So I went with the green again!  

This is a very simple card to make. I did stamp off once on the pink flowers before stamping the darker swirl.  The rest is all stamped directly from the ink pad.  It was a lot of fun to make. I like all the fun colors. It just makes me feel warmer looking at it. Another frigid cold day in Minnesota!

Thank you SO much for visiting today,
Wanda

Thursday, January 04, 2018

Paint Play, Better Together, Birthday Card

I bought the "Paint Play" stamp set because I thought it was cute but I hadn't used it yet. Not even one image in the set!  WOW!!! So today I thought I would take a look around Pinterest and see what I could find that looked like fun.  And it was fun to make.  Lots of colors to play with.  Something I don't usually do because I'm too lazy to clean my stamp and use more colors!!  But today I thought I'd give it a try, colors and all!!! You can see the original here.

The base of my card is a folded half-sheet of Flirty Flamingo. A color I haven't used much of and I could tell by the amount of card stock I still have on hand.  On top of that is a 4" x 5-1/4" piece of Basic Gray card stock.  And the focal piece is 3-3/4" x 5".  

I stamped off on the larger round scribble circles using Flirty Flamingo. Then I stamped right from the pad using the swirl image.  Next I added the larger Pear Pizzazz leaves. Then the Daffodil Delight flowers.  I used Fresh Fig on the medium scribble circles and I used Flirty Flamingo on the smaller circle clusters.  I also used Pear Pizzazz on the center of the yellow flowers. I'm not a big fan of green centers on flowers but I was just copying the card.

The words are from the "Better Together" set and Basic Gray ink was used to stamp them.  I did make a few little changes due to the orientation of some of my flowers but all in all it's pretty darn close.  I like the looks of it and now to go clean my stamps!!!

Thank you SO much for visiting today,
Wanda


Wednesday, January 03, 2018

Moon Baby, Baby Shower Card

Today's card was a lot of fun to create. I LOVE using one image in different colors to create a fun background.  Here I used the diaper pin from the "Better Together" set. The pins are stamped using Daffodil Delight, Pear Pizzazz, Soft Sky and Pink Pirouette.  After stamping them I cut the piece of Whisper White card stock down to 4" x 5-1/4".  

Next I took a 2" x 4" piece of Whisper White and stamped the baby image on it. I also stamped one on some scrap card stock along with the teddy bear.  I had to fussy cut the umbrella top, baby and bear.  Once they were cut I colored them in.  I usually color first and then cut but lately I've been messing up things so I thought it would be safer for me to cut and then color!  Sometimes you just have to!!! I set the umbrella, baby and teddy bear in place using Dimensionals.

I cut a 2'1/4" x 4-1/4" piece of Daffodil Delight card stock and layered it behind the focal panel.  The base of the card is a folded half-sheet of Daffodil Delight. 

This card can be used as a baby shower card or a new baby baby card. I just think the little baby is adorable all by itself!

Thank you SO much for visiting today,
Wanda

Tuesday, January 02, 2018

Better Together Birthday Card

I found a fun card on Pinterest and wanted to make it. I didn't have the ribbon so I thought I would try to work with what I had.  I took some white ribbon and ran some Washi Tape over it and pressed down so it would adhere better.  I wrapped a piece of it around the card panel and then I took another piece and tied it to the first piece. With a little manipulating I was able to get the Washi tape side to face forward.  

This was a fun and easy card to make.

The base of the card is a folded half-sheet of Pacific Point card stock. On top of that is a 4" x 5-1/4" piece of Whisper White that was textured with the large polka dot embossing folder.  The focal panel was cut 3-5/8" x 2-1/4" and the Pacific Point layer was cut 3-3/4" x 2-3/8".  

I cut a 1" x 5-1/2" wide strip of Pacific Point card stock and used the triple punch to cut the ends.  I taped that in place using the top edge of lined up with the center of the card. I added Dimensionals to the focal layers and set them in place over the strip.  The words are from the "Better Together" set and were stamped using Pacific Point ink.  I stamped the hat and fussy cut it. I set it in place using Dimensionals.  You can't see it in the photo but I had used "Wink of Stella" on the hat pom pom and the dots.  I added a couple of rhinestones and the card was done!

Thank you SO much for stopping by today,
Wanda

Monday, January 01, 2018

Pretty Kitty, Beautiful Bouquet, Birthday Card

Today I thought I would get out the "Pretty Kitty" set.  It's one I have not played with much. Hmm, I seem to have a few of those, don't I? I got this set because I'm such a great lover of cats. One can not have enough cats and according to our city ordinance, we can only have 3 pets, so there is a limit!!! I only have 2.

Anyway, back to my card.  The base is a folded half-sheet of Basic Black card stock. On top of that is a 4" x 5-1/4" piece of Pool Party. I used some scraps of Decorative Series Paper (DSP) from the "Whole Lot of Lovely".  It was the only DSP that I could find that would match and blend well.  I cut them 3-1/4" x 1-1/8". I cut the Basic Black layer 3-3/8" x 1-1/4".  The kitty was stamped on a 2" x 3" piece of Whisper White card stock and layered on a 2-1/8" x 3-1/8" piece of Basic Black.  The words are from the "Beautiful Bouquet" set.  They are stamped in black and then die cut with the oval die. The layer behind it was die cut using the scalloped oval.  That wasn't the plan I had for the card but it was what I HAD to do.  As I was stamping the words, I dropped the stamp and it not only made a big mark on the card front but also on the corner of the stamped (and already colored) kitty image.  So, I had to get out the ovals and do some creative layering.  The kitty image should have been moved up a bit more and over to the left a little but this is how it had to be!! I doubt you would have noticed had I not said anything!!!  I just want to show you how to save your card because sometimes you can!!

Thank you SO much for stopping by today,
Wanda