Pin It

Thursday, December 31, 2015

A Happy Birthday, Everyone English Garden Card

I'm not sure if I like this card or not. It's a little busy. I think of all of the things I could do different after I see it in my post.  (I usually post the photo first and then type my verbiage).  The flower in the center is a keeper because it's doing what it's suppose to do. It draws your eye to the center of the card.  The eye is attracted to red.  Then my eye moves to the left to the littler red flower. And then finally to the right to catch that little bold pink piece. So I got the eye movement going, that's a good thing.  Perhaps if I would have used the Hello Honey for the layers or maybe just the layer on the "Happy Birthday" part?  And maybe a Hello Honey layer behind the strip that the circles are taped to.  I don't know.  It's an okay card but.....

I used Hello Honey for the base of my card.  The circles were punched out with a 1-3/4" circle punch and the layer behind was done with a 2" circle punch.

The words are from the "Happy Birthday, Everyone" set and I stamped them in Mossy Meadow and layered them in Mossy Meadow cardstock.   The more I look at it, the more I am liking it!

Thank you SO much for visiting today,
Wanda

Wednesday, December 30, 2015

A Traveler and World Map Masculine Birthday Card

Don't look too close at the train.  I touched it while the ink was still wet and I transferred ink all over the place. I thought it was dry enough.  The sad part is, I had other things to do to the card and perhaps had I done them the ink would have dried completely. The world may never know!!! LOL 

This was a quick and fun card to make.  I stamped the images using Soft Suede ink.  I used the words from the "Wetlands" set.  I seem to use those words more than I use the other images in that set!!!  Maybe I'll make a card using the "Wetlands" set tomorrow.  I'm sure it will still be sitting on my worktable!!!  I'm notorious for NOT putting anything away!!!

I used Dimensionals on the words.  The rest of the pieces were just taped on flat.  

If you need a quick card, this is the way to go, except let the ink dry first before you handle the images.  Or don't put your thumb on the inked part!!!  LOL

Thank you SO much for visiting today,
Wanda

Tuesday, December 29, 2015

A Butterfly Framelit and Wetlands Birthday Card

I was in my workroom today (which is were I love to be) and I saw this butterfly that I had cut out a while back.  Actually it was quite a while back and it was still in great shape.  I thought I should try to do something with it today before it does get ruined.  
I took out my 12" x 12" "Irresistibly Yours" paper and I sprayed it with Marina Mist ink and water.  I didn't want a solid piece so that was why I went with the misting.  

I used Tip Top Taupe card stock on the top part and added a half a paper doily.  I added a piece of 1/4" white ribbon and then the butterfly.  The butterfly was set in place using Dimensionals and pearls were added down the center

The words are from the "Wetlands" set and were layered using Pacific Point (oh, that is the color of the butterfly).  The words were set in place using Dimensionals.


It was a fun card to make and pretty quick because the butterfly was already done.  I love it when I can find pieces of stuff and make a card from it!!!  See why I never throw anything away?   LOL

Thank you SO much for visiting today,
Wanda

Monday, December 28, 2015

An English Garden Birthday Card

I saw a fun card on Pinterest made by Debbie at Expressivelydeb.  I LOVED her colors but I needed to make it with current colors.  I could have used the 12" x 12" stacks but I opted for the "English Garden" paper pack.  I had scrap pieces and they were just the right size.  I used the 1-3/4" circle punch for the papers and the 1-1/4" circle punch for the words.  

The words were done on my computer.  I needed to make a quick card and I have a little stash of printed out words, and some of them are already punched out!!!  That makes for even a quicker card.

I used the "Cherry on Top" Washi tape.  I believe on Debbie's card she used ribbon.  I have a very limited supply of current ribbons, so I worked with what I have.  I'm trying to learn to do that more and more in my stamping and also in my every day life.

The green circle was just taped on top of the Whisper White cardstock.  The next two circles were added using Dimensionals.  And the words were just taped in place.

This was a fun card to make and VERY quick, plus super easy!!

Thank you SO much for visiting today,
Wanda
 

Sunday, December 27, 2015

A Summer Silhouettes Birthday Card

As I was paging through the 2015-2016 catalog I saw the "Summer Silhouettes" set.  It's been around for a little while now and I think it may be one of the sets retiring in a few months.  I do like this set and with that in mind I thought I would make a card with it. I liked the card that was on page 122 of the catalog but I did change it a little.

For my card I used Mossy Meadow for the stems, Pear Pizzazz for the leaves, Daffodil Delight and Hello Honey for the flowers. And for the bottom part I used Mint Macaron.

I used Hello Honey cardstock for the layer and for the oval scallop.  

The words are from the "Wetlands" set. I used black ink on Whisper White cardstock.

It was a very simple and quick card to make.  I wanted to make something with a touch of spring to it (as I'm looking out the window to our freshly fallen snow!)

Thank you SO much for visiting today,
Wanda

Saturday, December 26, 2015

A Guy Greetings and Happy Birthday, Everyone Masculine Card

Okay, you guessed it.  I did not put away the "Guy Greetings" set.  So you get to view a new card using it.I am loving that brick background folder.  And no, I did not put that away either!!!  But I will be doing that today.  I get to spend the afternoon in my workroom!!!  YAY!! It's  a place I LOVE to be in. I am not taking any responsibility for housework today at all.  It's a "me" afternoon.  Notice I said "afternoon?"  That's because it's hubby's birthday and I will have to make dinner.  But for now, it's all about ME!!! LOL

My card was pretty easy to make too.  I used the large "Happy Birthday" from the "Happy Birthday, Everyone" set.  I LOVE those large letters!  It lets you use those smaller images you have and you don't have to be real creative with it unless you want to!!

I stamped the words and car using Chocolate Chip, though they did come out very dark.  I think it was because I had just inked my pad and it was a little too wet to be using right away!  But I don't like to wait for anything so I used it right after it was inked!!!  The car is from the "Guy Greetings" set.  What a fun set!  I LOVE it! It's SO versatile and you know I love that and look for that in most sets I buy (especially if they are expensive!).  Oh  and I stamped the words and image using Very Vanilla cardstock.  

I layered the images with Chocolate Chip and Early Espresso cardstock.  The base of the card is Very Vanilla.  It was simple and quick to do too!!

Thank you SO much for visiting today,
Wanda
  

Friday, December 25, 2015

A Sparkly Season Merry Christmas

I wish you all a VERY Merry Christmas!!  I hope your day is filled with joy and many fond memories.

This is the card I sent out this year.  I used the "Sparkly Season" set to make it.

For my sparkle I used glue and a toothpick along with some Dazzling Diamonds ultra fine glitter.  I wanted some sparkle to my card and this did it.

I had colored in the image using markers.  I did that way back in October in the car while we were on our way for a 3 day getaway.  I like to have stuff to do in the card.  Many times coloring is one of them. Usually with colored pencils, but this time I braved it and used markers.  And I didn't mess up once.  I even reminded hubby to let me know when there was bad roads, road construction and tunnels!!  I got them all colored on that little trip!! 

Then it was a matter of the glitter.  That took a few nights.  I didn't have a lot of space to lay them out to dry, so each night I would do a few.  Then it was time to assemble.  There are LOTS of Dimensionals on this card.  Every piece has some!  

I did glue the textured background on. I find that tape doesn't quite do the trick because of all of the gaps in the texture, it doesn't get complete adhesion.  I am leaning towards an easier card next year but that all depends on what Stampin' Up! comes up with and what catches my eye.  I can never seem to do just simple!!!  But it's worth it, I like my little snowman card!

I hope you enjoy the rest of your day and thank you for stopping by!
Wanda

Thursday, December 24, 2015

A Guy Greetings and Gorgeous Grunge Masculine Birthday Card

Since I decided I was done making Christmas cards, I thought I would begin my needed stash of masculine Birthday Cards.  

I used the "Guy Greetings" set for this card.  I am hoping that it won't be retired.  It's a wonderful set full of fun images and LOTS and LOTS of words. Though the words here were done on my computer.  
For my card, which is not how I planned it out, I used the striped paper from the "Pretty Petals" paper stack.  I wanted the stripes on the bottom but when I sat down to assemble the card, I didn't pay attention and they ended up on top.  Which is okay (it has to be, it's all put together), but it does look okay this way too.  A good mistake I guess!

I used Very Vanilla and Early Espresso for my cardstock.  The ink I used is Early Espresso.  I have one of the older ink pads and it's in need of replacing.  Re-inking just isn't cutting it anymore.  

I used the dots from the "Gorgeous Grunge" set.  And I planned on putting the dots on but once I had set my eyes on that decorative paper, I totally forgot about the dots so I had to add them later!!  I hate it when I do that!!! LOL  But that worked out for me too!!

I set the car and the words in place using Dimensionals.  And that was it.  A super easy and quick card.  

Thank you SO much for visiting today,
Wanda

Wednesday, December 23, 2015

A Wild about Flowers Get Well Card

Today I want to share with you a non Christmas card.  I think I'm done making them now!!! I needed to make a get well card for later this month so I thought today was a good time to make one. 

I used the "Wild about Flowers" set.  The words are from my computer.

I used Cherry Cobbler and Mossy Meadow ink.  The decorative paper is from the "Merry Moments" stack.  I never seem to use those stacks up.  But there's still time before it's retired so I may try to use it in a few more cards.  

I used the brick wall background folder.  I have had it for a little while but have just started using it.  I was thinking it was more for masculine cards, but it's not!

This was a super easy card to make.  I taped everything in place and the words were set in place using Dimensionals.  And that's it!

Thank you SO much for visiting today, 
Wanda

Tuesday, December 22, 2015

A Home for Christmas and Petite Pairs Christmas Card

Today I played with the "Home for Christmas" paper again.  I SO love that reindeer.  This is probably the last time I will be playing with it.  I have some other cards I need to make, and I don't need any more Christmas cards.  This was a fun card to make though. There's lots of things going on in it.

I fussy cut the reindeer and attached it to a piece of decorative paper that is on the back side of one of the other pieces of decorative paper in that pack.  I also used some dotted Cherry Cobbler paper from the "Merry Moments" paper stack.  I used Mossy Meadow for the green pieces.  And the fun Brick Wall background texture folder.  I saw it on a card and liked the look of a half wall! 


The words are from the "Petite Pairs" set.  And that was it. It was a very simple card to do.  It took a few minutes to put it all together but it was SO worth it!!!  I may have to keep this one!!!

Thank you SO much for visiting today,
Wanda

Monday, December 21, 2015

A World of Dreams and Hardwood Sliding Card Technique

 I have not made a slider card in years.  I forgot how fun they were to make.  The only thing I remember about making them was that you needed a strip from a plastic bag!  The rest was a blur to me!  Terri taught her Technique Night group this last week.  It was a lot of fun to do and I honestly still only remembered the plastic bag.  The rest seemed new to me!!! Oh my, I'm getting old!!! LOL

To make this card we took a piece of 5-1/4" x 11" cardstock and scored it at 3-1/2", 7-1/8" and 1-3/4".  We wrapped a piece of plastic bag strip that was about 1-1/4" x 11" around the 3-1/2" panel.  We taped the strip so it was snug but could still slide back and forth.

With our card laying flat and the 3-1/2" panel to the right and the seam of the bag near the bottom, we applied tape at the seam and stuck a piece of 3-3/8" x 5-1/2" piece of decorated cardstock to it.  (Decorated side up) This is the piece that will be pulled from the top of the card.  

Next we flipped the card over and taped the top of the plastic strip and added another piece of card stock and had the words facing down.  We stapled a piece of ribbon to the top piece.  You will want to pull the ribbon to make sure it works before you tape that tiny 3/8" side seam.

Then we decorated the front.  Terri always comes up with such pretty ways to decorate the techniques. It's such a fun class.  

Thank you SO much for visiting today,
Wanda

Polymer Clay Christmas Ornaments


Today I would like to share with you the two ornaments I made for my granddaughters.  

I like like the Santa one except for his mouth.  It looks like he's panting or sticking out his tongue.  It's suppose to be his bottom lip.  I think I used a little too much clay there!  I am hoping to be making some of these to put in my web store.  They were very fun to make plus you can personalize them.  


The baby's 1st Christmas one I won't be posting since it was something I found on the net and copied it. I have a different layout that I use to make years ago but I couldn't find it.  Oh but I did find it after I had this one all made.  Isn't that how it goes.  So I will probably have some in pink and blue in my store next year too!!! 

I love playing with polymer clay.  I like playing with earthenware clay too but I don't have a kiln so this is the next best thing for me. Plus with polymer clay you don't have to paint it or use colored glaze.  You use the colored clay and when it's baked it's done!!!

I just wanted to share these with you!  I will have a regular post later tonight.

Thanks SO much for looking,
Wanda

Sunday, December 20, 2015

A Home for Christmas and Petite Pairs Christmas Money Holder

This could be used as a money holder, a gift card holder or even a candy holder.  Finished size it's 3-1/4" x 4-3/4" and 3/8" thick.

I even wrote down the instructions for you too!!! You will need a piece of decorative paper or cardstock  cut to 5-1/2" wide x 9-1/8" long.  

Score on the long side at 3-1/4", 3-5/8", 6-7/8" and 7-1/4".  Turn and score the short end at 3/8" and 5-1/8".  Or you can just score the first side and turn the paper and score the other side at 3/8" too.  Either way it works out fine.  

Looking at the last photo you will see where you need to cut away some of the 3/8" pieces.  This will form the front flap.  On the 3/8" side, clip the score lines where they meet the long score lines.  You will only be making a 3/8" clip.  That little tab also needs a little trim too.  I cut little tiny triangles off them so when the box closes it won't be too bulky inside.  Click on the bottom photo to see a closer view of what I'm talking about.  

Now fold all of your score lines.  Glue those little flaps to the inside of the holder.  Then you will be gluing the outside (longer pieces) to the other longer pieces.  You can understand what I mean if you fold the holder together first without gluing.  You can see how it goes together and where you need to glue.  I glued the front side pieces to the back side pieces.  If you glue the back side pieces to the front you will have raw edges in the front of the holder.  Like I said, fold it all together so you can see how it looks before you glue!

In the last photo, the bottom part of the image is the flap part of the card.  I cut away the sides on that section.  Then I snipped and trimmed.  

Once the sides are glued, I used my bone folder to press the glue into the paper for a better bond.

Now you are ready to decorate the front.  I used a 2-3/4" circle of Mossy Meadow with a 2-3/8" piece of decorative paper on top.  It's the reverse side of this green decorative paper.  Next I fussy cut the deer out and set it in place using Dimensional pieces.  
I stamped the words using the "Petite Pairs" set and Real Red ink on Very Vanilla cardstock.  I punched out a 1-3/4" Mossy Meadow scallop and layered the two.  I glued the reindeer piece onto the top half of the top flap and I glued the scalloped piece to the bottom half.  I only glued the bottom half of the scalloped piece.  The top half is where the rest of the flap goes to keep the holder closed.  And that's all there is to it.  

Have fun with these!

Thank you SO much for visiting today,
Wanda


Saturday, December 19, 2015

A Watercolor Wings Peek-a-Boo Card Technique

Today I a going to share a card technique that I learned at Terri's last Technique Night.  It's a super easy, quick and fun technique. 

We used the "Watercolor Wings" set.  I don't have this set.  It's on my wish list but I have so many sets that I doubt I would have much time to play with it.

To make this card we took a folded half sheet of Whisper White cardstock.  Then we took a piece of decorative paper that was cut 4" x 5-1/4".  We rolled the paper to find the center of the long side.  We gave it a little pinch to mark it and then we cut it the length of the snips.

Next you fold back the snipped pieces.  When you are done it sort of looks like a collar.  

And then to decorate it we used Dimensionals to the left wing and center of the butterfly.  If you want to add words, you will need to do it before the butterfly is added.

I told you it was quick and easy, didn't I?  And I LOVE the effect!!!

Thank you SO much for visiting today,
Wanda
 

Friday, December 18, 2015

Season of Cheer Gift Card Envelopes

Some of the places I shopped at I had picked up gift cards. Some gave me envelopes and some didn't.  I was in need of a few envelopes so I decided to make mine.  After all, I do have the Envelope maker and TONS of decorative paper!!  The two main ingredients for envelopes!!!

I cut my decorative paper 5-1/2" x 5-1/2".  I lined the left edge of my paper at the 2-3/8" mark.  I ran my stylus down the score line on the right and I punched the top. I turned the paper and lined the score line up with the long bar that sticks out on the left side and then I scored on the right side and punched again.  I repeated this 2 more times.

Next I cut the tip of one end of the envelopes off.  I didn't like how high it stuck up when the card was folded closed.  After cutting, I glued the two sides and it was done!  I set them under a heavy punch to let the glue set up while I worked on the next one.  Now they are ready for their gift cards!!!

These are super easy, fun and quick to make!!! Plus it's a good way to use up some of your decorative paper. Oh and they are a lot prettier than the ones I got from the store.

Thank you SO much for visiting today,
Wanda

Thursday, December 17, 2015

A Petite Pairs and Home for the Holidays Christmas Card

Today I thought I would play with the little deer from "Home from the Holidays".  I was cutting out a few deers for a couple of stampers and this one was sitting off to the side, so I thought I would cut it out.  Then I needed to find what to do with it. 

The words are from the "Petite Pairs" set.

It's a super easy and quick to make.

I used the "Falling Snow" embossing folder for the background.

Thank you SO much for visiting today,
Wanda
 

Wednesday, December 16, 2015

A Snow Place and Snow Friends Winter Christmas Card

I guess all snowman card don't have to be a Christmas card.  There are just plain winter cards.  It could be use for a winter birthday or a thank you card.  And of course it could be used as a Christmas card.

The pretty snowflake paper is from the "Home for the Holidays" 12" x 12" paper pack.  I set it in place on top of a folded half sheet of Night of Navy.

I took some Whisper White card stock and tore it to make the snow drifts.  I sponged them with Night of Navy.  I taped them on top of the snowflake paper and then sponged all edges.  Then the fun began.

I stamped all the pieces from the "Snow Place" set and cut them with the coordinating dies from the Snow Friends die set.  I colored in the head band using the Real Red marker.  And I colored the noses with the Pumpkin Pie marker.  Oh and the rosy cheeks were colored in using the Pirouette Pink marker.  


I used Chocolate Chip for the brown.  I stamped the hat twice because I didn't think the ink was dark enough.  I think my Chocolate Chip pad a bit off.  It doesn't match the color from the old fabric pad.  


The words are from the same set!  It was a fun card to make, it kind of reminded me of  those vinyl cling forms that I use to play with as a kid.  Dating myself, I know!!!

Thank you SO much for visiting today,
Wanda

Tuesday, December 15, 2015

A Sheltering Tree Masculine Sympathy Card

I wanted to play with the "Sheltering Tree" set.  I was leaning more towards a winter card and somehow I ended up with a masculine sympathy card.  

I used Early Espresso for the base of the card and for the ink.

I used the words from the "Love & Sympathy" set.  

I am not thrilled with this card.  It's great for a masculine sympathy card but I wanted to make a leafless tree winter card.  I'll give it another try in a few days.  Maybe!!!

Thank you SO much for visiting today,
Wanda

Monday, December 14, 2015

A Happy Scenes Christmas Card

I wanted to play with the "Happy Scenes" stamp set without the window die.  I do like the window die but I also like the images in the set just as they are.

I stamped the trees on a piece of Whisper White cardstock using Smoky Slate ink.  Then I trimmed the card to the size you see.  I didn't cut the cardstock first, I wasn't sure where I wanted the ground to end.  I added some silver glitter cardstock behind the image piece.  I layered it on a piece of Whisper White that was textured using the "Falling Snow" embossing folder.  I layered that on top of a piece of Smoky Slate cardstock.  And that was then set in place on top of a folded half-sheet of Whisper White cardstock.  


The words are from the same set.  I used the scalloped punch and Smoky Slate cardstock.  I added a layer of the glitter paper using the 1-3/8" circle punch and I punched the words using the 1-1/4" circle punch.  I set the layered trees and the circle pieces in place using Dimensionals.

Thank you SO much for visiting today,
Wanda

Sunday, December 13, 2015

A Home for the Holidays Christmas Card with the Corner Flip Technique

There's two fun things on this card that I LOVE.  I LOVE the Santa (of course) and the Corner Flip Fold technique.  You can find that technique here.  I have used it on several cards since I learned how to do it.  It's super fun and very easy.  The link I provided you has detailed step by step instructions for you to make your own.  It's so cool that the inside of the font folds forward to become the front of the card. It's magic!  Or it's expected if you cut the two sides right!!!  Just make sure your cardstock is on the long side in the cutter first!!  I included that in the instructions.  I'm sure yours will turn out find the first time!  I hadn't made one in a while and I referred to my own instructions to make this one!! And it worked!

The Santa here is from the "Home for the Holidays" Decorative Paper pack.  I fussy cut him out.  It was worth the couple of minutes it took.  

I had to make sure I layered some other color to the inside of the card or the flipped piece would have blended in and looked a bit blah.  This is not my design.  I was at Terri's Stamping Extravaganza and I was taking pictures of finished cards and projects.  It was a fun day.  I got to see all of the new products.  She will be having one in January to show off all the new Sale-a-Brations and new spring catalog items!!!  I'm excited to see samples and projects!! Plus to buy some stuff.  You have to when it's Sale-a-Bration!!!


This was fun to make.  I have lots of images that will fit into that folded square area!!!  And I'm sure I'll be getting some new ones that will fit there too!  I just love this card technique!

Thank you SO much for visiting today,
Wanda


Saturday, December 12, 2015

An Oh, What Fun and Home For Christmas Card

I just had to play with the cute characters from the "Home for Christmas" paper pack again.  I LOVE the reindeer that I used in my previous post and of course, I LOVE the Santa!!!

This was a pretty easy card to make.  First fussy cut out the Santa and I set him aside.  I like to do that part first because when it comes time to assemble the card I want everything all done!! 

I took a folded half sheet of Real Red cardstock for the base of this card.  Then I took a piece of decorative paper.  Mine came from the "Merry Moments" 6" x 6" stack. I cut that piece 4" x 5-1/4".  I took a quarter piece of Whisper White card stock and cut it to 4" x 5-1/4".  To cut my piece of Whisper White cardstock, I found the center (2-5/8").  I went over to my cutter and put that center piece on the cutting pad. I lined up the left corner and cut a long angle.  I repeated that for the bottom piece.  I had a large extra piece that I will use to punch or stamp on later.

Next I textured the top piece with the "Falling Snow" embossing folder.  The words were stamped on the bottom piece and they are from the "Oh, What Fun" set.  I stamped them using Mossy Meadow.

Now I was ready to assemble my card.  I taped the decorative paper to the Real Red card base.  Then I taped the textured piece to the top.  I lined up the top and right edges so the decorative paper didn't show. Then I did the same for the bottom piece with the words on it.  

It was now time to add Santa.  I put Dimensionals behind him and set him in place paying special attention to where his body will go so it hid where the tips of the white cardstock met!  Tricky, I know!!! LOL  And that was it.  Super easy and very quick!

Thank you SO much for visiting today,
Wanda
Friday, December 11, 2015

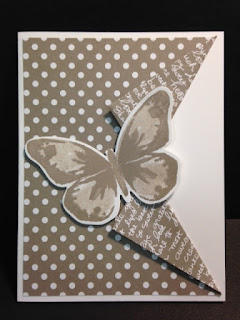
An Oh, What Fun and Home for Christmas Card

I just can't get enough of this little dear.  I think it's absolutely adorable.  I have not been hoarding my paper but I have not been using it as much as I hoped I would either.  There's a lot of little reindeer on a sheet.  I am hoping that Stampin' Up! will have some cute bunnies and other critters like this for Spring and Easter!!!

For my card I used the "Falling Snow" embossing folder.  I cut that piece 3-3/8" x 5".  I cut mine after I texture them just to be sure I get the exact size I need.  Next I cut the Real Red cardstock 4" x 5-1/4"  These layers were set in place on top of a folded 8-1/2" x 5x1/2" piece of Whisper White cardstock.  

I fussy cut the reindeer.  I took a red Sharpie and colored in a small rhinestone and set it in place on the reindeer's nose.  The words are from the "Oh, What Fun" set.  I set them in place using Dimensionals.  I die cut a star and the other little stars are scraps from the star punch.  I don't throw anything away.  If you saw my workroom you would see how true that is!!!  I glued the reindeer and stars in place.  It was too difficult to tape them.

This was a quick and fun card to make.

Thank you SO much for stopping by today,
Wanda

Wednesday, December 09, 2015

A Love & Sympathy Card


Today I was in need of a sympathy card.  I have some on hand but I always feel I need to make "fresh" one.

For my card I used the "Love & Sympathy" set.  I also used the "English Gardens" decorative paper.

The base of the card is Mossy Meadow.  I used a marker to color the flower in using Watermelon Wonder and the stems and greens were colored in using Mossy Meadow.

It's a simple looking card and easy to make.

Thank you SO much for visiting today,
Wanda


Tuesday, December 08, 2015

A Happy Scenes and Perpetual Birthday Calendar Christmas Card

Today's card was inspired (copied) from a card I found at Freshly Made Sketches.  It was made by Cindy Hall.  You can see the original card here.  I did change it a bit.  I struggled with the edges that she made.  I LOVED how they were made but I couldn't recreate them without making a huge mess.  I tried to wipe off the edges of the block before I stamped but I managed to make a mess.  I even got it on my fingers and transferred it to my card.  UGH!  I was about to give up but I stuck with it.  So, this is what I came up with.

I used the "Happy Scenes" set for the trees.  I took a piece of post it note paper and traced that line under the trees and set it on top of my glitter paper and cut that same shape.  

The words are also from the "Happy Scenes" set.  And the snowflakes are from the "Perpetual Birthday Calendar" set.  

I used Soft Sky for the snowflakes and sponging.  And I used a strip scrap piece of Pool Party for the word strip.  I still like Cindy's card better.  I do like my card and like I tell the gals who come to my home to stamp, "don't compare yours to the original".  One of these days I will follow my own words!!  LOL

Thank you SO much for visiting today,
Wanda

Monday, December 07, 2015

Santa-Tizer Hand Sanitizer Holder Stocking Stuffer

Today I'm working on some Santa-tizers.  I need to make 14 of them!  I have two done so far!!!

They are easy to make, it just took me a little longer because I was writing down some measurements for you as I was working on them.

These directions are for the 2.5 oz. Germ-X bottles (I got mine at Walmart). Cut the red card stock 2” x 11”. Score at 5”, 6-1/4”, 9-1/2” and 10-7/8”. Punch the end with a decorative tag punch. Fold all score lines inward. Punch a 1” hole at the end near the 10-7/8” score. Center the circle in that area. You will want to decorate it before you glue that tiny scored end to the back of the holder.

I added the white textured piece to the front. That piece measures 7/8” x 3-1/4”. I glued it in place. Then I added the square center to the glitter buckle piece. That center is cut ½” x ½”. The belt is cut ½” x 7-½” I cut my ½” x ½” piece off the end of the belt piece before I cut it to 7- ½”.


Before you glue the 10-7/8” part to the back of the holder, you will need to insert the bottle. Now you can glue the belt on. Add the buckle. If you trim up the belt a little shorter, you can glue it in the front of the holder and hide the seam with the buckle. Then you have a smooth belt all around the holder.


Add some bling and you are done! My bling are pearls.  I used a black permanent marker and colored on them.  I was going to use silver rhinestones but I really wanted the buttons to be black.  

I printed the words "Santa-tizer" on the computer and punched them out with the Word Window punch.  I used the retired Modern Label punch.  It's red on red so it's kind of hard to see.  But you can see it clearly in person!!  Some people add a string and punch the word piece and tie it around the neck of the bottle.  I have 14 to make, I don't want to do that for 14 bottles!!!

These are fun and easy to make!  If you use a 12" long piece of card stock you can make that little last scored piece a bit longer and easier to work with.  I didn't have any trouble with the 1/8" piece.  It's up to you!  They make great stocking stuffers!!!

Thank you SO much for visiting today,
Wanda

Saturday, December 05, 2015

An Oh, What Fun Gorgeous Grunge and Home For Christmas Card

I was totally inspired by a card I saw on Pinterest that was made by Magical Scrap World .blogspot.com.  The original card has the cute deer on it with some fabulous large snowflakes.  I have the deer but not the snowflakes so I opted to play with Santa instead.  I like this card but I think I would like to retry it using the reindeer and some retired snowflakes.  I just LOVE the look of that reindeer card.

For my card I used Whisper White as the base and then I layered Mossy Meadow.  I stamped the background using Soft Sky and "Gorgeous Grunge" along with the "Perpetual Calendar" stamp sets.  The words came from "Oh, What Fun".  

I cut out the Santa from the "Home for Christmas" decorative paper pack.  The music and green pieces of decorative paper were from the same pack.  I do like the way this turned out.  And most of all, I did have fun making it!!!

Thank you SO much for visiting today,
Wanda

Friday, December 04, 2015

A Wild about Flowers Birthday Card


This time of year I often forget I have other stamps sets than just Christmas. I'm in the Christmas mode right now (and mood too) and I forget that I have other non-Christmas sets.  

Today I was in need of a birthday card.  I'm actually getting it out in the mail tomorrow and if the USPS is not too bogged down it will actually get to my friend's house on her birthday!  An on time card.  I haven't done one of those in a long time!!! LOL

I used the "Wild about Flowers" set.  I have the clear stamp set.  I like it but there are times I still get things crooked.  I'm talking about the flowers.  Okay, fine.  The words too!!!  Gosh!!!  I thought I had them lined up just right and when I removed the stamp from the paper, UGH!  it was crooked!  But it's handmade!!  It's for a friend who stamps and will understand!! LOL

All it in all it was a fun card to make. I LOVE Washi tape and I forget I have that too.  I think if the Washi tape wasn't there the crookedness of the words wouldn't be so noticeable!

This set makes it easy to whip up a card in a short amount of time.

I used Bermuda Bay for the base of my card.  Wild Wasabi for the green stems and Hello Honey for the flowers.

Thank you SO much for visiting today,
Wanda

Thursday, December 03, 2015

A Festival of Trees Work of Art and Petite Pairs Christmas Card

I wanted to play with the "Work of Art" set and I wanted to play with the "Festival of Trees".  I forgot that it was not retired and it was being ignored because of all of the other new things I was playing with. It's kind of hard to go back when there's so many new things to play with.

This was actually a fun and simple card to make.  I stamped Old Olive ink and then moved the stamp up for a total of 4 images.  I didn't like how washed out the second and third image was so I stamped again at the bottom and them moved the stamp up two more times.  I did that for a total of 3 times.  I eyed the image.  It was okay if it didn't line up perfectly. I didn't want it to.

Then I stamped the tree using Memento black ink.  I stamped the image and moved it over just a touch to the left.  I cut it out and layered it using Old Olive cardstock.

The words are from the "Petite Pairs" set.  I stamped them using Memento black ink and I used the oval punch. I used the oval scallop and Old Olive cardstock.

I also textured the background with the new "Softly Falling" embossing folder.

This was a super easy and fun card to make.

Thank you SO much for visiting today,
Wanda

Wednesday, December 02, 2015

Half Circle Pop-Up Stamping Technique

Today I am going to share with you a card I received in the "Half Circle Pop-Up" Technique.  You can see the instructions for that technique here.  It was one that Terri taught at her fun Technique Tuesday group.  

This card was made by Nancy.  I LOVE the tree on the inside.

If  you have not tried this technique, please do. It's easy enough and a lot of fun!  

I also like how she added the striped paper to the bottom of the inside piece.  I tend to leave out details a lot.  

Sorry this post is short.  It's December and I'm already behind on things.  I was hoping to have our Christmas cards done Thanksgiving weekend, but that didn't happen. I just finished the glitter stuff on them last night and now to start gluing pieces together.  Why do I always feel I need to make complex Christmas cards?  But I do manage to get them done in time. I would like to have them done by this weekend.  Keep your fingers crossed for me (but not when you are stamping!!! LOL).

Thank you SO much for visiting today,
Wanda

Tuesday, December 01, 2015

A Snow Place Christmas Card

I was in need of a super simple looking Christmas card.  Not a lot of frills, not a lot of details, just a "to the point" type card.  I think I succeeded!!!  

I used the pretty Holly from the "Snow Place" set.  I colored in the leaves with Garden Green and I dotted on some Mossy Meadow.  I colored in the berries with Real Red.  I didn't want to use The Cherry Cobbler because I thought the berries would look almost black.  Edited: OOPS, I found out today 12-2-15 that the holly is from the "Oh, What Fun" set.  Sorry

The words are from the same set and I stamped those using Cherry Cobbler ink. 

I cut the Whisper White cardstock to 5" x 3-3/4".  I cut the Garden Green cardstock 4" x 5-1/4" and I set those layers on top of a folded half sheet of Cherry Cobbler cardstock.

It's quick and simple and super clean looking.  To me it looks like it belongs on the inside of a card.  Okay, maybe not "belongs" but may go well on the inside of a card.  I could always fold the card backwards and make that the inside.  Though I think I would like my wording up higher on the inside!!  Fine then, it's staying on the outside!!! LOL

Thank you SO much for visiting today,
Wanda

Monday, November 30, 2015

An Acorny Thank You Card

UGH!!!  I was saving this card to post on Thanksgiving day and I totally forgot it.  I had moved it (see why you should never clean your workroom?) and I it was out of sight.  Out of sight, out of mind!

This was one of the cards that was in the swap I participated in earlier this month.  It is the half circle pop up technique.  It's a very fun technique and I LOVE how much fun you can have with that pop up.  The instructions for the card can be found here. 

This card was made by Shelly.  I LOVE the wood grain.  It went so well with the acorn and Thanksgiving theme.

I like making these fun cards.  The instructions are easy to follow too!

Thank you SO much for visiting today,
Wanda


Sunday, November 29, 2015

A Love and Sympathy Card

On a more serious note, I needed to make a sympathy card today.  It's sad to have to make one any time but this time of year seems to be more a difficult time.  

For my card I used the "Love & Sympathy" set.  It has all you need to make a card.  There's even words for the inside.  I have not made a sympathy card in a long time and I struggled with this one a bit.  

I decided to use Cherry Cobbler and Mossy Meadow for my colors since they are more of a winter color but yet pretty.  I colored in the image with markers and then stamped it on Whisper White card stock.  

I stamped the words and punched them out with the large oval punch.  I had some other brand of oval dies so I used one for the layer. I think it's a bit too thick but it worked just the same.

I used an embossing folder to texture the background. It needed something, and that was it.  

Thank you SO much for visiting today,
Wanda
 

Saturday, November 28, 2015

An Oh, What Fun Christmas Card

This is another one of those "They can't all be winners" cards.  I'm not thrilled with how this turned out. Actually, I wasn't sure what direction I was going with it in the first place, but this is what I ended up with.  UGH!!  UGHLY!!! LOL

I fussy cut the Santa from the "Home for Christmas" 12" x 12" decorative paper.  The green background paper is from that same pack. And the words are from the "Oh, What Fun" stamp set.  

I'm not sure what I could do to this card to make it better.  Santa almost looks like he's on a magic carpet!!!

I just shake my head at it.  I have no idea what I was thinking here!.  I promise I won't do it again!!!  LOL

Thank you so much for bearing with me here,
Wanda

Friday, November 27, 2015

A Wetlands and Happy Happenings Masculine Birthday Card

I found this fun masculine card made by Sharon Graham at Split Coast Stampers.  I haven't surfed around on their site in a while.  I wasn't looking for anything in particular but when I saw this fun card, I just had to make it.  You can see the original card here. The words I used came from the "Happy Happenings" set.  I wanted to use words from a current set and I found ones that fit that space!  

I like simple cards for guys.  

For the stamped birds, I took a piece of card stock cut 1-3/4" x 1-3/4" and I put post it notes all around it on top of the Whisper White card stock.  I removed the card stock in the center and then sponged on some Sahara Sand and Soft Sky.  Then I added the Crushed Curry and that is when I saw the greens come out of the mixture of colors.  I removed the post it notes, which was a mistake.  I then put the post it notes back on and stamped the birds.  I used Memento black ink but I should have used Early Espresso.  I stamped the weeds and the words using Early Espresso ink.

I cut the white piece 3-7/8" x 5-1/8".  I cut the Early Espresso 4-1/8" x 5-3/8". I layered those two on top of a folded half sheet of Sahara Sand.  I was kind of glad the card stock used here was Sahara Sand. I think I'm still on the first pack I bought when that color was introduced.  I don't use it much at all!

This was really a quick card to make.  And such a great masculine card!!!  I think it would make a wonderful Father's Day card or even a masculine Sympathy card.

Thank you SO much for visiting today,
Wanda
 

Thursday, November 26, 2015

Happy Thanksgiving!

Today I am taking the day off to spend with family.  I hope you are having a safe and wonderful Thanksgiving.  I will be back tomorrow with something new, fun, and or different!  As usual!!

Happy Thanksgiving,
Wanda

Wednesday, November 25, 2015

Gorgeous Grunge Pencil Notepad Stocking Stuffer

I found a fun notepad but I didn't want to go through all of the work and steps to make it.  You can see my inspiration here

Instead of cutting lots of pieces of paper and clipping them together and gluing the end, I opted to take a finished scratch pad and work from there.

I took my scratch pad and measured it.  Once I got my measurements, I cut my Crushed Curry cardstock the same size as a piece of the pad paper.  

Next I took a piece of paper off the pad and folded it in half and then folded that half in half.  I marked those folds on my cardstock and lightly sponged the edges.  Don't fold the score lines, just lightly bend them to sponge.  I sponged all edges too. Set the piece aside.    

Then I cut a piece of Cajun Craze the same width as my pad.  I scored it at 1-1/4" and I folded it over to the back of the pad.  Then I scored that mark the fold made.  You may want to try this piece with some scrap copier paper.  I didn't make my Cajun Craze long enough to cover the entire back of the pad.  After finishing it, I wished I had.  But I can always add a piece to cover the back.  Anyway. I glued the Cajun Craze to the back of the pad.  

Next I glued the Crushed Curry piece to the inside of the Cajun Craze piece.  

I cut a piece of Smoky Slate 3/4" wide and long enough to fit the top of the pad.  I stamped the broken lines from the "Gorgeous Grunge" on top using Smoky Slate ink.  I glued that in place and the pad was done!

These would make a great stocking stuffer.  They would also make great teacher or student gifts!

Thank you SO much for stopping by today,
Wanda

Tuesday, November 24, 2015

An Oh, What Fun Christmas Card

Oh my, I can't believe how quick this card went together. I am pretty sure I found it somewhere on the net.  The 4 punched out circles are decorative paper and the words are from the "Oh, What Fun" stamp set and Mossy Meadow ink.  It's all done on a folded half sheet of Whisper White card stock.  And that's it.

I don't think I've done such a short post ever!!!

Thank you for visiting today,
Wanda

Monday, November 23, 2015

A Sleigh Ride Edglets and Petite Pairs Christmas Card

I was surfing the net and found a fun card that was laid out like the card I have here.  The dies were not Stampin' Up! but there was a tree and maybe another tree on the second layer.  I don't remember.  I tried to find the card but all I got off the net was that the card was found here at Elsea Designs.  I looked through the blog for a while but didn't find the card so I gave up.

The original card had snowflakes embossed on the left side where I did the silver punched stars.  

For my background I used Pacific Point ink and then I misted it with water and added table salt.  While I was putting the rest of the card together, the paper had a chance to dry.  I just used Whisper White card stock, not watercolor paper.  But the watercolor paper would work well too.  

This was a fun card to make.  Maybe because of the fun layers I got to play with.   You know me and layers!!! I LOVE them!!!

Thank you Marymaci for finding the original card, that was sweet of you to hunt it down for me. Please send me your snail mail address and I will send you the card I made. You can find my email address on the right sidebar.  It's the second item "Got a Question".

You can view the original card here.

Thank you SO much for visiting today,
Wanda
 

Sunday, November 22, 2015

A Cozy Christmas Christmas Card

This card is the last one out of the 5 that I made at Terri's  wonderful Christmas 2015 Stamp-a-Stack.

The words are from the "Cozy Christmas" set.  

We  used the "Home for Christmas" decorative 12" x 12" paper on the left side of the card.  

The base of the card is Mossy Meadow as well as the ink we used.

The card stock is Very Vanilla and the piece the words are stamped on measures 2" x 4". We stamped the words and then added the ribbon.  The piece was then taped in place.  And that was it.  Another super quick and easy card!!!  You have to have some of those now and then.  There are times I love spending a lot of time fussing on a card. Making LOTS of layers, and coloring.  And then there are times that I don't want to do a whole lot but yet I still want to have a nice card in the end!  It all balances out!

Thank you SO much for visiting today,
Wanda


Saturday, November 21, 2015

A Home for Christmas Reindeer Christmas Card

Here is another card I made at Terri's FABULOUS Stamp-a-Stack.  This was another fun card.  Not quite as quick as yesterday's card though.  Fussy cutting the deer took the quickness out of making this card, but I didn't mind the cutting.  You didn't have to be perfect because the deer went on Very Vanilla card stock and any vanilla that was showing from the decorative paper blended in.  Sometimes I just like to sit down and cut designs out.  And since the last card went so quickly, it was nice to sit and do a little cutting!!!

The decorative paper measures 5-1/4" x 1-1/2".  The tags were 4-1/4" x 2" before punching the one end.  At the bottom of the Very Vanilla tag is a piece of red glitter paper that was cut using the Washi Tape punch.  

Oh and don't forget that cute nose.  It's a rhinestone that was colored with a red Sharpie marker and set in place!!  SO darn cute!!!  I had a lot of fun making these cute cards!!!  I just LOVE this adorable reindeer.  I need to use it more on my cards.  It's going to retire after Christmas and it will be gone!!!  I hate it when I don't use up my papers.  I still hoard!!!  UGH!!!

Thank you SO much for visiting today,
Wanda  

Friday, November 20, 2015

An Every Blessing Christmas Card

Today I am going to share with you a card that I made at Terri's Christmas Stamp-a-Stack.  I just LOVE the simplicity of this card.  It was super easy to make but yet the image provides a big punch!

The image was stamped using Night of Navy.  A silver glitter paper star was added with a mini glue dot and that was it!  Super simple and super quick. If I didn't already have my Christmas cards planned out and already started, I would have used this one.  It's kind of sad though.  If I had used this card I would be done with my cards by now!  Oh well!!  That's the way it goes!!!

This card has a fun layout too.  The card was cut on the short side of a full sheet of card stock (at 4-1/4") and then folded in half.  The front panel was cut at 2-1/8".  The front panel is made using Whisper White and Smoky Slate card stock.  The Smoky Slate was cut 3-1/4" x 4-1/4".  And the Whisper White piece was cut 3" x 4".  There is also a 3" x 4" piece of Whisper White card stock on the inside for your sentiment.  The two top panels were taped together and then taped to the left side of the card.  You may want to mark it before you tape it in place so you don't get tape everywhere.  I so often mess up making these cards. I tend to tape that whole stamped piece and then find out as I'm setting it in place that it is now stuck, not only to the front but also to the inside!  Yay me!!! LOL  This time I was mindful of what I was doing and I was able to just tape to the left side only!!!  Happy me!!!  

These were fun, easy, and SUPER quick to make!!!

Thank you SO much for visiting today,
Wanda

Thursday, November 19, 2015

A Woodland Textured Lovely as a Tree Guy Greetings Masculine Birthday Card

Today's card was from the swap at Terri's Tuesday night.  This card was made by Tanya.  She used the "Woodland 3-D" technique.  I thought it was a fun technique.  Though I thought it took a long time to use the brown marker on the tree bark.  So I opted not to use this card in my swap.  Hind site, this technique didn't take as long to do as the Pop-up one I did.  

You can find the instructions for this fun technique here.  

I love the looks of this card.  What a perfect masculine card!

Thank you SO much for visiting today,
Wanda

Wednesday, November 18, 2015

Half Circle Pop-up Technique Birthday Card

Today I would like to share with you one of the cards I received in Terri's Technique Tuesday night swap.  I was in awe when I saw this card that Mary made.  It's absolutely stunning. It's one of those cards that make you feel good when you look at it.  I want to keep it but yet I should use it.  I don't know how that one is going to turn out!!! LOL

This is a fun card to make but it does take a little bit of time.  You  can find the instructions to do this technique here.  

I don't know what set the words are from, obviously I don't own it!!!

The decorative paper is from the "English Garden" 12" x 12" Designer Series Paper pack. 

I think the base of the card is the new in color Mint Macaron.   With the colors of those flowers, there's lots of options for the color of the base of your card, if you don't have the Mint Macaron.  

I thought the flower on the inside was from the "Flower Shop" set but it's not.  It is probably with the set where the words came from.  But the "Flower Shop" set would too!

Give one of these cards a try!  They are fun if you are not making a bunch of them in one sitting!

Thank you SO much for visiting today,
Wanda