Pin It

Sunday, May 31, 2009

A Quick Graduation Card

I needed a quick graduation card and let me tell you this one was quick. In under 15 minutes I was done. Now keep in mind this is not counting the time I spent on the Print Artist program making the graduation caps. Actually the cap was in the program, I just re-sized it and duplicated it until the page was full. SO I did have the paper done ahead of time. Much like you would just grab a piece of decorative paper from your stash!!!

I have always loved this layout and for this little graduation cap it was perfect. The gal who is graduating is from Blaine and this is the school colors!! I will post this and head off to the party that starts in a few minutes.

The measurements for this card are as follows:

Cut your card stock or decorative paper (top layer) 2-7/8" x 4"
The white layer is cut at 3" x 4-1/8"
The bigger blue layer is 3-1/2" x 4-1/2"
and the base of the card is a piece of white card stock cut in half and then that half folded in half.

I used the 1-1/4" and 1-3/8" punch for the circles. The had was stamped on a piece of scrap white an taped behind the layered circles. Those two layers were set on the bigger blue layer using Dimensionals. I taped that to the base of the card (the white folded piece). I had forgotten to add the ribbon but that was ok because the Dimensionals raised that part of the card up enough that I was able to slip the ribbon under it and still tie the bow!

Now to grab an envelope and go!!

Thanks SO much for visiting today,
Wanda

Saturday, May 30, 2009

Foil Embossing Technique Page

Here's another fun technique to give a try!!

I saw this done on the internet and metallic rub-ons were used here. I have not worked with them but I do know they are oil based. Here I used black StazOn. I chose that color because it's a product that Stampin' Up! sells and many demonstrators purchase my pages for classes and their own personal use.

After I ran the foil covere card stock through the embossing folder I took my StazOn ink pad and just ran it across the foil. I let it dry for a few minutes and then I wiped off the excess ink. And that is pretty much all there is to this technique. It makes a fun background image. If you have other colors of StazOn you can give them a try to see what effects you get. It is very pretty in other colors and in multiple colors too. Just be careful to use the lighter colors first, you don't want your ink pads ruined.

Give this one a try and have fun!

You can find more technique pages here. And you can purchase the CD's here. The first set is on page one and the second set is on page two, they are easy to find there. To purchase the actual finished pages you will need to contact me via email.

Thank you SO much for visiting today,
Wanda

Friday, May 29, 2009

Cup of Candy Weekend Project

Here's a fun project I'm going to have to remember to use around Christmas time!!

I was going to buy hubby some wild rice soup at the grocery store. I had taken the cup and a lid and I looked and they did not have wild rice soup that day. SO I could hardly put the cup back in with the other ones. And I REALLY hope that people don't do that after touching them. I had brought it up to the register with me and told the gal why it was empty and I asked her if I could keep it. She looked at me funny and said "sure" with a question in her voice!!! LOL My intentions were to bring it home and put left overs in it for a future lunch for hubby. But then I thought how fun it would be to decorate it.

SO I got out some decorative paper but first I had to make a pattern so I could trace it onto the decorative paper without wasting any of it. The pattern was a bit difficult to make but I managed. And without taking the bowl apart!!! I got the paper cut and taped it in place. It was very simple once I had a pattern. Then I took a stamp from the Stampin' Up! "Oval All" set and used the "Just for You" image. I then punched it out using the scalloped oval punch. I LOVE that punch!!! Then I punched out a very large oval using a Marvy punch I had and same with the larger scallop oval. I sponged the edges of the scallops using Almost Amethyst. The works I stamped using the Almost Amethyst ink pad and then colored the inside of the words and the oval lines using a the black marker. I stamped it on Whisper White card stock and punched it out. I taped the layers together and taped them to the top of the lid of the bowl.

I tied a ribbon around the bowl and filled it with candies. I think these would be a LOT of fun at Christmas time. I'm going to go to The Dollar Tree to see what type of bowls they have with lids. I'm sure I can find something there and they would probably be plastic so they would last a bit longer.

These would also make great center pieces for your Open House when the new catalog comes out!!! Or use paper to match the theme of your even (ie: graduation paper) and place them on the tables as a center piece!! There's LOTS you can do with these!!

Just have fun!!

Thanks SO much for visiting today,
Wanda

Blog Candy Winner!

I almost forgot to draw the name for the Blog Candy!!! That wouldn't be a good thing.

There were a lot of you who do prefer spring over summer. I'm SO with you. And one of you mentioned that it was snowing where you live in Canada. I would LOVE to be there. I'm such a snow freak, especially if it is snowman snow!!! I REALLY love the snow. I don't mind shoveling it. Driving in it is not fun but I do it. It's the ice on the roads that I don't like. But anyway, back to the spring, which is almost over!! I love it that there are very few bugs and I love the cool breezes and the smells in the air of blooming flowers and trees. This weekend we will be opening up the air conditioner and power spraying the inside of it to get it ready for summer. Not a fun job but a necessary one!!

Onto the winner!!! Drum roll please!!! LOL The Random Number Generator picked comment #1. You will have to click on the photo to see the number closer but trust me it is #1!!! The winner is Linda Peterson and here is the comment she left:

Linda Peterson said...

I am a very Spring person. I do not like heat very much. I look so forward to seeing each of your techniques and am getting ready to order your second CD. You are so awesome for sharing so much info with us.
Linda Peterson

Charlene, where are you?? You are usually #1 when you leave comments!!! This would have been your lucky day!! See even the first one to leave a comment could (and did) win the Blog Candy.

Linda please email me with your snail mail address and I will get the package out in the mail to you.

Thank you all for playing. In a few days I will be posting the 700,000+ hits Blog Candy so stay tuned!!!
Wanda


Thursday, May 28, 2009

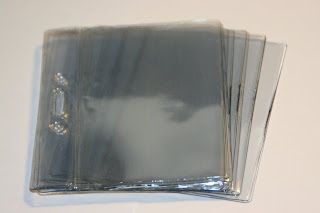
Badge Holder Albums - Weekend Project

While digging in one of my craft drawers I ran across a project I was going to do someday. Guess what? It’s “someday!” LOL I found a bunch of packages of badge holders I was going to use to make a mini album.

This is a fun and not very expensive little project. You can use this to make a mini photo album or to keep little punched out flowers, circles and other tiny card making supplies in.

I have packages of them from 3 different companies and the only difference I see is one of them has larger holes. The sizes are all the same. And the one with the larger holes also has the holes just a little bit further apart than the other ones. The other two companies badge holders are exactly alike. That’s a good thing. I will only have to deal with two sets that are different!!!

They measure 3" by 3-5/8". So I cut my card stock that size. I did cut it on the wider side of the 3-5/8" mark though. I wanted it to be just a touch bigger because of the score line I needed to make at 11/16th” so the cover will open easier. I didn’t add a score line on the back. I also cut the some shirt board using the same measurements. The shirt board is the same thickness cardboard you get on the back of the Stampin’ Up! Decorative papers. I cut it so the nicer side of this card/shirt board is on the outside. I affixed the card stock to the shirt board on the front only. You can cover the back if you like but I didn’t.

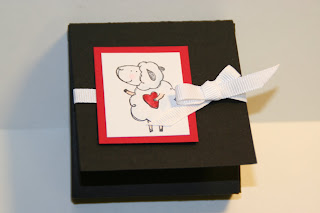
I then decorated the cover. To attach the “pages” together I had punched holes in the cover and back matching them with the sleeves. Then I ran a ribbon through the holes of both covers and sleeves. I tied a knot and a bow and the album was ready to use!!

It’s a fun, quick and inexpensive project. These have been around a while but like I said, I had run across them digging in one of my craft drawers. I now have some room in that craft drawer. But I’m pretty sure I’ll be stuffing something in it for safe keeping for a “someday” project!!!

These make great Hostess Gifts, Customer Appreciation Gifts, Stamp Camp projects, Craft Fair items and even fun kids projects!!!

Thank you SO much for visiting today,
Wanda

Wednesday, May 27, 2009

Wednesday Sketch Challenge

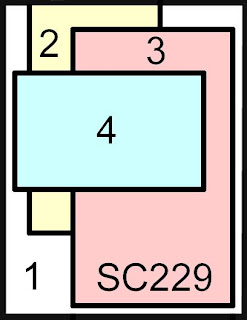
Here is the card I did for the Wednesday Sketch Challenge over at SplitCoastStampers. I am always happy when I have a bit of time to play along. When I saw the sketch I wasn't sure I wanted to play. It was that square piece #3 that threw me. But as I looked at it and the decorative papers I had I thought some plaid would be fun in that space. Well, I managed to use 3 plaids in this card. As I had the sheets of plaid sitting out it reminded me of a bad day of matching clothes!!! LOL But as I put the card together I began to like the plaids I picked. I always second guess myself and I really need to stop doing that.

I used the Stampin' Up! "Trendy Trees" set. I didn't like the Always Artichoke leaves so I added more and then I added a little Baja Breeze leaves to it and I liked it much better. I sponged the edge of that piece with Always Artichoke. And I lightly sponged the edges of the "dear dad" words with the same color.

I finally got to open my corduroy brads and buttons container!!! And the decorative paper Manchester was new too!!! The shocker here is the decorative papers. I actually used 3 pieces from the same pack!!! See, I'm almost cured from hoarding papers!!! Almost!!! LOL

I really liked this sketch because it had LOTS of layers and I LOVE doing layers on my cards. They just seem to add a lot more dimension, color and contrast to cards. But there are times when no layers are fun too but I really struggle with cards like that!

This card would be great for many masculine occasions. This one could be for dad on his birthday or for Father's Day. It's just a very versatile card!!! And as I look at it I am really liking the colors and SO glad I went with them!!!

If you have time, head on over to SplitCoastStampers and play along with today's sketch. You can even go back in the archives and start at #1 and work your way through all the sketches!!! I haven't done that yet. Maybe some day!!!

Thanks SO much for visiting today. The blog candy drawing is after midnight tonight! Good luck to all of you who entered!

Wanda

Tuesday, May 26, 2009

A LONG Overdue Thank You Card!

I have finally found my list of cards I needed to make. I was going by memory and frankly that does not work very well for me anymore!!! It's SO sad.

Hubby and I had gone out to dinner and met some friends who were dining at the same place. They asked us if we wanted to share a table. We thought it was great and we had a wonderful time catching up on things. We need to do that more often.

Anyway, I wanted to send a thank you card and I actually wrote it down on my list and then I misplaced the list. But I did find it and realized I have other cards that have slipped my mind too. UGH. I wish I had a better memory!!!

For this card I used the Stampin' Up! sets "Echo's of Kindness" and "Holiday Blitz." I hadn't put the decorative paper that I had out the day before SO I thought I would use it up. Yup, I actually used up that piece. And I think now I no longer have that print or that color in my stash anymore either. That's a HUGE step for me. It's tough when you get down to your last quarter sheet and don't really want to use it up. But I did and I also survived it too!!! LOL

Once again I used the Cuttlebug Dotted Swiss folder. My favorite!!! I used it twice on this card. Once on the white background piece and again on the solid Almost Amethyst piece. I added a little bow and ribbon alongside the flower. That space just needed a little something. The top needed something too but that is where I put the "thank you!"

This was a very simple card to do. I had stamped the image using black StazOn and I colored it in with markers and a blender pen. One of my favorite techniques. I sponged the edges of the flower and the "thank you" and put it all together! Now to remember to get it out in the mail tomorrow!!! LOL

Thanks SO much for visiting today and don't forget the blog candy!
Wanda

Monday, May 25, 2009

Quick I Need A Birthday Card

Ok, I thought I was on top of things this month and then it dawned on me I needed a birthday card and I needed it like a half hour ago!!! LOL SOOOO, I head down to my workroom where I get easily distracted by other things in the room. A stamp set not put away, some card stock sitting by the paper cutter, etc. And the next thing I know another 20 minutes have slipped by.

I quick grab my book where I keep a copy of each Sketch Challenge that Split Coast Stampers has offered. I like having a layout at hand. I had the butterfly stamp from the Stampin' Up! "God's Beauty." I stamped the image on glossy card stock using Black StazOn. I colored it in using an Almost Amethyst marker and a blender pen. Then I came in with Lavender Lace to darken the bottom areas of the elongated ovals on the wings. I sponged he edges and it was ready for layering.

The words came from the Stampin' Up! "Birthday Bests" set. I even stamped on the inside of the card which is something I rarely do. But this set has it all, even a belated stamp. I think this set was designed just for me!!! LOL

I used the Cuttlebug Dotted Swiss folder (again). I just LOVE that background. It goes SO well with most cards!! And especially this card. It was just what the card needed.

And it's great to use up those little pieces of decorative papers too. I have TONS of them. But hey, at least I am using them now instead of hoarding them!!! I have gotten REALLY good about not hoarding my papers any more. How many papers do you have to have before you realize you need to start using them? A few hundred?? LOL I have lots but I have been using them now too!!! It's a start on my way to recovery from hoarding paper. It's a 12 step program and I'm doing well!! LOL

Anyway, my friend LOVES purple and I think this card is purple enough for her, don't you?? LOL I think she'll like it!!

Thank you SO much for visiting today and don't forget about the blog candy!!
Wanda


Sunday, May 24, 2009

Time For Some Blog Candy!!!

I was thinking it was time for some Blog Candy. It had been a while since I posted any. I know I still had to do the 700,000+ hits one yet and I was going to do that today but as I was looking through my Blog Candy box I noticed that the Blog Candy I had posted in March went unclaimed. SO I will need to do a "redo" on that candy before I move on to the 700,000+ hits one. And I'm sure it won't be long after that I'll be doing one for 700,000+ hits!!! You can find out more about this set of rubber stamps by clicking on the link above. This is a very fun flowery set

And again you know nothing is ever free. To be entered in the random drawing you need to leave a comment on this post only. And what is the theme of the comment???? Well, with spring almost over and summer just around the corner I think something about the seasons would be good!!! SO here's your question!!! Are you a spring or summer person?

As for me, I'm a spring person. Actually I'm a winter person but since the choices are spring or summer I have to pick spring. I don't do summer well at all. I do tan well but right now I'm so white I think I would catch fire if I went out in the sun!!! LOL I don't like to be hot and once the temps rise enough that I can't cool off the air conditioner comes on and it will run until the summer is over. Once in a great while it will get shut down because of a cool front but it's rare. I need to move to Canada for my summers, way up north in Canada!!! I would love it.

Leave your comment here by midnight Wednesday May 27th. I will go to the Random Number Generator website and enter in how may comments are left here and have it pick a winner. Only one comment per person please. If you accidentally hit enter twice I do moderate my comments and I can delete the extra one for you. You do need to check back on Thursday evening to see if you are the lucky winner!!

Oh and in that Blog Candy box were other items too. I find little stamping and scrapbooking things and add them to the Blog Candy as the "game" is going on!! And I'm sure I'll be adding more things to until Wednesday!!

Good luck to you!!
Wanda

Saturday, May 23, 2009

Versa Glaze Technique

Sorry I'm a few days late in getting this technique posted.

This is a fun technique I came up with. I was looking for some color for my clear embossing powder and this is what I came up with. I don't really recall what made me think to mix the VersaMark refill with the ink refill but what is important is that it worked. I can now make any color VersaMark I want as long as I have an inker for it!!! Which reminds me I need to order a new one!!!

After I mixed the two products together I used a paint brush and brushed it on the rubber stamp. Then I stamped it on the glossy card stock. I sprinkled the image with clear embossing powder and heat set it. Once that cooled down (almost immediately) I sponged the color over it. It's a very simple technique to do and you can use more colors on your images as I did in the flower post I did a few days ago. You can click here to view it.

You can have a lot of fun with this technique too. If you mix up a lot of this "ink" you may want to cover it with a paper cup so it doesn't collect dust. It's not fun when you have dust in your clear embossing images.

Thank you SO much for visiting today,
Wanda

Friday, May 22, 2009

Simple Anniversary

I just remembered it was my brother's wedding anniversary tomorrow and I totally forgot to make him a card. SOOOOO, I quick whipped one up and got it in the mail today. He lives 30 miles north of me. What are the odds of it arriving tomorrow??? But then again the holiday weekend did buy me some time, they are out of town!!!! If it doesn't arrive tomorrow it will be there on Tuesday! Either way they will be getting it late!!! LOL

For this card I used the Stampin' Up! "To Have and to Hold" set. It's such a fun and yet elegant set. I REALLY hope it will still be in the upcoming catalog. Keep your fingers crossed on that one!!!

The words were done on the computer. I couldn't find an anniversary rubber stamp that would fit within the small oval punch. I layered the words on a piece of brushed silver card stock.

I did use the Dotted Swiss Cuttlebug folder. You know it's one of my favorite background folders to play with.

I colored in the campaign glasses using the So Saffron marker. There really isn't a lot to this card. But then again I did say I quick whipped up this card!!!

The beautiful decorative paper is from the Bella Birds package. I thought the color would go well with the brushed silver. The base of the card is made using a half sheet of Brocade Blue. And to cover the lines between the decorative paper and the dotted swiss I used some white grosgrain ribbon I got at The Dollar Tree. Such a great deal on that ribbon. It contained 5 yards!!!! Now that is a really good deal.

I was going to post my new technique page today but I didn't get it finished. I will post it tomorrow so stay tuned!!!

Thank you SO much for visiting today,
Wanda

Blogger Issues

Is anyone else having Blogger issues? Yesterday when I went to go on my blog I got an error message telling me that the website didn't exist. My blog/website was no where to be found. Where on earth (in cyber space) did it go? Later that night it was back. Now this morning I was locked out of it. UNREAL!!! I had checked on a few other fellow bloggers blogs and some of them I could open and others I couldn't. Hopefully you all are able to open Blogger!

Well, back to work on that "VersaGlaze" technique!!! I would like to get it posted tonight!!!

Have a great day,
Wanda

Thursday, May 21, 2009

Just Beachy Summer Fun!

This Stampin' Up! "Just Beachy" set is such a fun set. I have already confessed that I originally bought it because of the fish in the set but now that I have looked at it and seen other things done with it I am finding it to be a pretty fun set to have!!!

The decorative paper I used on this card is from the "Tea Party" assortment. I just LOVED those stripes. And it was after I decided I wanted to use that striped paper that I chose the colors I was going to use for the card. I wasn't sure about the images yet though. I was leaning towards the car but the fish kept looking at me!!! LOL I stayed away from those fish and thought about making a summer beach invitation card.

Those sandals are just TOO stinkin' cute!!! I have another idea with those that I will share with you in a day or two. It would make a great weekend project. I just LOVE those weekend projects!!! Some of them don't even take the whole weekend to do!!! LOL

Okay, back to the card. I used a blender pen and More Mustard to color in the car. Then I colored in the panels on the car and the wheels using just the marker alone. And the sandals were colored in using markers. Not a whole lot of effort into coloring for this card. The background paper is what really carries this card. It's a quick and simple card to make and now to mass produce them for the summer fun invitations!!!

Thank you SO much for visiting today,
Wanda

Wednesday, May 20, 2009

Wednesday Sketch Challenge

I was SO glad I had a little time to play with the Sketch Challenge today. I just LOVE this layout!!! It's got a lot of possibilities. There's a LOT of stamps around here that will fit in that little window. Today I chose the butterfly from the Stampin' Up! "God's Beauty" set. I just LOVE that butterfly!!!

I stamped it on glossy card stock using black StazOn. Then I colored it in using a Q-tip. I had colored the marker on the cover of my stamp set and picked up the color with the Q-tip. I started out with Pretty in Pink. I colored the whole butterfly in except for the little round dots at the edges of the wings. Then I took the Pretty in Pink marker and colored it in so it was a little darker. And finally I took the Regal Rose marker and colored it in at the darkest parts of the wings.

I kept this card simple. I figured it could be used for SO many occasions. Birthdays, Thinking of You, Sympathy, Mother's Day, Get well, etc.

I used the Dotted Swiss Cuttlebug folder for the white background piece, the Pirouette Pink and Pretty in Pink piece. I layered them on black card stock and taped them all together. Before I taped the larger Pirouette Pink piece on I tied a bow and added it to the bottom of the piece. That area just needed a little something!! I thought about adding some words there but I wanted to keep the card simple enough and blank so I could use it for any occasion.

If you have time stop by at SplitCoastStampers and play with the sketch!!! You don't have to be a member there play along and submit your work!!!

Thanks SO much for visiting today,
Wanda

Tuesday, May 19, 2009

VersaGlaze Flowers

Here's a fun thank you card I made using a brand new technique!!!

I used the Stampin' Up! "Live Your Dream" set. I have not played with that set much and to play with it using a new technique was even more fun!!

I used glossy card stock and sponged in the background colors using Ballet Blue and Night of Navy. I sponged the edges using Night of Navy. I then layered it on top of Sage Shadow, Apricot Appeal and Whisper White card stock. All of which I had run through the Cuttlebug Dotted Swiss folder. The white spot on the bottom part of the stems is from the flash on the glossy card stock. Sorry about that. I didn't pay attention to it when I was taking the picture. But then again it shows you that it was glossy card stock!!! LOL

The "Thank You" was from a rubber stamp I had special made. I used the oval punches and oval scallop punch for the words and layers. I added 3 black brads to the Sage Shadow piece and it was enough to finish off the card. Though as I look at it I'm not thrilled with the color scheme but it's done and all taped together so there's not much I can do about it but start over and I'm not going to do that today!!! I've got TOO many other things to tend to today!

Stay tuned, I will be posting that technique later in the week. First I have to type it up and figure out what stamp to use for the technique page and then to get a page finished to post here!!! It is a very fun and different technique.

Thank you SO much for visiting today,
Wanda

Monday, May 18, 2009

Dressing Up Cookies!!

I wanted to bring a couple cookies to a friend tomorrow and I wanted to dress them up a bit. I suppose Saran Wrap would have been just fine alone but..... I REALLY wanted them to look a little more special than that.

SO after wrapping them up in the Saran Wrap I tied a Pink Pirouette ribbon around them and tied it in a bow. It looked pretty but it still wasn't enough.

Then I thought I would add some type of label on it. I immediately thought of the Sale-a-Brations set that had the "yummy" words on it. But then I would have to try to hunt it down!! The lazies had kicked in!!! LOL I had just used one of the images in the Stampin' Up! "Oval All" set and in that set was this wonderful "Just For You" stamp. It was perfect!!!

I stamped the image on white card stock using Regal Rose ink and then I punched it out with the large oval punch. I stamped the image on Pretty in Pink card stock and punched it out with the scallop punch. I taped the two pieces together and had an adorable label. But how was I going to attach it??? I thought about just taping it to the Saran Wrap but that seemed a bit tacky. SO I got a tiny hole punch and punched a hole through the two layers on the oval. I took several pieces of sewing thread and threaded it through the knot on the ribbon and then through the label. I tied it in a knot and clipped the ends. It was just what the cookies needed. Isn't it cute???

Thanks SO much for visiting today,
Wanda

Sunday, May 17, 2009

Bridal Shower Card!

This has to be the cutest bridal shower card!!! I love the dress on this and it was very easy to do too. I didn't have the Sizzix Large Scallop die cut so I used the largest Nestabilities scallop I had and it worked just fine. Just use what you have. I couldn't see myself buying that large scallop just to make dresses. I have not had a use for it yet so I am holding off until I can find more than one or two used for it to justify me purchasing it!!!

Anyway, I used the large Nestabilities scallop and cut it out using some old flowered vellum that Stampin' Up! use to sell. I didn't even know I still had some!!! And then I cut another scallop piece out of Pink Pirouette card stock. The vellum alone wasn't bold enough to stand out against the card stock.

To do the dress I did cut a practice piece out and made a template. Actually I ended up making two because I wasn't happy with the first one. The waistline was down too far. I cut out one side and used that piece for a template for the other side so they would be fairly semicircle. I cut the vellum and card stock separately and then I taped them at the waist where it wouldn't show.

I tied the ribbon around it and added a rhinestone brad. Cute touch, huh?? Not my idea. None of this was my idea. I saw it on SplitCoastStampers. It was a card by Eileen LeFevre.

When I laid my eyes on it I knew I HAD to make one. And I really did need one. I forgot about a bridal shower that I NEEDED a card for. This card was actually pretty quick to make. And I wish I would have gone back to SplitCoast to view Eileen's card again, I would have used the oval punch and stamp like she did too!!! I did my words on the computer and they will have to do since the card goes in the mail tomorrow morning. UGH!!!

Isn't this such a fun idea? Wouldn't that dress be great for a girls night out invitation too??? I'm sure there's lots of other ideas you can use that dress with!!!

But for me I needed a bridal shower card and that is what I got!!!

Thank you SO much for visiting with me today,
Wanda

Saturday, May 16, 2009

Branch Out Thank You!

I was able to find some time to play with the Stampin' Up! "Branch Out" set again. The first time I played with it I struggled a bit but this time it was much easier. Maybe because I had a purpose and a need for the card and last time I just wanted to make a card!! It really does make a difference in how the card can look when you are done!!! Well, it does for me!

I stamped the tree in Chocolate Chip ink. And the tire swing too. But for the tire I took a marker and just added a bit of black color to it after it was stamped. Now had I been thinking of coloring the tire before I stamped it I would have taken the marker and colored the tire right on the rubber. But I didn't think about coloring the tire until after I had stamped it and saw it on the card stock! For the color in the tree I used some fun stuff called "Flower Soft." Isn't it cool?? And PSSSSSST Sandy, the Flower Soft arrived today!!! We're splitting some and I just had to use my half of the "Sweet Pea" color!!! That color was Sandy's suggestion and a great one at that!!!

The "thank you" is from the "Oval All" set. I hadn't had a chance to use that set and when I saw the "thank you" I knew it was going on this card. And that little butterfly on it cinched the deal!!! It's SO cute!

I also used the "Lots of Tags" die cut. The new oval punch fits nicely on that die cut! I sponged the edges of the die and the oval in Chocolate Chip. I also sponged the vanilla in Chocolate Chip as well. I layered the tree on top of a piece of Chocolate Chip and then layered that on top of a piece of Certainly Celery. The pink layer is Pretty in Pink and I ran that through the Dotted Swiss Cuttlebug folder. I think that is my favorite folder of all the ones I have!!! I seem to use it a lot, don't I? LOL

This was a pretty simple card to do. The Flower Soft helped with that! I was able to add a lot of color to the card using that stuff. I have wanted to buy this stuff since it first came out!! Now I have some and you may see it more on my cards!!

Thank you SO much for visiting today,
Wanda

Friday, May 15, 2009

Salted Background Technique Page

This is a very fun technique. I've seen it used on finished cards and projects but I've never seen how it was done. Nor have I seen the results closeup. I was quite surprised at how easy it was to do and how cool the end result is. Plus you learn a little along the way when you make more than one sheet of them!! I did learn that you do need to keep the paper wet to get the best results.

To do this technique I ran my watercolor paper under the faucet to get it wet. I had added a little piece of double sided tape to my work surface paper so the watercolor paper wouldn't move around on me. Then I took my paint brush and used a bit of ink from the re-inker bottles and added it to the watercolor paper. I didn't try to make my lines even or straight. I just added whatever color on my brush in open areas too. When I had the paper covered I added the salt. You can see in the photo how much salt to add. You don't want to cover the paper like you would for embossing and you don't want the salt to sparse either. Once the salt was added I took my spray bottle and misted the paper. This really activated the salt and as it started to dissolve it began making it's own cool designs in the paper!!! I did use the heat embossing tool to speed up the drying process. Once the paper was dry I just brushed off the salt and cut it to fit the area I needed. It is a very simple technique and I just LOVE what the salt does too!!! It kind of gives it a marbled look too. I thought it would be fun to figure out the best way to do that marbled part and try to duplicate it on a larger scale. The marbled areas are not very big on the paper. I will be trying to figure that one out and try to do a new faux marble type technique! We'll see what I come up with! Probably just a mess but a productive mess!!! LOL

I took the fish stamp from the new Stampin' Up! "Just Beachy" set. I thought it was the most perfect image for this background on the smaller scale I needed it for.

Click on the photo for a closer view. Doesn't it look cool???

Give this technique a try! It's a LOT of fun!!

To view other techniques just scroll down to the bottom of this post and click on the word "Technique Page" in the labels.

If you wish to purchase the technique pages please email me. You can also purchase them on CD. Just look to the right of this post up at the top and you'll see where my web store is. Just click on that and you will be directed to the store. There you will find the CD's.

Thanks SO much for visiting today,
Wanda


Thursday, May 14, 2009

Lavished in Luxury! Weekend Project

Here's a fun gift to make and it really doesn't take all that long either!!! Gotta LOVE that!!!

Once again I am recycling glass bottles. These had Hormel bacon pieces in them. I like bacon but yet I don't. I won't eat a piece of fried bacon. I find the fat on it disgusting. But the Hormel bacon in the jar has very little fat, it's mostly the meat. It works great in our salads and dishes that call for bacon. If hubby wants bacon he can order it when he goes out for breakfast with is family on Sundays!!! WOW, more information you didn't need to know about me!!! LOL

Ok, onto the project! I typed up the words on the computer. I used Carmine Tango font and the size of it is 20. It fit in the large oval punch nicely. I printed a full page of them on Whisper White card stock. After I punched it out I sponged the edges in Lavender Lace. I punched out the new larger oval using Lavender Lace card stock. I used the Sizzix "Lots of Tags" die cut for the label part. I cut it out of Whisper White and sponged the edges of it as well.

I tied a ribbon around the neck of the jar. I was looking for some Lavender Lace ribbon and realized I didn't have any. SO I take out my catalog and was going to add it to my list of things to order and much to my surprise there is not one piece of Lavender ribbon in the whole ribbon section. Not even Lovely Lilac!!! Hmmm. I thought I could dye some ribbon but it's just too messy of a project for me. Plus I don't feel that the ink sets well enough and it still gets on your fingers.

On the top of the lid I punched out a scallop and layered on top of it a 1-3/8" piece of white card stock that has the word "Diva" typed on it.

On the bottom I have the directions and the ingredients. If you are making them for yourself you don't need to add this information but if you are making them for gifts or to sell you MUST add it.

I suggest 1 or 2 Tablespoons in the bath water.

The recipe for the bath salts can be found here.

Save those fun looking jars, you never know when a project will pop up that you need them for. I have a garage full!!! LOL Have fun making these!

Thank you SO much for visiting today,
Wanda

Wednesday, May 13, 2009

Wednesday Sketch Challenge

I actually had time to play along with the SplitCoastStampers Sketch Challenge today.

This was a fun layout. To figure out what image to use I just look through my stamps and see what best fits in the area and then I go from there. Once you have the image you want to use the rest is pretty simple. Colors and layers and sometimes decorative papers. It's the image that throws me. I use to sit for about a half hour just wondering what to use until one day the light bulb came on. It must be one of those newer florescent ones because it did get pretty bright in here!!! LOL Now when I have a layout to play with I just find the image that fits in the area. I did trim down the image on the card stock a little here (at the bottom). It didn't fit all the way in the area but enough to work with! Then I just cut the other layers. I knew I waned to use the Cuttlebug Dotted Swiss folder for the white background. And once I started setting the layers in place I thought the pink could use a little texture too. Once I did that I liked what I saw.

I colored in the hair on the couple, the flowers and his bow tie. I used a glitter pen to highlight the veil. I sponged the edges and it was ready to assemble!!! I think this is one of the quicker sketch challenges I've done in a very long time!!!

I think I have all the wedding cards I need now!!! I'm behind on thank you cards so I'll be making a few more of them soon too!

If you have time go to SplitCoastStamers and play with the Sketch Challenge. Each week there is a new one!!

I keep a copy of each Sketch in a photo album and I take it out a lot. I just flip through the pages until I find a sketch that the image I want to use will fit in and I just go from there!!! It sure made my card making a lot easier!!

Thank you SO much for visiting today,
Wanda
Tuesday, May 12, 2009

Something for Dad!

It's always so difficult to come up with masculine cards. Today while I had a few gals over here stamping one of them was using the Stampin' Up! "And Many Mower" set. She had stamped the golfer guy image. He's SO cute. Though I am not one who really cares much for puns this particular image didn't have any words on it. Anyway, she (Kay - you know how I HATE to mention names on my blog LOL) had stamped the image and was coloring it and asked what to do about the golf ball. One of the other gals (Colleen) told her to run a piece of white though the Dotted Swiss folder and punch it out for the ball. Kay ended up using a small pompom left over from the Easter rabbits tails!!! It was the perfect size for the image. And had she used the Cuttlebug folder she would have found out the golf ball would only have one dimple in it at most!!!

SO I thought I would play with the set too. I stamped the cute guy image and I did not add the pompom. Mostly because I forgot about it!!! I can always add it later if I feel it needs it. I then took Colleen's idea and ran a piece of white card stock through the Dotted Swiss folder. I cut out a 3-1/4" diameter circle and stamped the "Dear Dad" image on. I did have to take a marker and fill in where the dots were punched so the words didn't look like they had holes in them. I also had used the back side of the paper, the smooth side. I think I was lucky that the thin "dear" word didn't hit a dot!!! If I make any more I would stamp the words first and then run it through the Cuttlebug folder.

The background of the Handsome Hunter card stock was run through the Cuttlebug too using a "Tartan" or diamond type image. I don't know what it's called. Provo Craft didn't write the names of them on the folders. But this image seemed to fit the design theme of the card.

All in all it was a simple card to make too. The coloring was done using a blender pen which usually goes pretty fast. The edge of the image was sponged using Handsome Hunter and the Ticket punch was used on the corners. The brown is Close to Cocoa which seemed to go so well with the green.

I was actually pleased with the card if I must say so myself!!!

Thank you SO much for visiting today,
Wanda

Monday, May 11, 2009

Lots of Dots!

I was hoping my Stampin' Up! "Tea Party" decorative paper would have been here so I could use it in the background. But alas it was not so I did the next best thing and used the Dotted Swiss Cuttlebug folder. But when that paper comes, watch out!!! LOL

I used the Stampin' Up! "Sweet Stems" set and colored in the flowers using Almost Amethyst, Pink Pirouette and Barely Banana. The Pink Pirouette was colored in using a blender pen and the ink pad. The other two colors were directly from the marker. Oh and the stems were colored in useing Sage Shadow. I pretty much stuck to the Soft Subtles group, it just seemed to fit with this image and layout!!!

I got to play with the Scalloped Oval punch too!!! I think it was a great idea for Stampin' Up! to come up with it!!! It's so sweet looking.

The words are from a rubber stamp I had made for me. I have often wodered if I had a stamp made for me from Stampin' Up! would it ever retire??? LOL I may have to keep that in mind. I suppose they could retire their font. Anyway, I make a LOT of "Thank You" cards and I wanted a rubber stamp that I could use that fit in the ovals nicely and this one did. I did use a couple of Dimensionals behind the oval. After taping it in place on the layers it didn't want to stick to the white card stock, it was raised up too high. SO to fix that I just added a couple of Dimensionals behind it. Problem solved!!!

I tied a 1/4" piece of white grosgrain ribbon to the pink card stock and then assembled the card. I needed to add that ribbon there, the pink area needed a little something. The bottom of the card could use a little something too but I'm not sure what so I left it as it was.

I will be making more thank you cards soon, I'm getting a bit behind in them.

Thank you SO much for visiting today,
Wanda


Sunday, May 10, 2009

Birthday Echos

I just LOVE this Stampin' Up! "Echo's of Kindness" set. I'm going to miss it when the new book comes out. But for now I'm going to use it a lot so I (hopefully) get sick of seeing it so it will be easy to say goodbye to it!!! I haven't had much luck with that in the past!!! LOL

Anyway, I thought I would play with the new "in" colors as well. For the main part of the card I used Pacific Blue and the layer is Kiwi Kiss. And of course Whisper White!!!

I used the "Watercolor Vine" wheel and Pacific Blue ink on the Pacific Blue main part of the card. I could have used VersaMark but I don't feel it would make a dark enough image that I was looking for.

I stamped the flower image twice and colored it in with a blender pen and the Pacific Blue ink pad. I sponged the edges with Kiwi Kiss and layered it on top of a piece of Kiwi Kiss.

And once again I used my "Happy Birthday" that I printed out on the computer. Yup, I still have some left!!! LOL I layered it on top of another larger round circle and then on top of the scallop. This was a quick and simple card to make!! I need to find more words to fit in the 1-1/4" circle and print them out so I can have a file of words for quick cards!!! And one of the great things about using the computer to do your words, you don't have a stamp to clean up or put away when you are done!!! It's obvious that I have issues with doing that. It was one of the things I hoped I could tend to this year and so far it hasn't worked. So much for that resolution!!! I think it lasted about a week!!! And that's pretty long for me!!! LOL

Thank you SO much for visiting today!
Wanda

Saturday, May 09, 2009

Flower Embosslits Card

I thought I would play with the flower embosslit die. These dies are great because the not only cut the image out but them emboss it too.

I cut two flowers out of Pink Pirouette and one out of Pretty in Pink. I folded them in half but a bit crooked so I could get it to show more petals. Then I sponged the edges. I taped the folded flower together too.

Then I punched a 3/4" circle out of white card stock and I glued it in place over the hole of the flower. I did not like the look of the white and because I glued it instead of taping it I found it almost impossible to remove. SO I took the Barely Banana marker and colored in the white c
centers of the flower. It instantly took the "blah" out of the flowers!!!

For the leaves and stem part I used one of the images in the Stampin' Up! "Flower Fancy" set. I just taped off the flower and inked the image using Garden Green. I stamped the image on a piece of white card stock, colored the leaves in and then sponged the edges. Then I added a layer of Pretty in Pink behind it. I then taped the flowers in place.

I had cut a piece of white card stock to layer on top of my Pretty in Pink base of the card. I sponged the edges and set it on top of the Pretty in Pink. As I was looking at it I thought it too had a blah look to it so I ran it through the Cuttlebug using the Dotted Swiss folder. It really did add a lot to the background.

I had the Happy Birthday printed on the computer a while back. I had printed out a full piece of card stock with them. I still have 10 or so left and I probably have 10 or so birthday's left till the end of the year too!!

I punched the words out with the 1-1/4" circle punch. The layer behind it is a 1-3/8" circle using Pirouette Pink and the scalloped layer was pushed using Pretty in Pink card stock. I taped the layers together and set it in place on the card.

I still wasn't liking the looks of the card so I took my white gel pen and added some dots to the flowers. I liked it. And As long as I had my pen out I went ahead and added some dots to the scallop. It just seemed to finish off the card!!! It is now ready to write in and send off to that special birthday gal!!

Thank you SO much for visiting today,
Wanda

Friday, May 08, 2009

Altered Notebook - Weekend Project

I found this adorable little notebook at Michael's. They are a Laura Ashley product. These do have an initial on the front of them but it was a shiny one and I didn't really like it. SO I matched up some card stock and came up with this. I did like the polka dots on the album so I left them. I was going to recover the whole thing but I am such a sucker for polka dots!!!

I took a piece of Certainly Celery and cut it to fit over the front flap. I rounded the corners and then sponged the edges. Then I got out my CuttleKids alphabet set and cut out the letter "A" in Old Olive card stock. I don't have a Stampin' Up! alphabet set because I already had invested in this one.

To jazz up the "A" a bit more I first sponged the edges. Then I added a punched flower, sponged it and put a rhinestone in the center. These rhinestones came on a sheet of almost 200 so I had a lot of them to work with!! I had cut a strip off and removing the one from the strip left a nice size strip to just run along the side of the "A". I liked the effect. It gave the card a little "bling" and it tied the rhinestone in the center of the flower to the rest of the notebook. And these small rhinestones looked to be about the same size as the polka dots to it all just seemed to flow together.

I took a picture of the notebook open so you can see how the flap fits. These have a wonderfully strong magnet that holds the flap closed. GREAT feature if you plan on keeping the notebook in your purse!!!

I made this for my niece and I'm going to be giving it to her on Saturday. I know she'll like it!!!

These are fun to do!! I really enjoy altering notebooks!! It dresses up an ugly one or enhances one you sort of like!!!

These make great little personal gifts for your friends or family!!!

Thank you SO much for visiting today,
Wanda

Thursday, May 07, 2009

A Quick Get Well Card

My younger sister was hospitalized Tuesday and I needed to quick whip up a get well card for her before I go see her. She has a barrage of tests that need to be run but they can't do anything until they get her blood count up. So we must play the waiting game. Poor thing.

I am not thrilled with this card and you can tell it was a quick one! Sorry. I thought the pink decorative paper in the Bella Birds package matched the card stock I chose but the Pretty in Pink just didn't want to cooperate. I'm sure she will understand.

I used the Stampin' Up! "Close as a Memory" set for the flowers and the "Sincere Salutations" for the words. I purchased that set SO many years ago and it is one I find myself using a lot!! I just LOVE it!!

Well, I must run. I need to get the card in an envelope and off I go to the hospital to go visit her again.

Thank you SO much for visiting today,
Wanda

Wednesday, May 06, 2009

Wednesday Sketch Challenge

Here is the card I made for this weeks Sketch Challenge at SplitCoastStampers. It had lots of layering which is something I REALLY like to do.

I LOVE the scallop on the edge of the long piece. I used the Bella Bird decorative paper for the background piece. The base of the card is Close to Cocoa. The strip, piece #2 is So Saffron. I stamped the dots from the Stampin' Up! "Itty Bitty Backgrounds" set and I embossed them in white.

The flower is from the "Echos of Kindness" set. I wanted to use "Wonderful Watercolors" but I don't know where I put it!!! I somehow misplaced it. UGH. I HATE it when that happens.

I did the words on the computer. I needed them to be small and I couldn't find any rubber images that were that small. The computer comes in handy for things like that!!!

It was a fun card to do!! And it's going in the mail on Thursday!! I'll actually get it mailed in plenty of time!!! Shocker, huh?? LOL

If you have time head on over to SplitCoast and play along with them. If you like to scrapbook there is a day that they have set up for that too. I still have not ventured into that area. I can't believe it's May and I still haven't found the time to work on a single page. I'm going to need to be more motivated to do it!! Hopefully before the year ends!! LOL

Thank you SO much for visiting today,
Wanda

Tuesday, May 05, 2009

I Got Lazy!

I was working on some fun candy bars I had made and after seeing how many I needed to decorate I instantly got lazy!!! I was originally going to make them all with the flowers on them and the punched border but after looking at the stack of candy bars I knew I needed to find some other design that was quicker.

The second one was the one I decided to go with. It was much quicker to make and I think it has a softer look to it. Though I think I may sponge the edges of the large white background piece and that should finish it off nicely.

It was also the first time I got to play with my Sale-a-Brations set. Shocker, huh??? LOL I picked that set because I knew I would be using it for candies and bath salts and probably some other gift items along the way. "A little Something for you" says it all, doesn't it?

The candy is made by taking chocolate chips and melting them. I added some Heath Bar Chips (toffee chips) in just before I poured it in the candy mold. The mold forms 4 pretty large squares with valleys in them so you can crack it and eat only one square (if you can restrain yourself)!!!! The candy bar measures 2-1/2 x 4" and about 5/8" thick. I find it easier to melt the chocolate chips than it is to actually make the chocolate myself. I like doing things quick. Making it yourself as opposed to melting the chocolate chips to me is like trying to reinvent the wheel!!! Nestle makes great chips and it makes a great candy bar. You can add Rice Krispies to the chocolate too, I bought the toffee chips for something different. I used milk chocolate chips and tomorrow I do need to make about 3 more bars so I may use semi-sweet for those who prefer the darker chocolate (YUCK!!! - not me, I'm a milk chocolate fan. Dark chocolate gives me the Robitussin shivers!!! LOL)

Once the candy bars were cool and set (you get to make two at a time and I pop them in the freezer to speed up the process) you just pop them out and wrap them up. I have a roll of purple cake decorating/candy wrapping foil. I use it mostly to wrap bath fizzies in! SO I was just using what I had. You can use regular foil or Saran Wrap. And in the cake decorating part of Michael's or Joann's you can get smaller amounts of the foil. These make GREAT gifts and chocolate chips go on sale a lot!!!

Thanks SO much for visiting today,
Wanda

Monday, May 04, 2009

For the Happy Couple!

I struggled a little with this wedding card. I could just redo one of my other cards, the people I need to make these cards for don't know each other. But somehow it just doesn't seem right. I just feel that I need to make an original card for each wedding.

I like the colors I used, Whisper White, Pink Pirouette, Pretty in Pink and Brushed Silver. I think it is that piece of the brushed silver at the bottom of the card that is messing the balance of the card out. It's too late to do anything about it but I think that is the culprit!!!

I know, I'm way too critical of my work but when I stepped back and took a look at the finished card I just wasn't into the half circle at the bottom. I should turn this layout into SplitCoastStampers for their Wednesday Sketch Challenge. I would LOVE to see what someone else does with this layout.

I did color the couple in a bit too. I colored the flowers in with Pretty in Pink. The bride's hair is Yoyo Yellow. The grooms hair is Close to Cocoa. The bow tie was colored in with black. I did use a glitter pen and drew the lines on the veil. You can see in the photo it has a bit of a shimmer.

The stamps used here are from the Stampin' Up! "To Have and to Hold" set. I've used it quite often. It's such a sweet and yet elegant set!!

Thank you SO much for visiting today,
Wanda

Sunday, May 03, 2009

Take it on the Lamb!!!

I found this most adorable lamb soap at Michael's in their dollar bins. I couldn't pass it up. Plus it actually did smell nice too!! Another reason to buy it!!

I took out my Sizzix window/shaker box die cut and ran a half sheet of 12" x 12" black card stock through it. I used the lamb from the Stampin' Up! set "Pun Fun." It is another one of those sets that I just love because it has so many cute images that can be used for SO many events! I believe that is called versatility!!! LOL You can't go wrong with sets you can get that much use out of!

Anyway, after I stamped the image and colored it in I layered it and set it in place on the flap of the shaker box. I had added a piece of acetate to the window of the box. The soap was wrapped in a clear celophane so I may not have had to add the acetate but I did anyway. I inserted the soap and folded the box up. I did glue the top flaps so the box would stay together without having to tie it shut with a ribbon. I wrapped the ribbon around the flap of the box and tied a bow and then placed the layer on it.

This was a fun and quick gift item to make. I just LOVE playing with those Sizzix dies. This one is especially fun because I get a lot of use out of it when I make bath salts for gifts or to sell!!! I've made a lot of boxes with it and it is still as sharp as it was the day I bought it. It seems like you can put a lot of miles on these things!!!

These would be fun as Hostess Gifts, Customer Appreciation Gifts, Make & Takes, Stamp Camp items and even for Craft Fairs!

Thank you SO much for visiting today,
Wanda

Saturday, May 02, 2009

It May Work After All!!

I was making this card for Mother's Day and when I got the layout figured out I realized there wasn't any room to add "Happy Mother's Day." I guess this card would fall under the category of "various occasions." It would work for a Birthday, Thank You, Thinking of You, Get Well and even Mother's Day without it actually saying. The sentiment could be added on the inside.

This was a fun card to make too. I used punches for the smaller squares so making those were a quick thing to do!! Gotta LOVE that!!!! I used the Stampin' Up! "Blooming with LOVE" set to make this card. I colored the images in using markers and a blender pen. I sponged the edges and added the layers. I was even able to use a piece of retired decorative paper. And I just LOVE it when I can use some of that paper I had been hoarding! Notice I used the word "had" in that sentence?? I am actually using those papers now!!! And without fear!!! LOL I also added a few clear dew drops to the card. It just needed a little something more and those fit the bill. I do have problems eying them on the sides when I have 3 in a row. Once I add a little bit of Crystal Effects to affix them I can never get them straight. But once I realize they are stuck and I can't do a thing about it I remember that after all, it IS a handmade card!!! And being reminded of that helps me accept the mistakes on it better!!! LOL

I do need a few more Mother's Day cards so stay tuned if you haven't found one you like yet!!! There will be a few more plus some other fun projects coming up!!!

Have a wonderful day and thank you for visiting,
Wanda

Friday, May 01, 2009

Another Mother's Day Card

As I had stated in a prior post I have several ladies who are close me that I like to give Mother's Day cards to. SO I'd better get a move on making them, Mother's day is next weekend!!! I can't believe how fast April flew by. Summer is just around the corner and I have hardly put a dent in my spring cleaning. But once I get in the cleaning mode, watch out!!!
For this Mother's Day card I used the Stampin' Up! "Echos of Kindness" set. The words came from the "All Holiday's" set. I also used the Sizzix Scalloped Oval die cut, twice. Once for the white and once for the Chocolate Chip. The next card I make using the oval will have to be Chocolate Chip with a white scallop!!! LOL

I colored in the flower with markers and a blender pen. Blending is one of my favorite techniques!! I sponged the edges. Another favorite technique. And last but not least is the pretty decorative paper. It is from the "Bella Rose" pack. I LOVE every sheet in that pack. It's rare that happens. Usually there is one design that I am not all that fond of but it's usually ok because there is the other side of the paper that I like. But this time it's all of them. That is a good and bad thing at the same time. You like all sides so you have to be careful on which sheets you use. Or you just buy another pack!!! That one works the best for me!!! LOL

Thank you SO much for visiting today,
Wanda