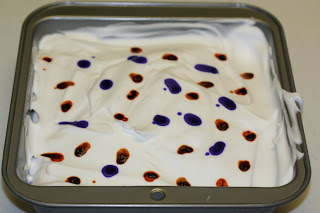
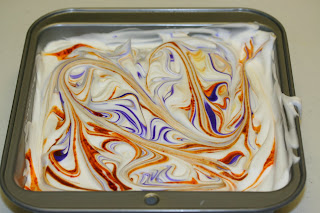
 I had to laugh when I saw the photos from my camera to the desktop. The pan of foam and ink looked like a confetti cake!! LOL It almost looks good enough to eat!!! I don't think it would taste very good and I wonder if the ink would come off your tongue very well??? LOL I mean, look now long it takes for it to come off your fingers!!!???
To do this technique you will need the following items: White Card Stock, Shaving Foam, Ink Refills (2 or 3 colors), Cake pan or other shallow pan, Stir Stick, Paper Towels.
Shake your can of shaving foam and fill your pan 1/4" from the top. I smoothes mine off with my hands, it's not necessary but I wanted to make sure it would all photo well.
Add drops of ink refills the foam. Pick colors that compliment each other. Here I used More Mustard, Pumpkin Pie and Lavender Lace.

Take your stir stick and run lines into the foam like you are making a grid. Don’t fold it in like you would a marble cake, you don’t want the colors under the foam, you want them to remain on the top.

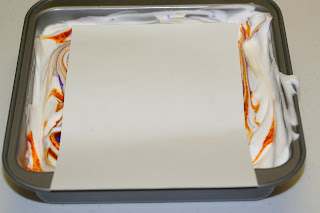
Press your card stock into the foam. Scrap the paper across the edge of the pan to remove excess foam.

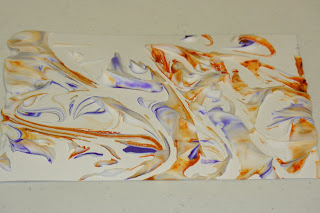
Take a paper towel and remove the rest of the foam. Allow to dry and use it as fun backgrounds, especially for Halloween cards!!! It adds a fun look to the background of your cards. You can stamp directly on top of the design too.


I've heard about this technique but have never seen it done. Thanks to your clear directions and pictures I do believe I can do this. I'm looking forward to see the card you make with this. jmniffer
ReplyDeleteThank you for the picture tutorial. I have not yet done this and it is great to be able to SEE exactly how it's done!!
ReplyDeleteHave to give this one a try for sure. Another product to raid out of the bathroom, DH is not going to like it! LOL!!
ReplyDeleteThis is one of my favorite techniques. It's just plain fun! And look at that counter!!! It's so close!
ReplyDeleteThis is just beautiful! I must try it! Thank you so much for the pictures...it takes some of the "scare" out of using this technique!!!
ReplyDeleteBlessings, Maria
Hi Wanda,
ReplyDeleteAre you planning on going to the next Inking of You stamp share? If so, are you planning on bringing your technique book, and my other question is, are you by chance going to make photo copies of this treasure and sell it to you fans (like me??) :)
Theresa
This is so much darn fun! Soem gals came over & we did alot of this. Most of it was beautiful! Like the blues and greens together. Some didn't turn out so pretty! TFS!
ReplyDeleteCherie