Remember those AOL disks you'd get in the mail? I had some come in these wooden boxes. Well, I just couldn't throw them away!!! It's tough to do, isn't it Cyndi??? (you know who you are!!! *winks*).
I ran across one in my workroom and decided it was time to do something with it. I had just gotten my new 12 x 12 papers and thought I'd actually use them! They may expire after this 6 month catalog season. I just hate it when I have papers I haven't even opened and find out they retired!!! It's not like you can't use them but you just can't demo with them. SO, I'm trying hard to use my papers, embellishments and ALL the stamps in the set, not just one or two that I favor!!! That's a BIG challenge in itself!
Here is what I did. I started out with the wooden AOL box. I didn't remove any of their labels, I just covered it as it was. Except I did sand the surface a little to allow the glue to have something to adhere to. I wrapped the paper around the box and marked with a pencil where I needed to trim it. After trimming I used the Anywhere Glue Stick and got the paper

attached to the box. I left the box open to dry while I worked on the matching cards. After I finished the cards I made a belly band for the box. Not that it really needed it but I thought the box needed a bit more finesse and I didn't want to make the front look just like a card so I thought the belly band was the way to go.
I took the Brocade Blue marker and colored along the edges of the box. It was raw wood but I felt it needed some color. I wasn't all that thrilled with how dark it turned out. I was surprised at how much color got absorbed into the wood. But it's ok, no one will notice unless I point it out to them!
I did use the little flowers Cuddlebug folder on the white card stock. If you don't have that and want to keep this all Stampin' Up! you can use the set "Little Pieces" and clear embossing powder and get a look similar to this.

Once I finished the cards I stamped the lower left corner on the front of the envelope. Stamping your envelopes is all a part of the presentation, right Ann? My friend Ann is the one who got me to stamp my envelopes. You don't make a card without stamping the envelope. I still do but I try to make a better effort to stamp the envelopes!!
Anyway, this is the finished pr

oduct. It's now a great gift for someone special! It makes a great Hostess Gift, Door Prize or just a gift to give to a wonderful friend.
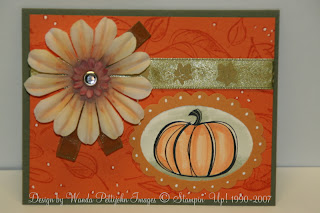
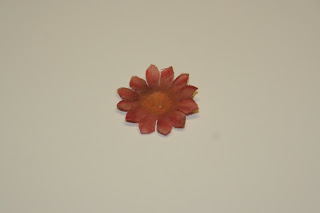
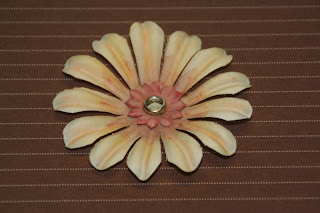
 Here is the first flower I colored and posted the tutorial for it. I decided since the colors had a fall look to them I should make a fall card. SO I took out the pumpkin from the Year After Year set and used the Giga scalloped punch and the Coluzzle oval template and put this card together. I found this ribbon on my shelf and thought it would fit well with it. The leaves in the ribbon seemed to go well with the theme of this card. But the flower looked like it needed something more. Not more color, it was colorful enough. But it needed leaves to go with the rest of the card. Well, cutting out leaves from the Leaves Awash jumbo wheel wouldn't do it for me, it needed something else. RIBBON!!!! Yes, ribbon!!! Make ribbon leaves. It will tie in the fabric of the ribbon to the fabric of the flowers nicely and I believe it did. I just tucked in loops (glued together) of olive green organza ribbon behind the flower and they represent leaves. I liked it when I added the third one!


 Yup, it's Wednesday and that means it's the Sketch Challenge (SC) at Split Coast Stampers! It's really the only challenge (so far) that I participate in. I LOVE learning and doing new layouts for cards. This one has been around for a while but I'd never done one. I've thought about it but never have. But since it was the Wednesday challenge I just HAD to!!


